Companies
In the Companies section, you can find information and tools for viewing, editing, and managing all company records in the system. This includes basic information about each company, as well as associated users and prescribers.
 The Companies page allows you to view, edit, or add companies to the software. Companies are organizations or entities with either a B2B or direct contract and include prescribers, as well as additional users that support administrative, billing, or other related tasks.
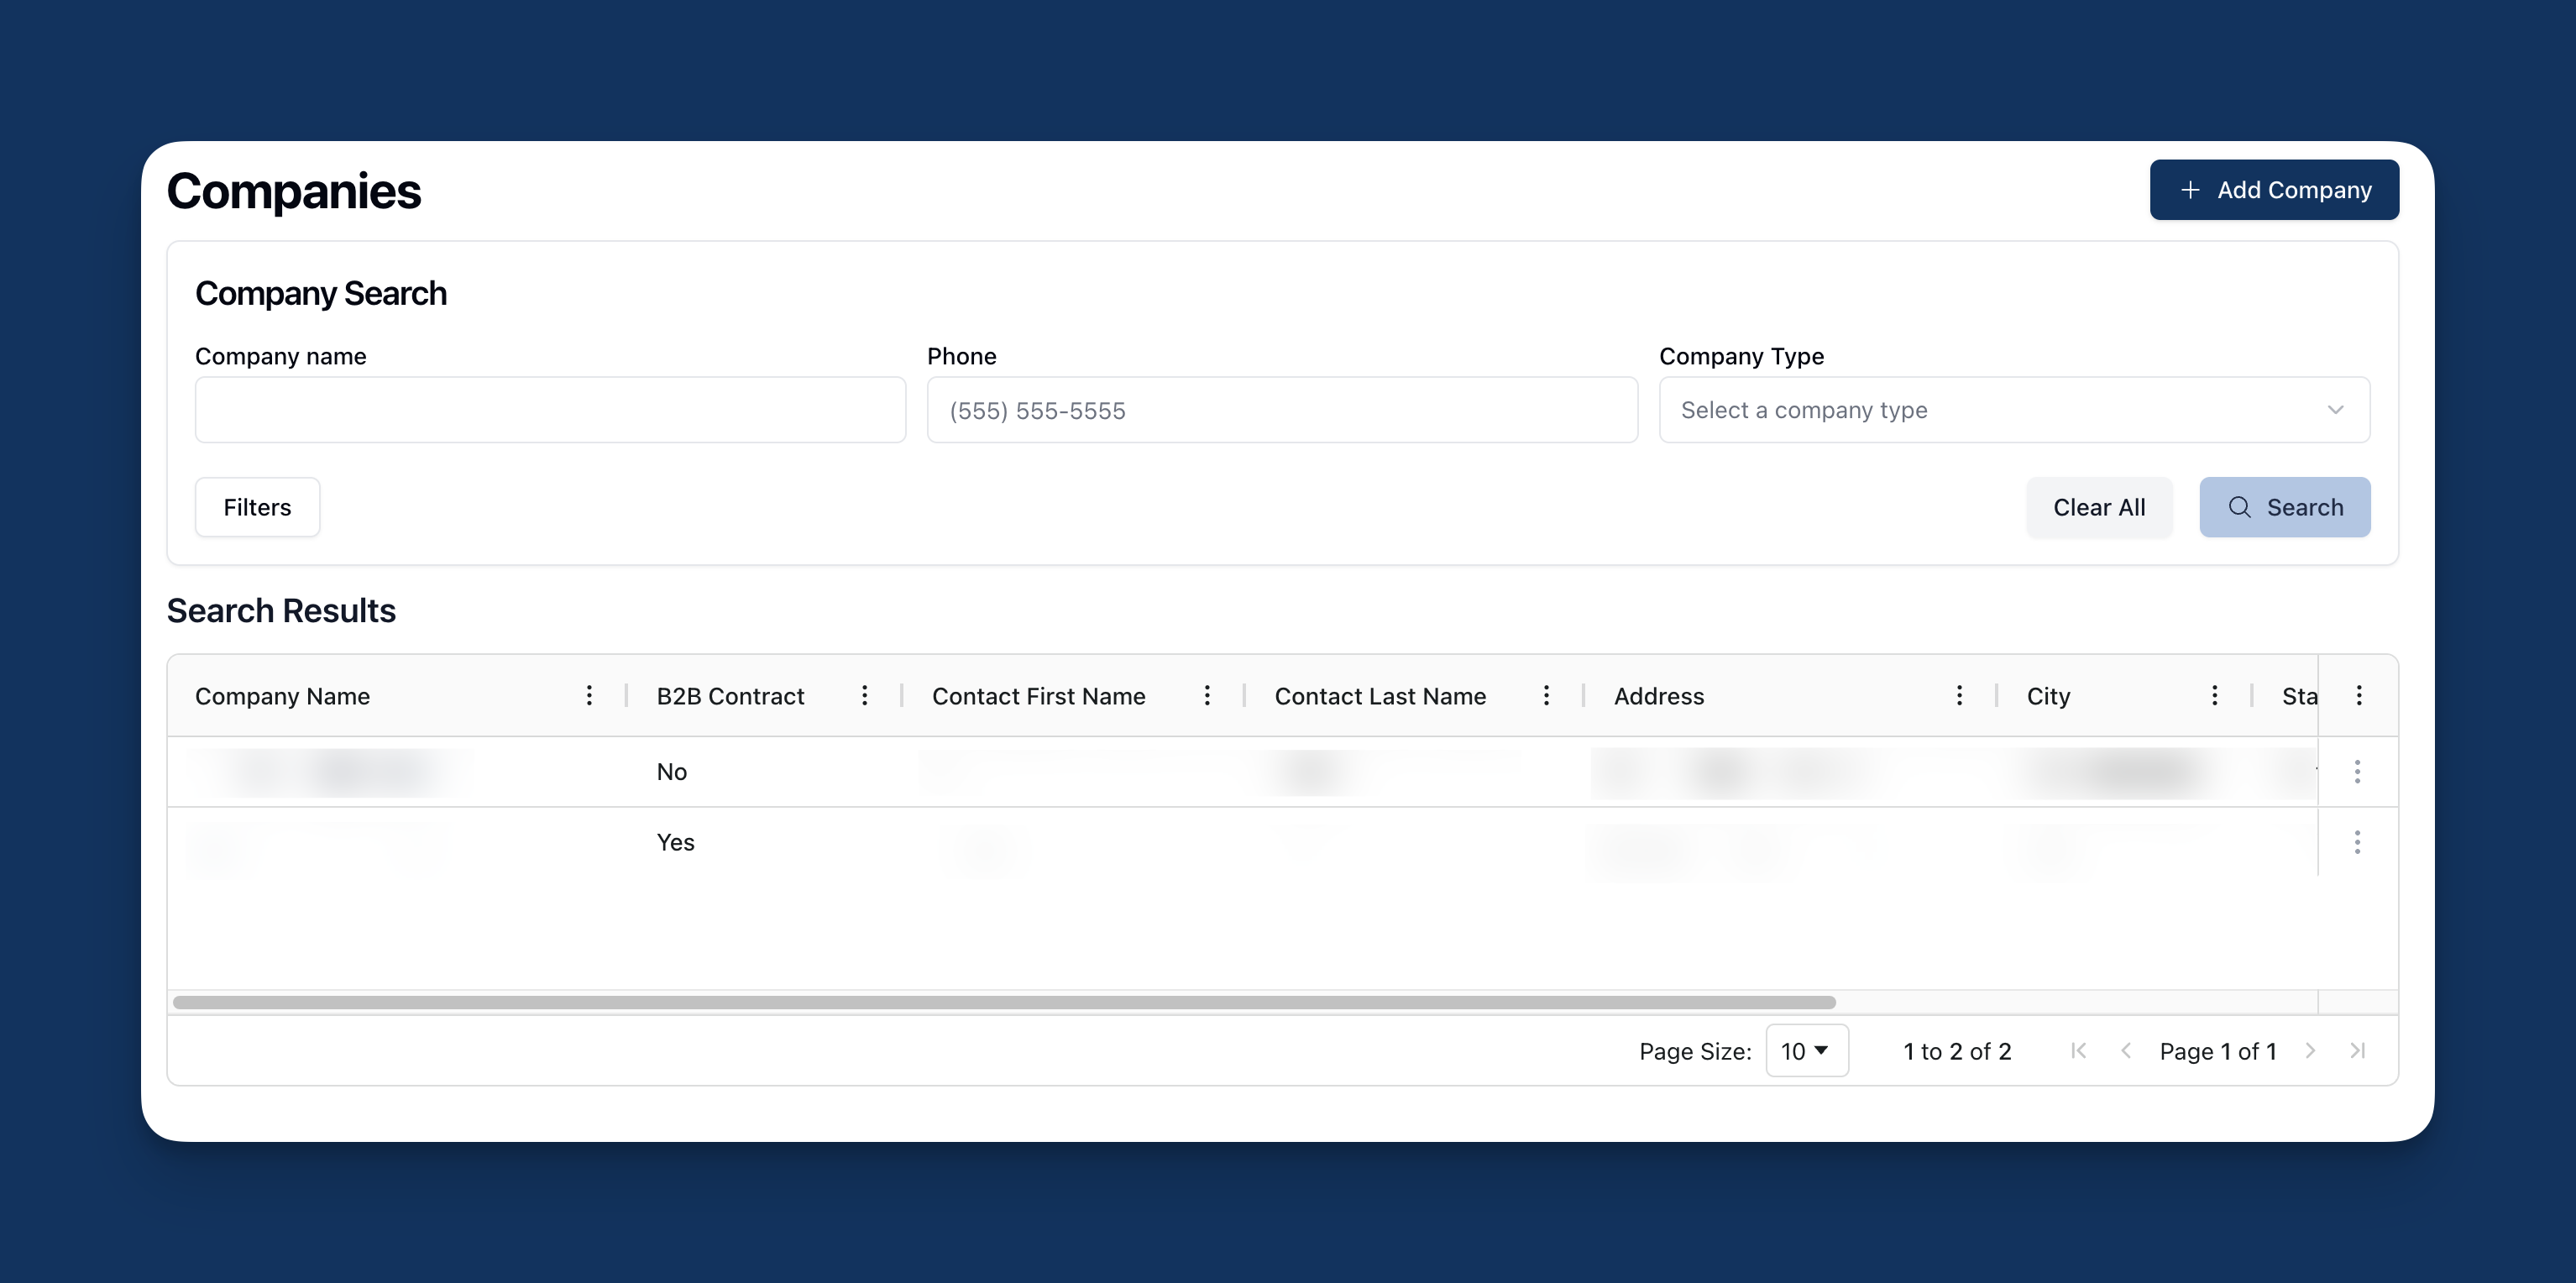
When navigating to Companies from the sidebar, a search form appears at the top of the page, followed by a table listing all companies in the database.
Companies Search
 Under Company Search, you can search for a company by the Company Name, Phone, or Company Type. Once you've entered the relevant search terms, click the Search button in the lower right corner to filter the results that appear in the table below.
 It's also possible to filter the search results to display only deactivated companies by clicking on the Filters button. To display deactivated companies only, select Show Deactivated Companies.
To remove any filters from the search results list, click the Clear All button to restore the Search Results table to the original view.
Search results
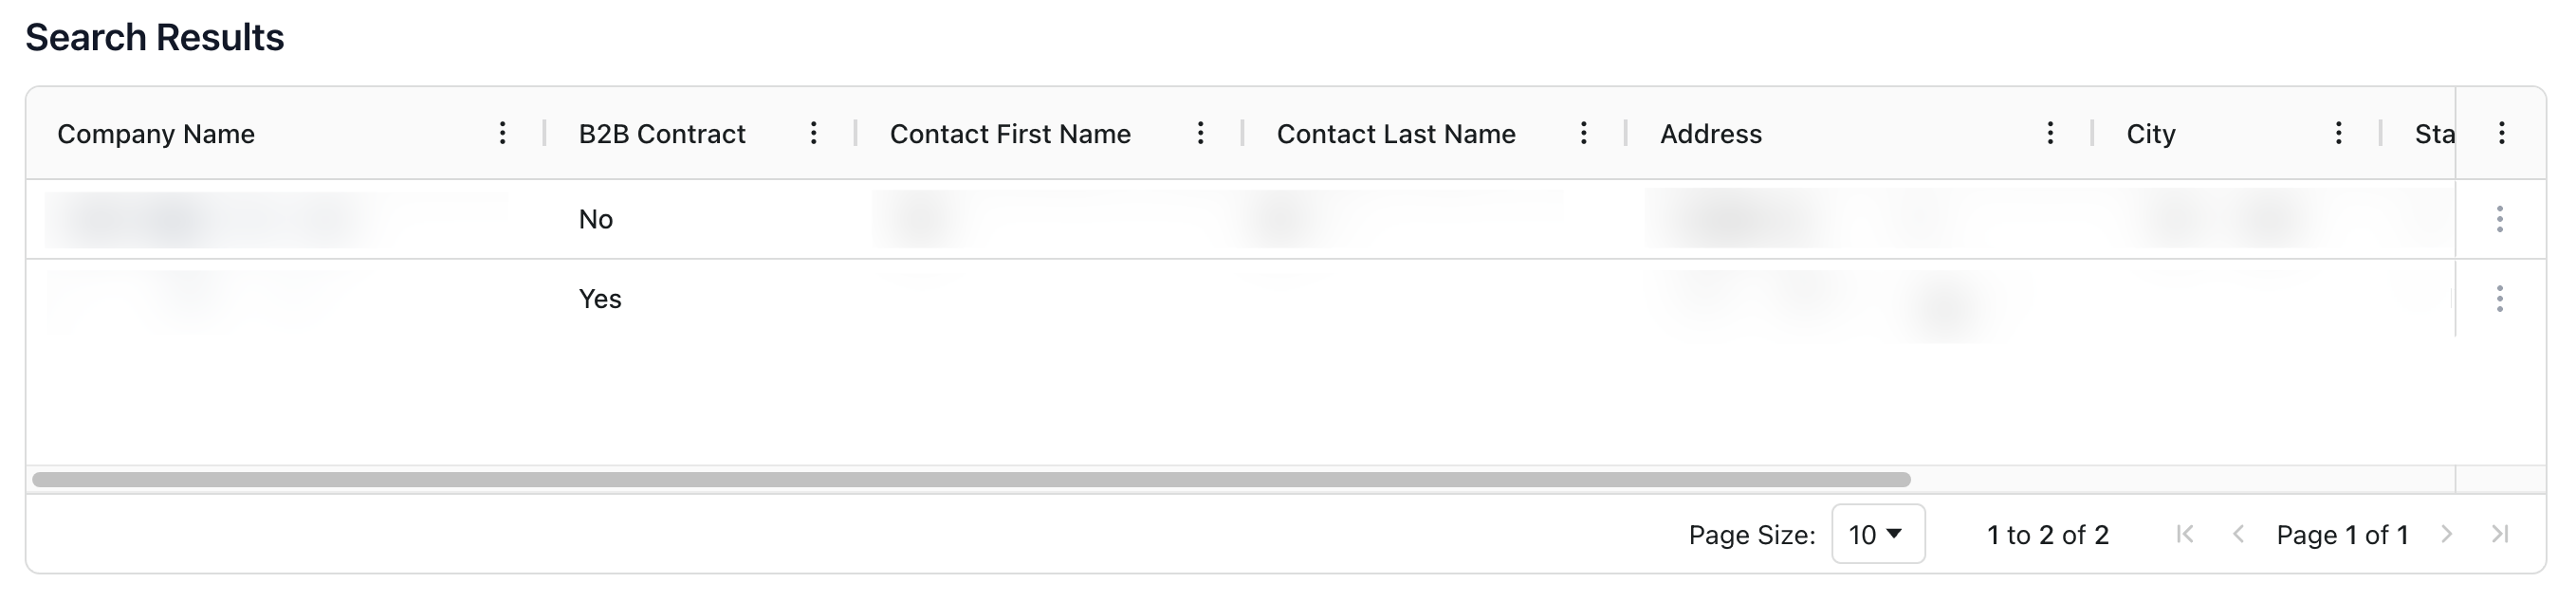 By default, the Search Results table lists companies in [TBD] order. Search results include the following information, sorted into columns:
Company Name: The name of the company.
B2B Contract: Whether the company is B2B or a direct contact. If the company is B2B, the column displays Yes.
Contact First Name: The first name of the primary contact at the company.
Contact Last Name: The last name of the primary contact at the company.
Address: The company's street address.
City/State/ZIP: The city, state, and ZIP code for the company.
Phone: The primary phone number for the company.
You can sort the companies list and search results by the categories listed at the top of the Search Results table. To do so, click the three dots ( ⠇) to the right of each column title to open the available options.
For more information on ways in which you can customize the table view and sorting options, visit Table Options and Sorting.
Viewing the company record
 To visit a company's profile, click the underlined Company Name from the search results list. On the company record, you can find the company name, contract type (B2B or direct), and the primary contact's name.
![]() For companies with a priority note attached to the record, a badge appears next to the company name, indicating the quantity of priority notes attached. Clicking the Priority Note icon loads the Notes tab with an applied filter to display only priority notes in the Search Results table.
For companies with a priority note attached to the record, a badge appears next to the company name, indicating the quantity of priority notes attached. Clicking the Priority Note icon loads the Notes tab with an applied filter to display only priority notes in the Search Results table.
To the right of the company information, you can find the Show Details, Edit Company, Deactivate, and Activity Log buttons.
Below the company information are a series of tabs. You can navigate to each of these tabs to view, edit, or manage various parts of the company record. By default, the company record opens to the Documents tab, displaying all documents related to the company.
Show Details
 Clicking the Show Details button on the company profile displays additional information about the company, including:
Phone Number: The primary phone number for the company.
Preferred Pharmacies: The company's preferred pharmacies.
Billing Address: The related billing address for the company.
To remove the additional information from view, click the Hide Details button at the top of the page. This returns the display back to default, showing only basic information for the company.
Edit Company
 Clicking on the Edit Company button allows you to edit or change any relevant information for the related company.
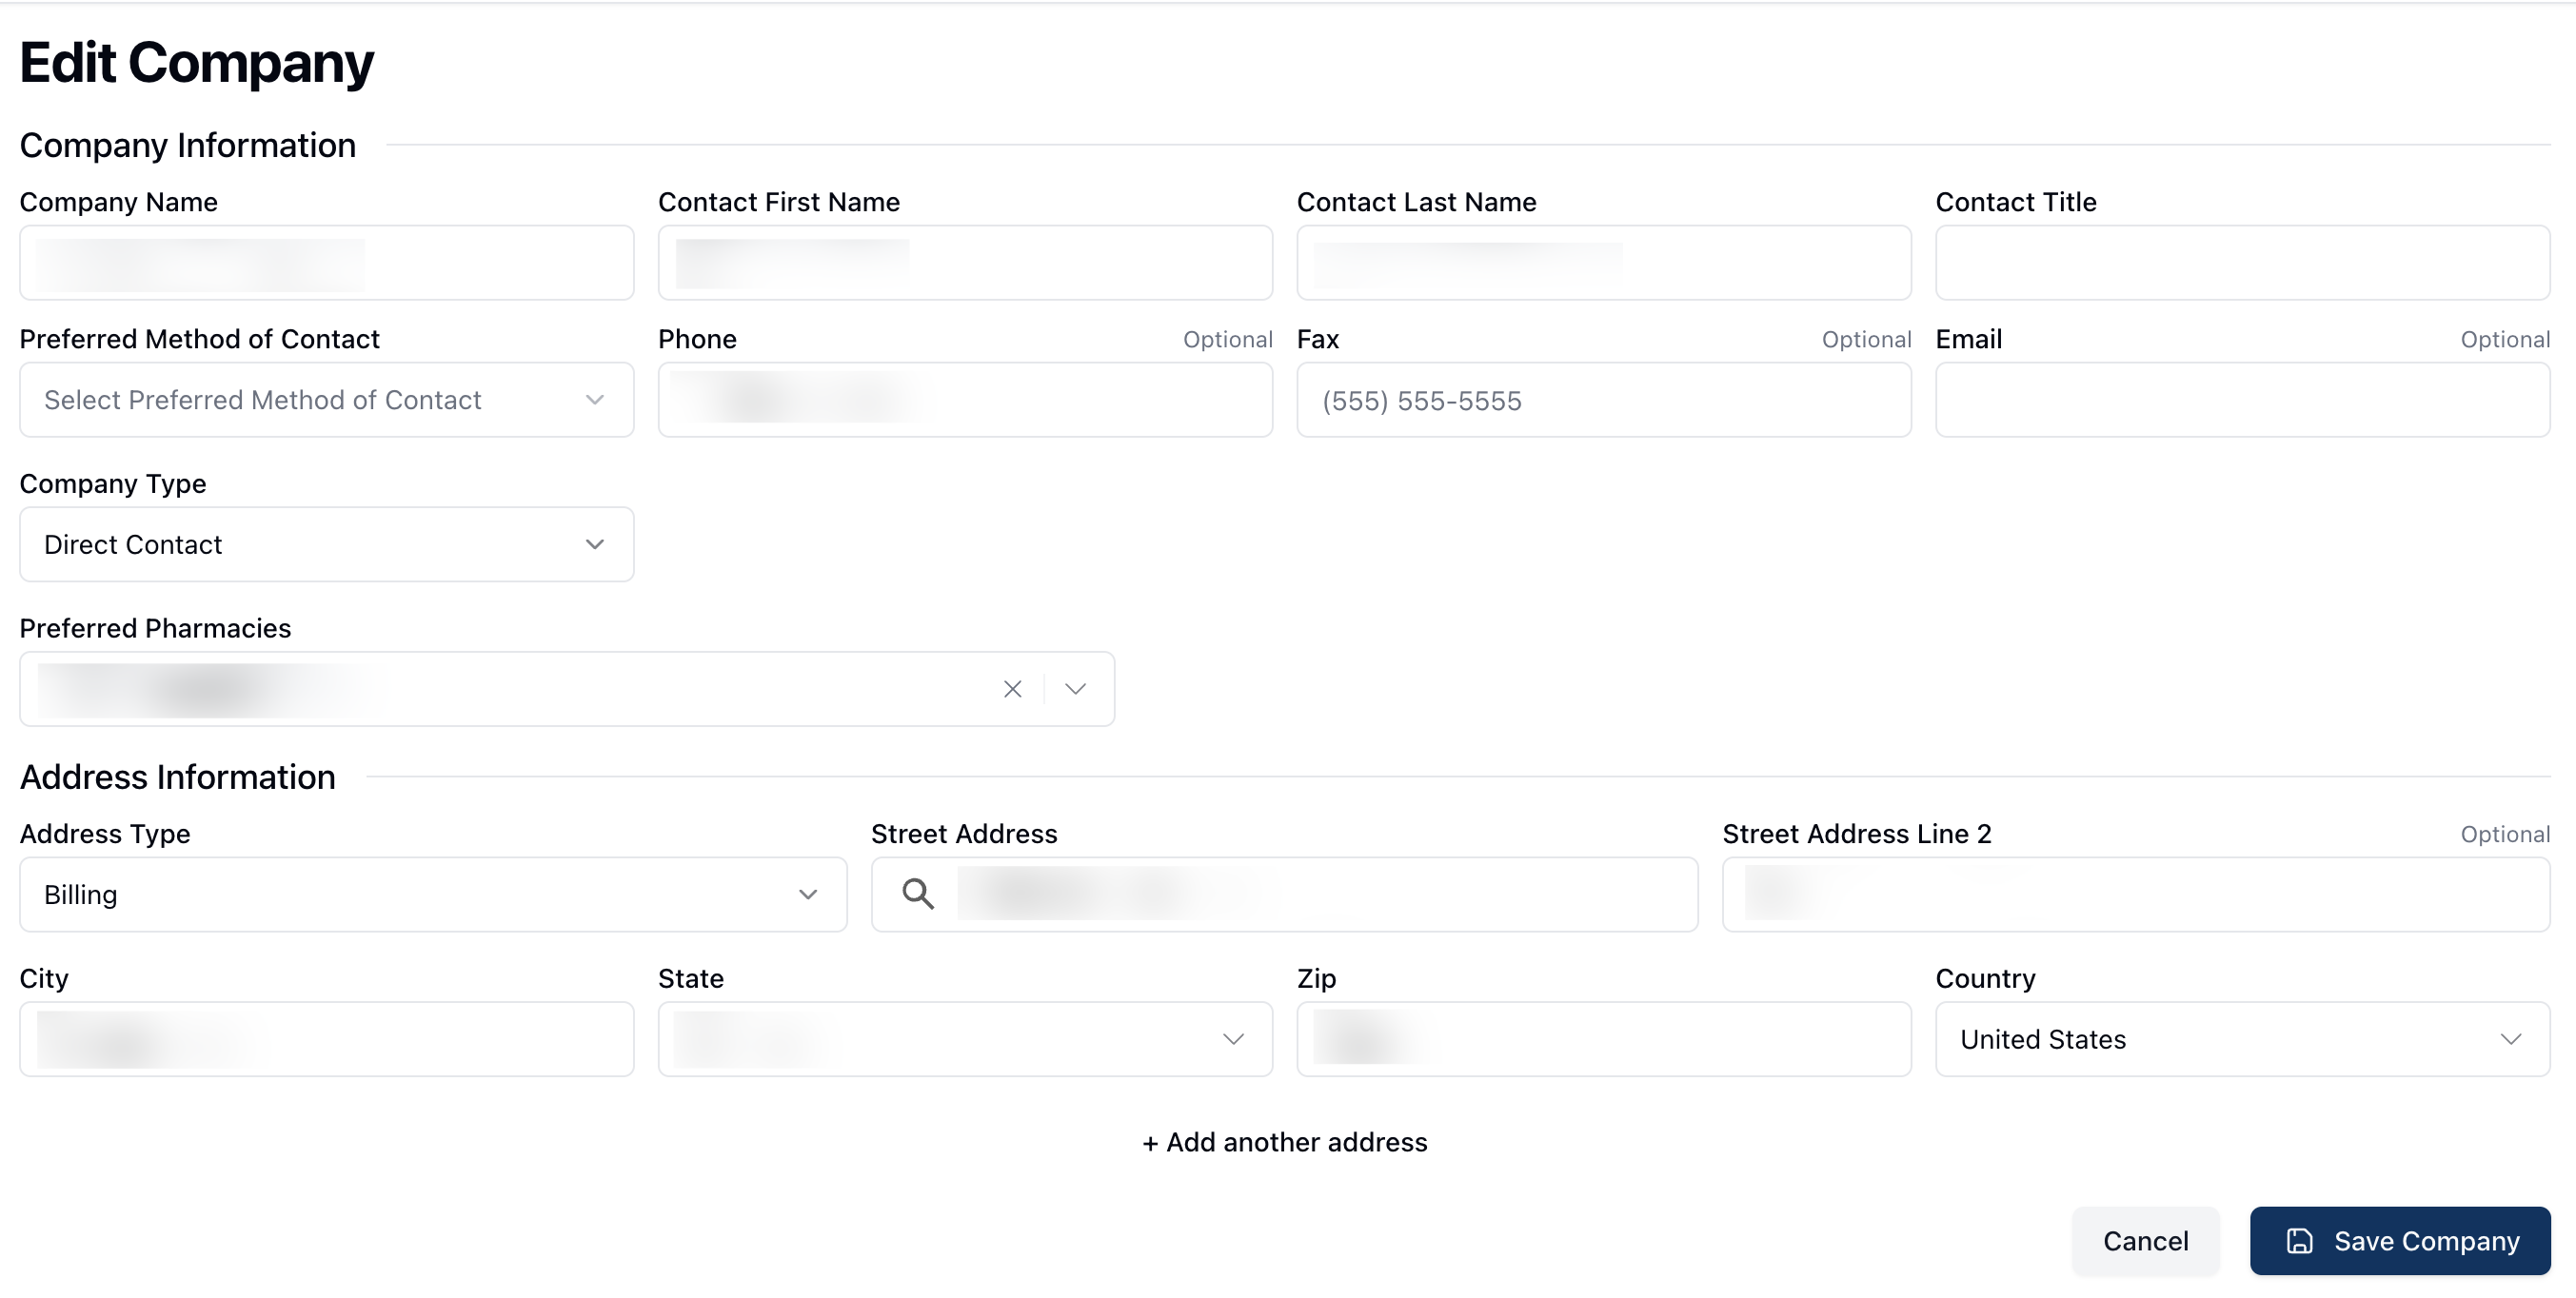 Once on the Edit Company page, you can directly edit, insert, or delete any of the company information by clicking directly on any of the editable fields. While on the Edit Company page, it's also possible to:
Edit or add additional Preferred Pharmacies from the dropdown menu
Add additional addresses by clicking + Add another address at the bottom of the form, which allows you to add an additional address and select the appropriate Address Type from the related dropdown menu
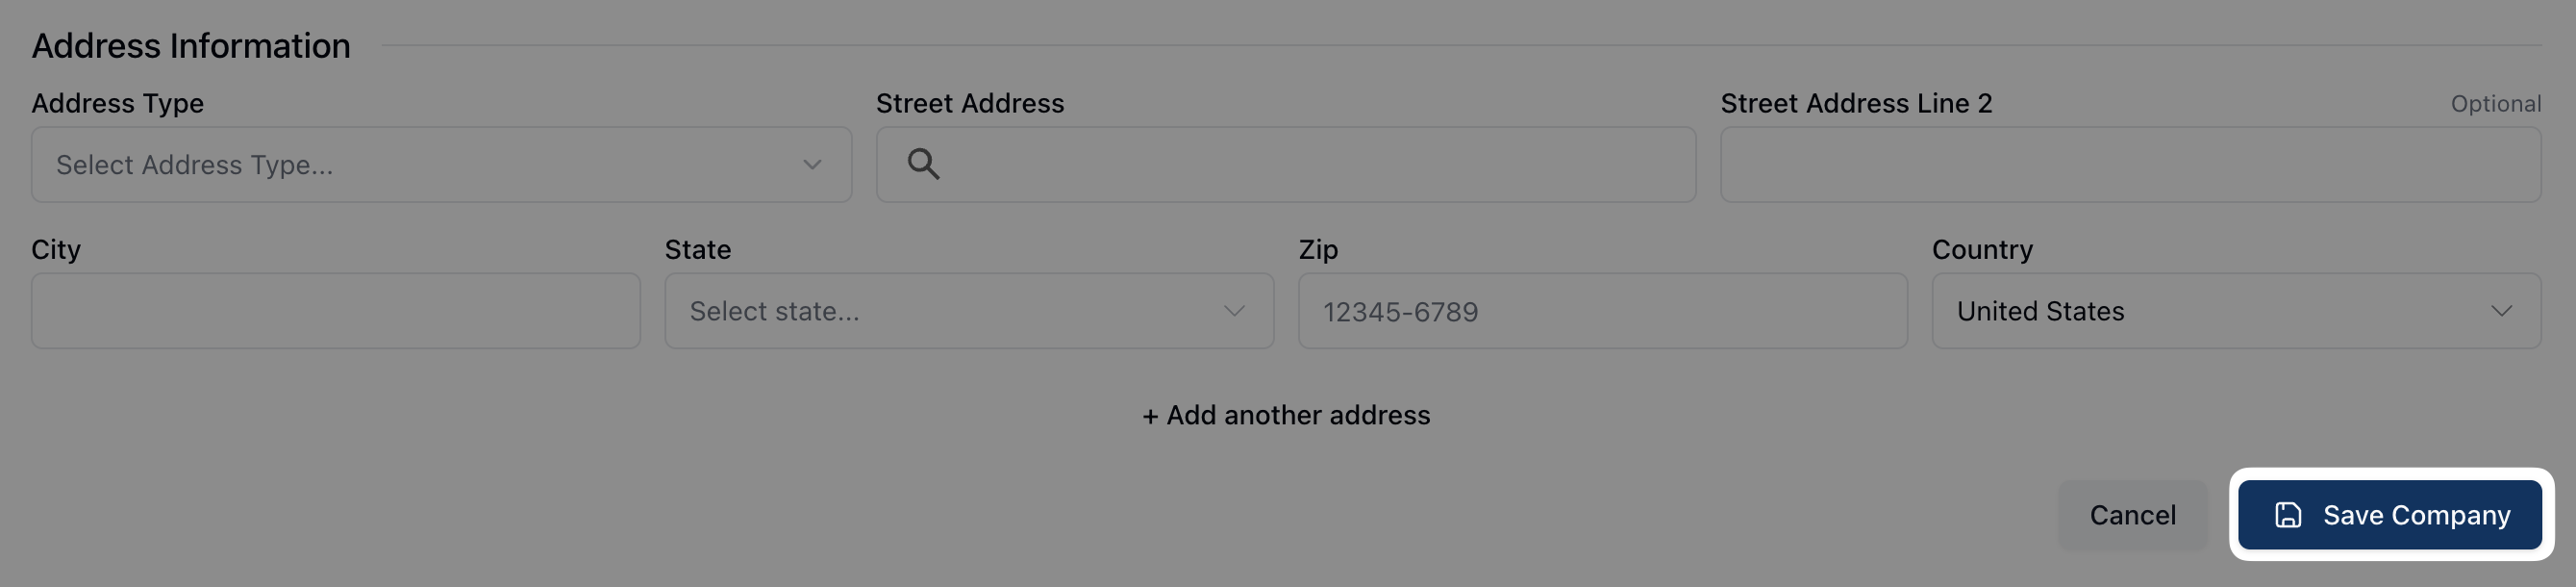 After making any changes to the company record, click Save Company to save your changes. If you made any changes in error, click Cancel to return to the previous page.
Deactivate
 To deactivate a company record, click the red Deactivate button in the upper right corner of the page.
 Clicking this button opens a popup asking you to confirm the deactivation. If you’d like to deactivate the company record, click Deactivate once more to confirm the action. If you clicked Deactivate in error, selecting Cancel returns you to the previous page.
You may also reactivate a deactivated company by visiting the company record and selecting the Reactivate button. In the popup that appears, select Reactivate to confirm the reactivation. If you'd like to keep the company inactive, click Cancel to return to the previous page.
Activity Log
 You can view the system Activity Log by clicking the clock icon in the upper right corner of the page.
For more information about the Activity Log, visit Activity Log.
Documents
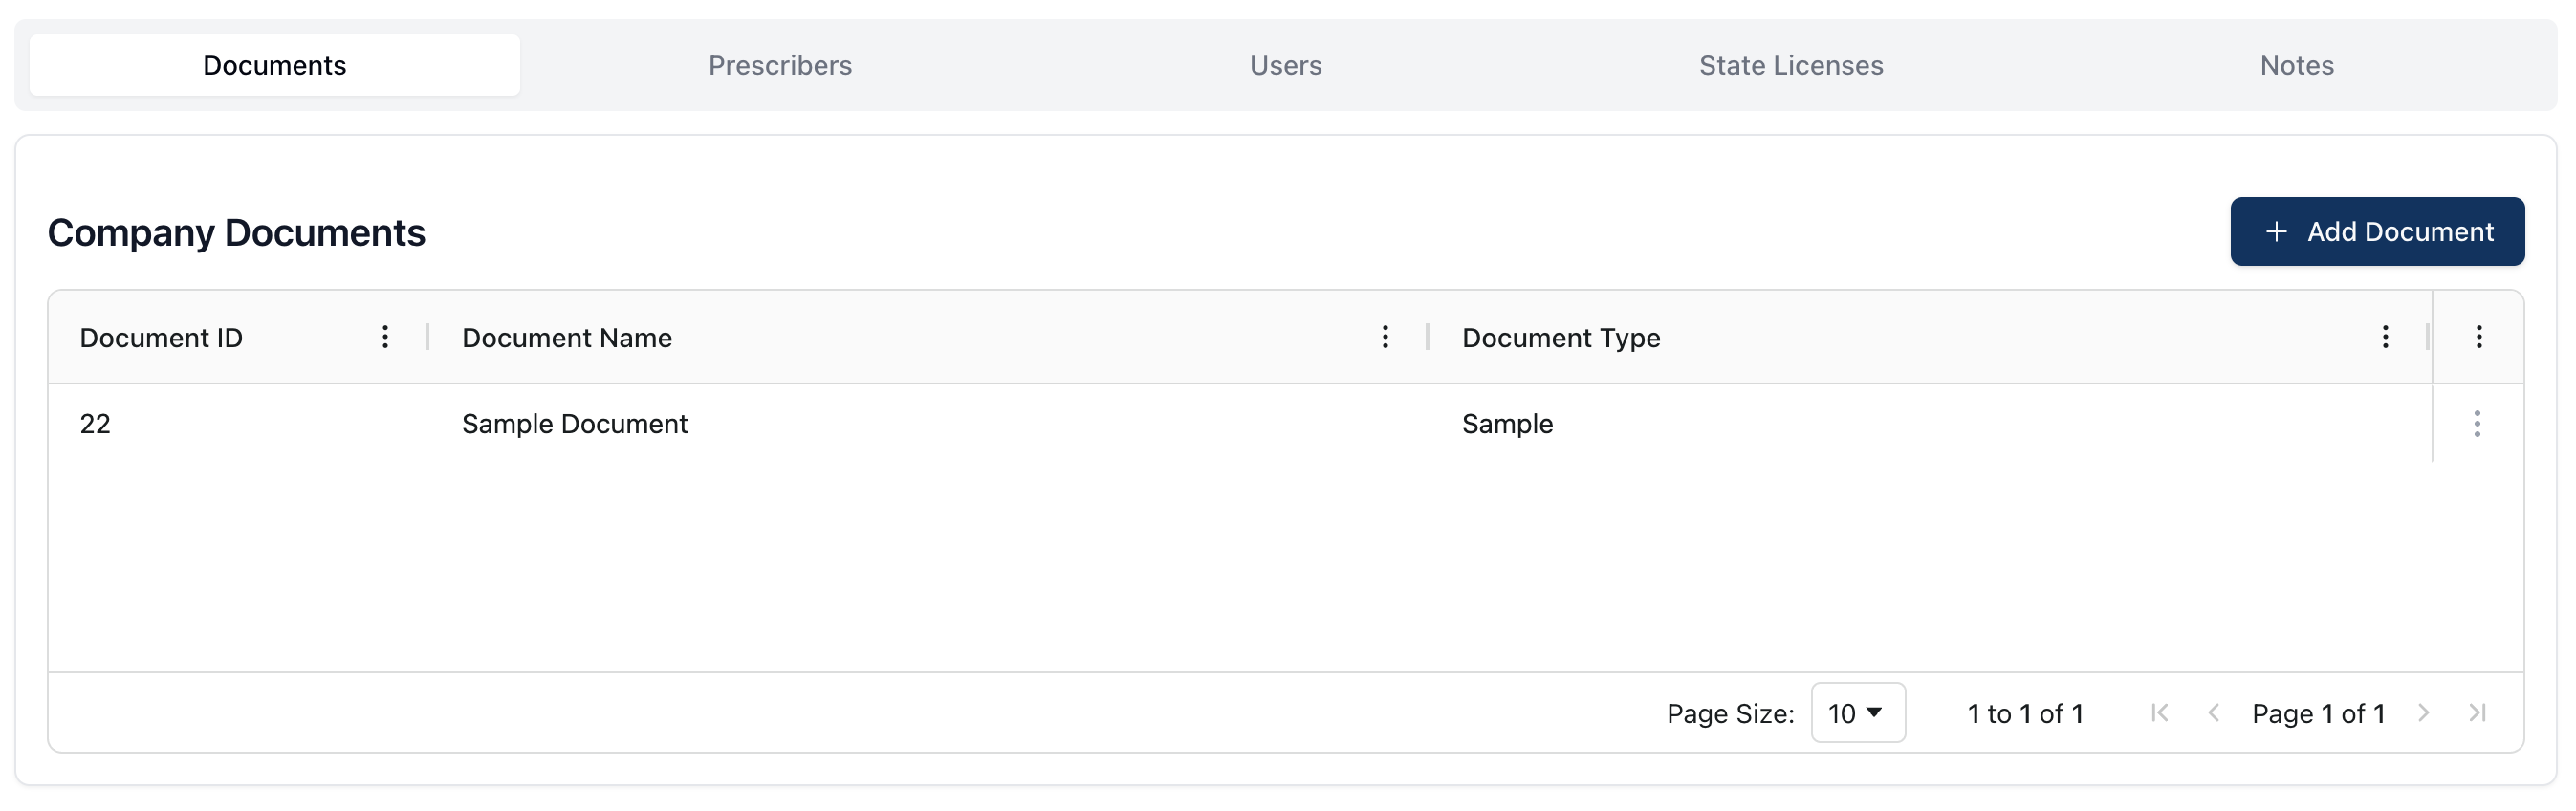 The Documents tab displays any uploaded documents related to the company.
The Company Documents table displays the related company documents, including the following information:
Document ID | The ID number for the document, automatically generated by the system. |
Document Name | The name of the document. |
Document Type | The type of document |
You can view each document by navigating to the right of each item in the table and clicking the actions menu ( ⠇) next the item. The actions menu includes the following options:
View, which allows you to download and view the document
Edit, which allows you to edit the information related to the document, including the name, document type, and the related file
Delete, which allows you to delete the document from the company record
Adding a company document
Looking for a shorter overview? Visit the how-to guide instead.
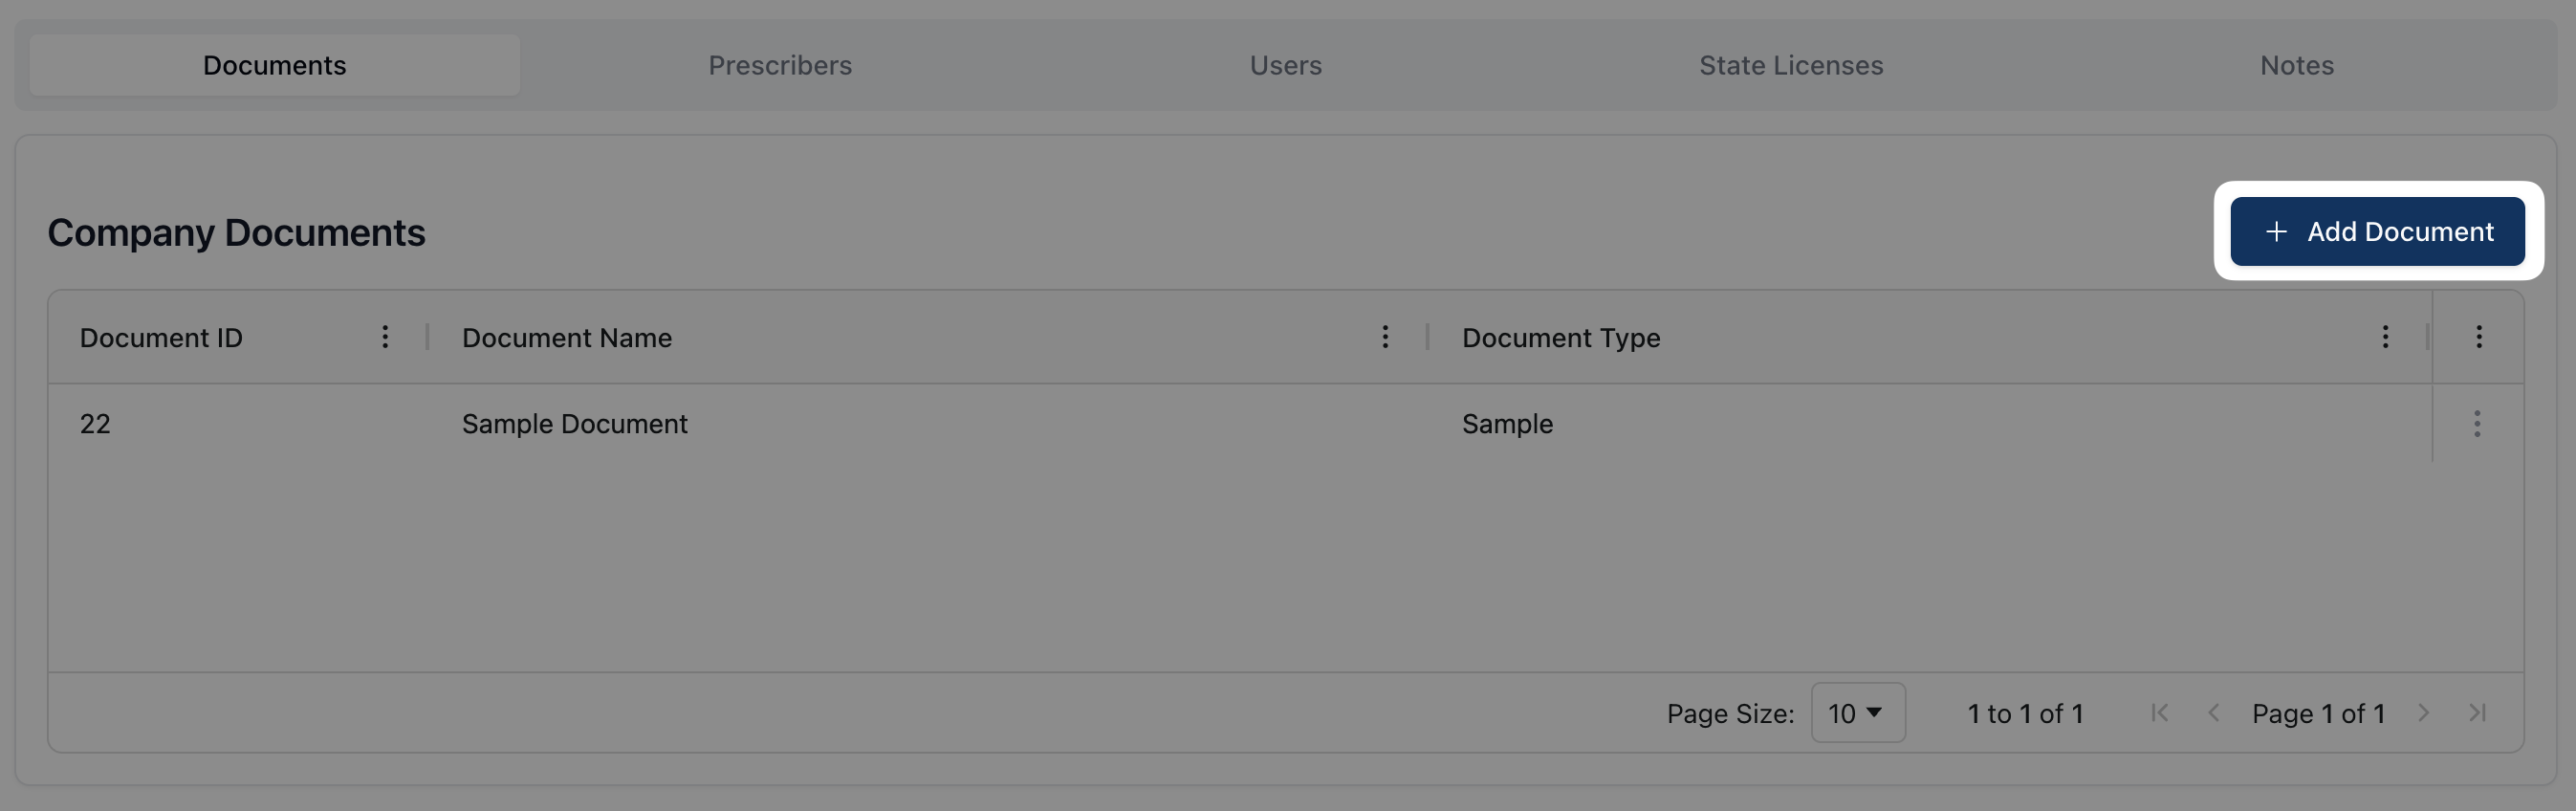 To upload a new document to the company record, click the + Add Document button in the upper right corner.
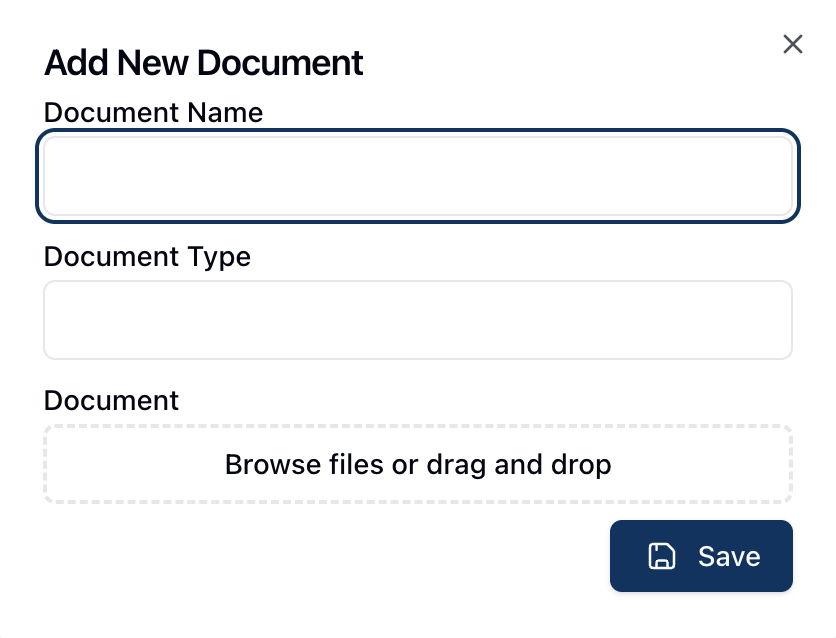 In the popup that appears, fill out all relevant fields, including the Document Name and the Document Type.
Under Document, you may drag and drop the related file(s) into the upload field. Alternatively, clicking directly on the outlined area allows you to browse and select the file(s) from your computer.
Once all of the relevant fields are complete, click Save to upload the document.
Prescribers
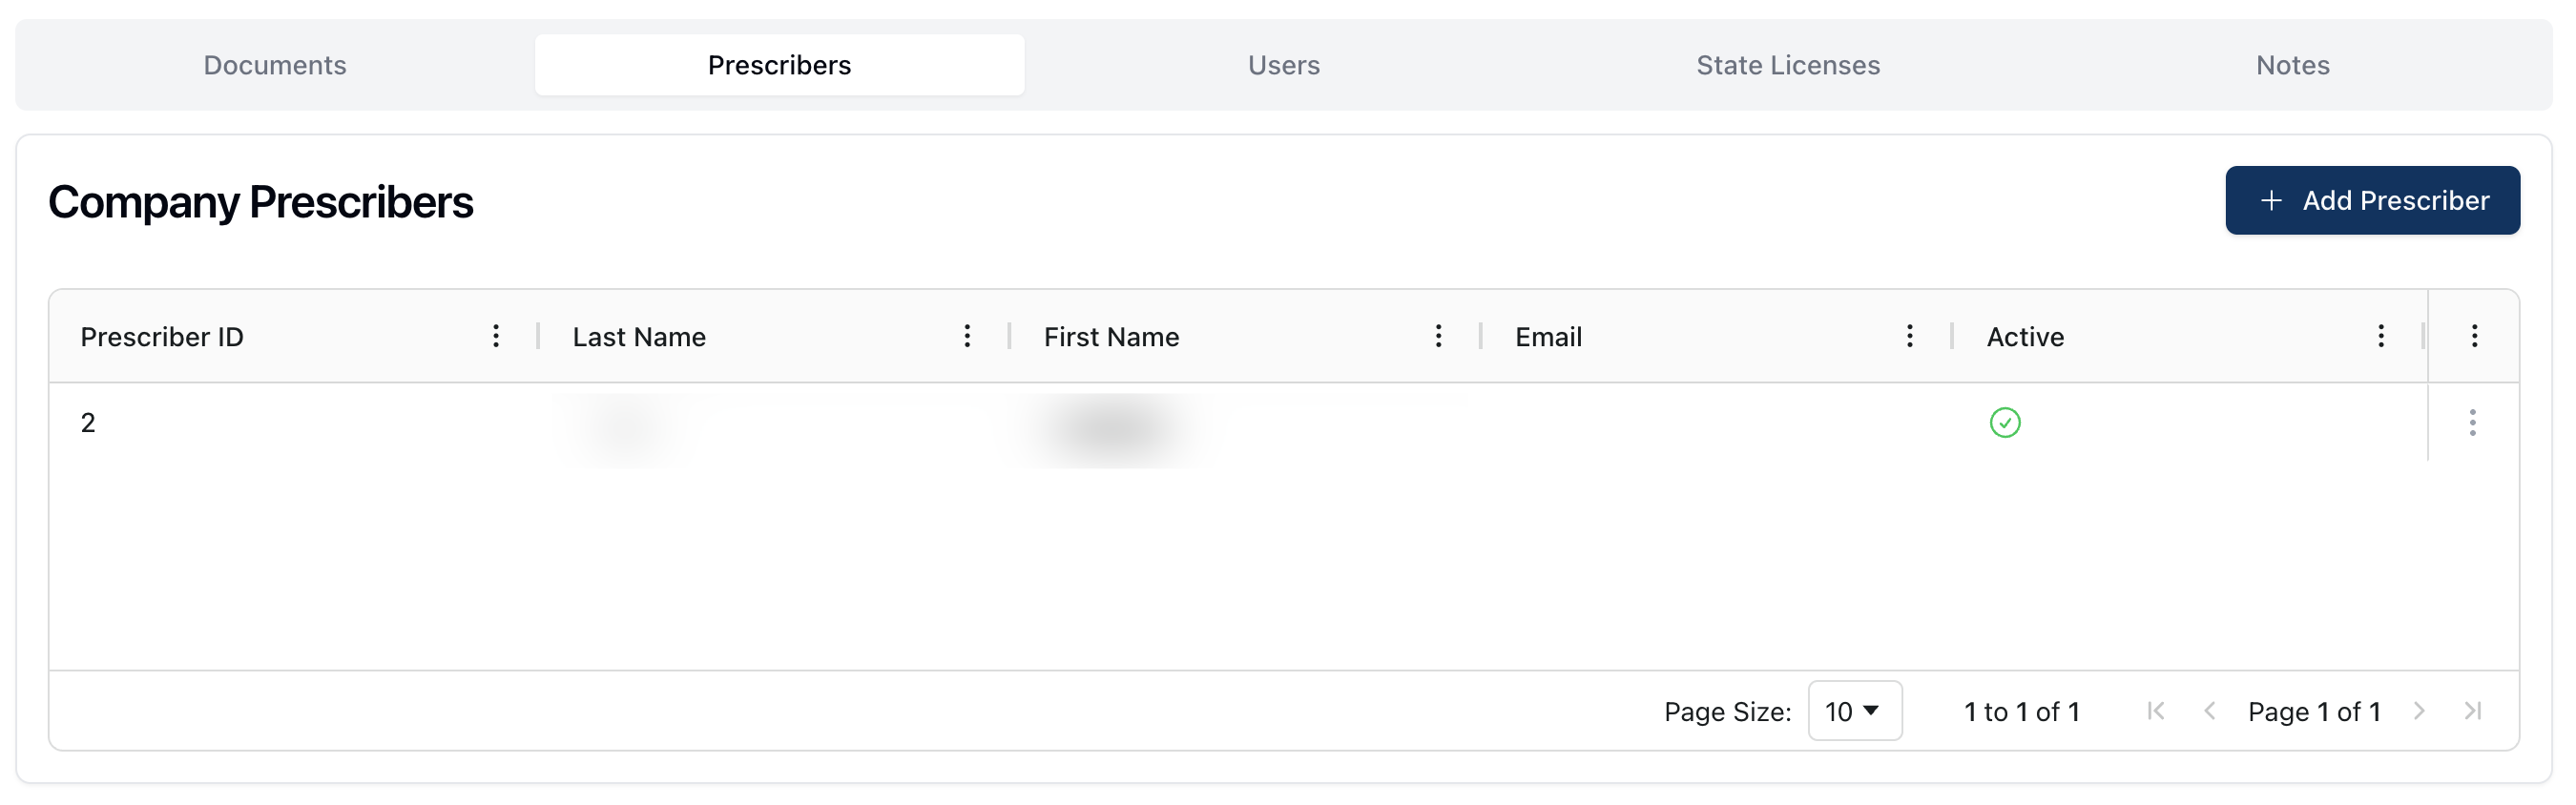 The Prescribers tab displays all prescribers related to a company.
The Company Prescribers table lists all prescribers related to the company, sorted by prescriber ID by default. Each prescriber includes the following information:
Prescriber ID | The prescriber ID number, automatically generated by the system. |
Prescriber Last Name | The prescriber's last name. |
Prescriber First Name | The prescriber's first name. |
The prescriber's email address. | |
Active | Whether or not the prescriber is active or inactivate in the system. A green check mark indicates that the prescriber is an active prescriber. |
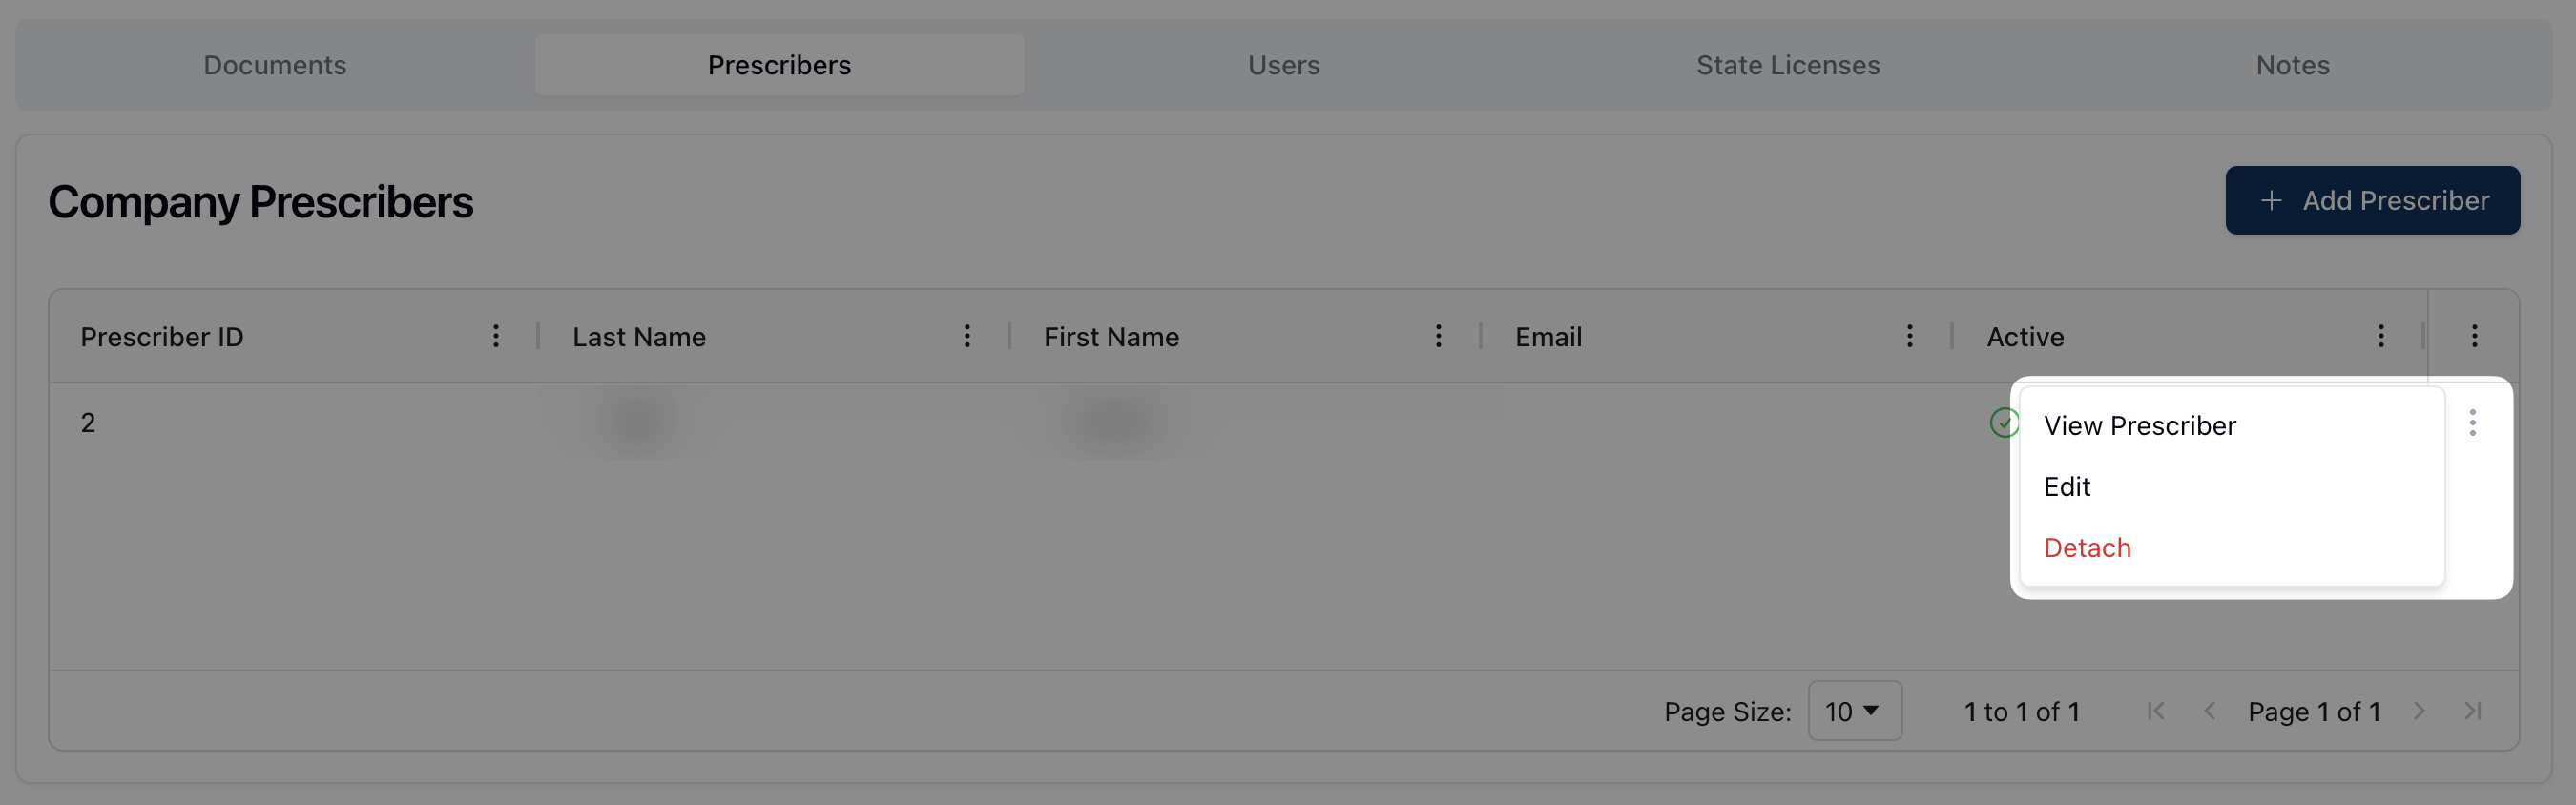 You can view each prescriber by scrolling to the right of the table and clicking the actions menu ( ⠇) to the right of the item. Selecting View Prescriber navigates to the related prescriber record.
This menu also includes the option to Edit the prescriber record and Detach the prescriber from the company.
Adding a company prescriber
Looking for a shorter overview? Visit the how-to guide instead.
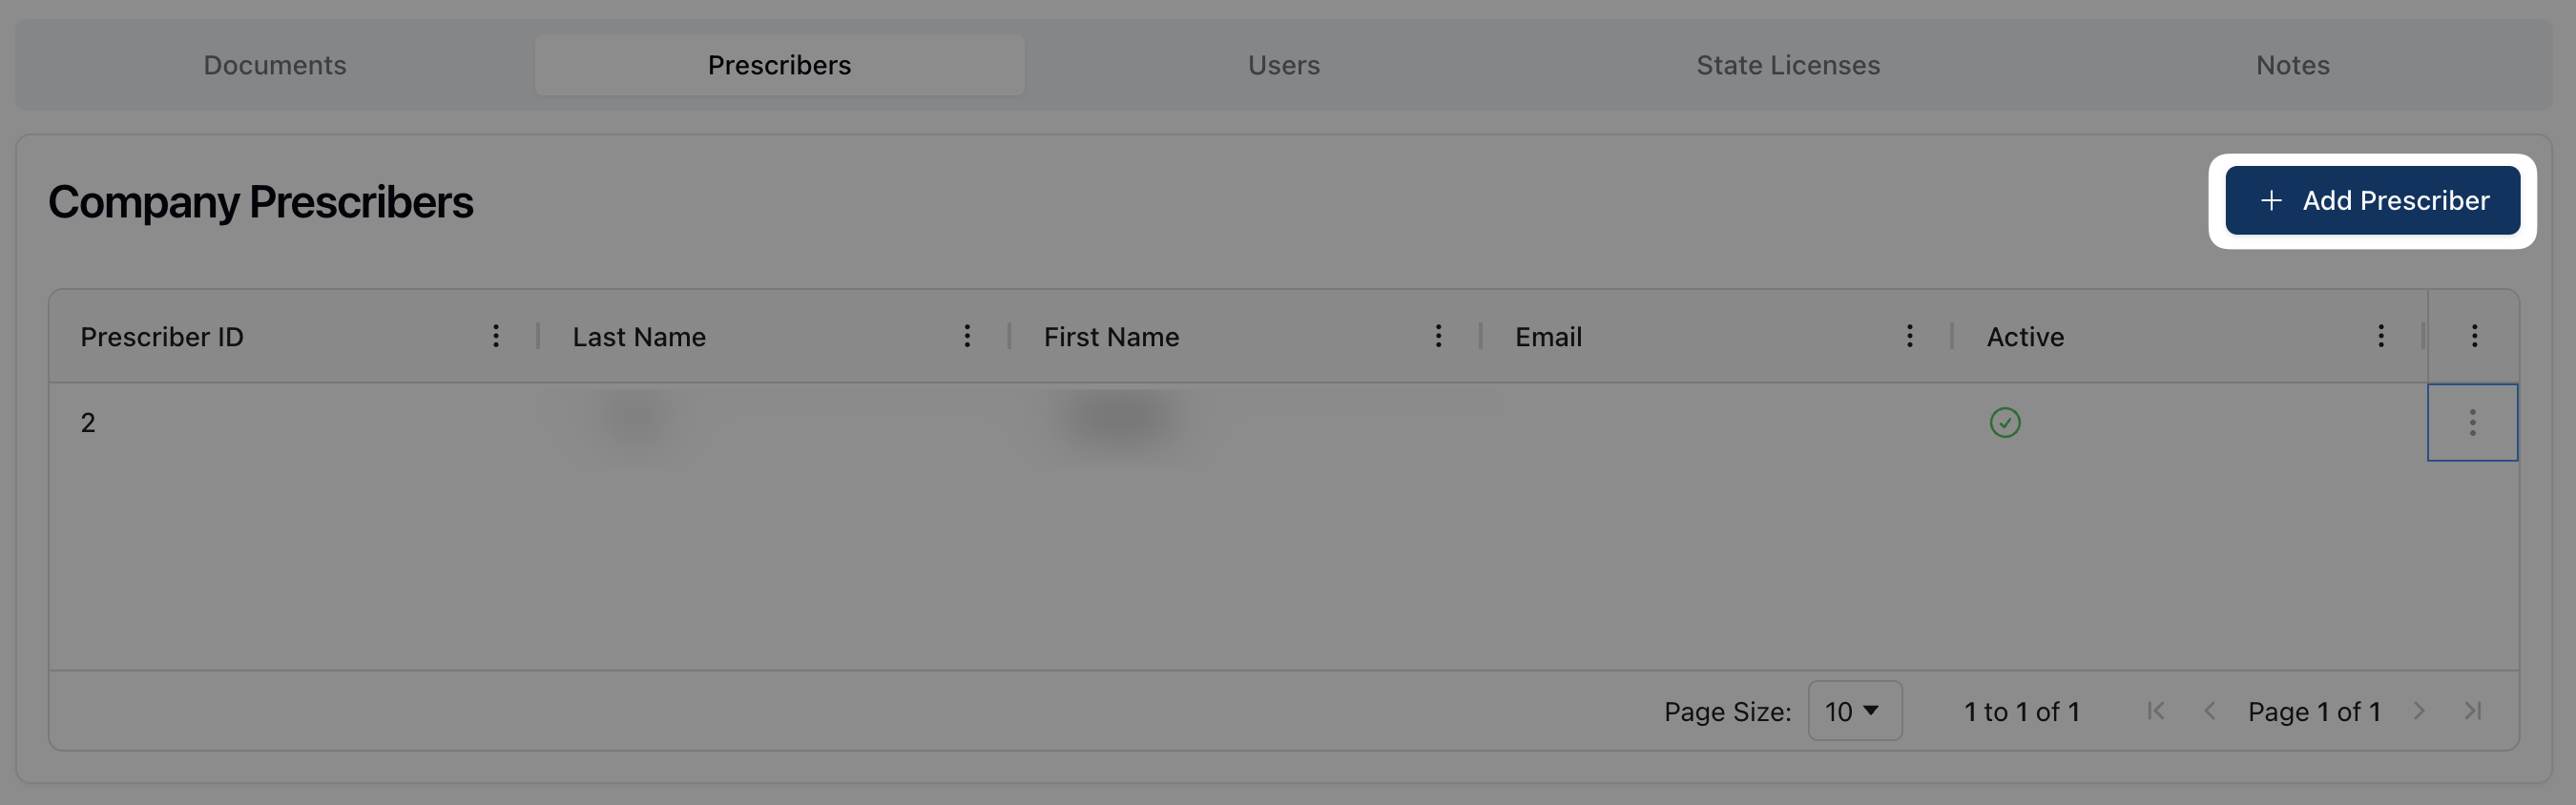 To add a new prescriber, click the + Add Prescriber button on the upper right corner of the page. Note that opening the Create Prescriber page from the company record automatically fills in the Company Information at the top of the page.
If the prescriber already exists in the system, such as with another company, you can search for their information using the search field below Prescriber Information. If this is a new prescriber, skip to the NPI Information section.
 Here, enter the prescriber's NPI number. After entering the number, select the appropriate prescriber from the dropdown results.
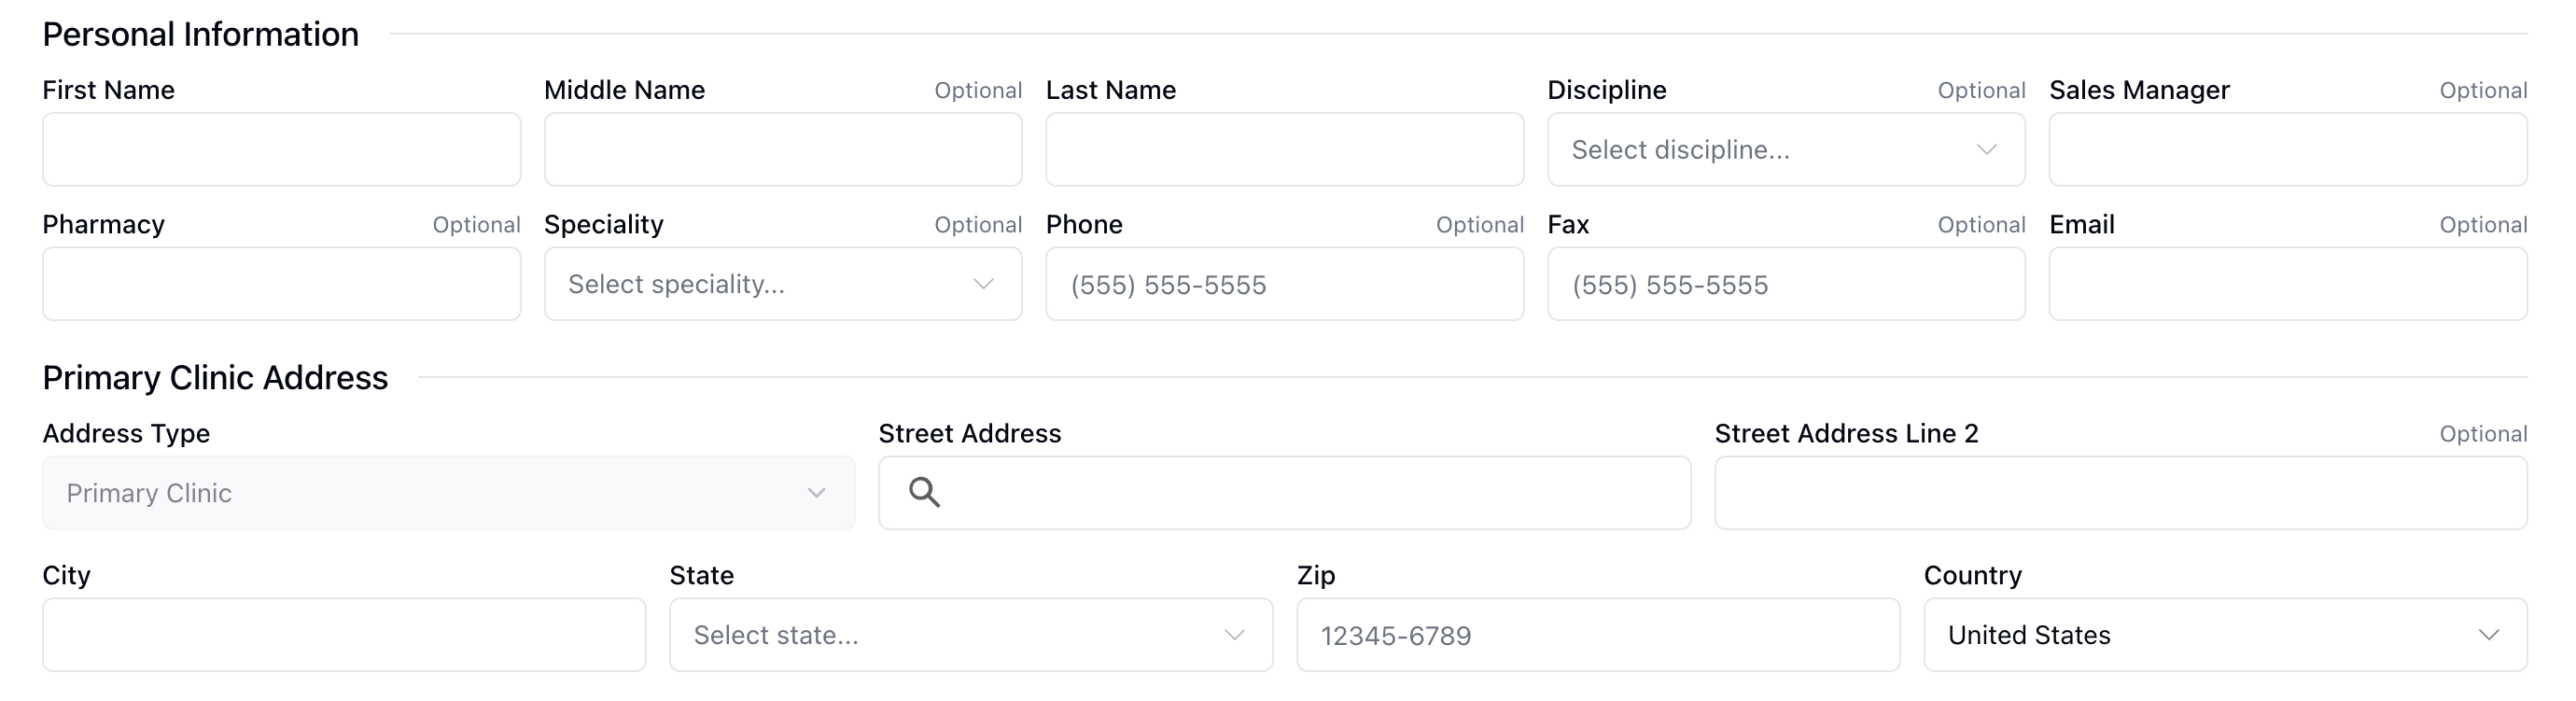 Once you select the prescriber, the prescriber's Personal Information and Primary Clinic Address will autofill in the fields below. You can then review the pre-populated fields to confirm the information entered.
 Under Licenses Information, enter the prescriber's DEA License and DEA Expiration. Once complete, click Save Prescriber to add them prescriber to the company record.
Users
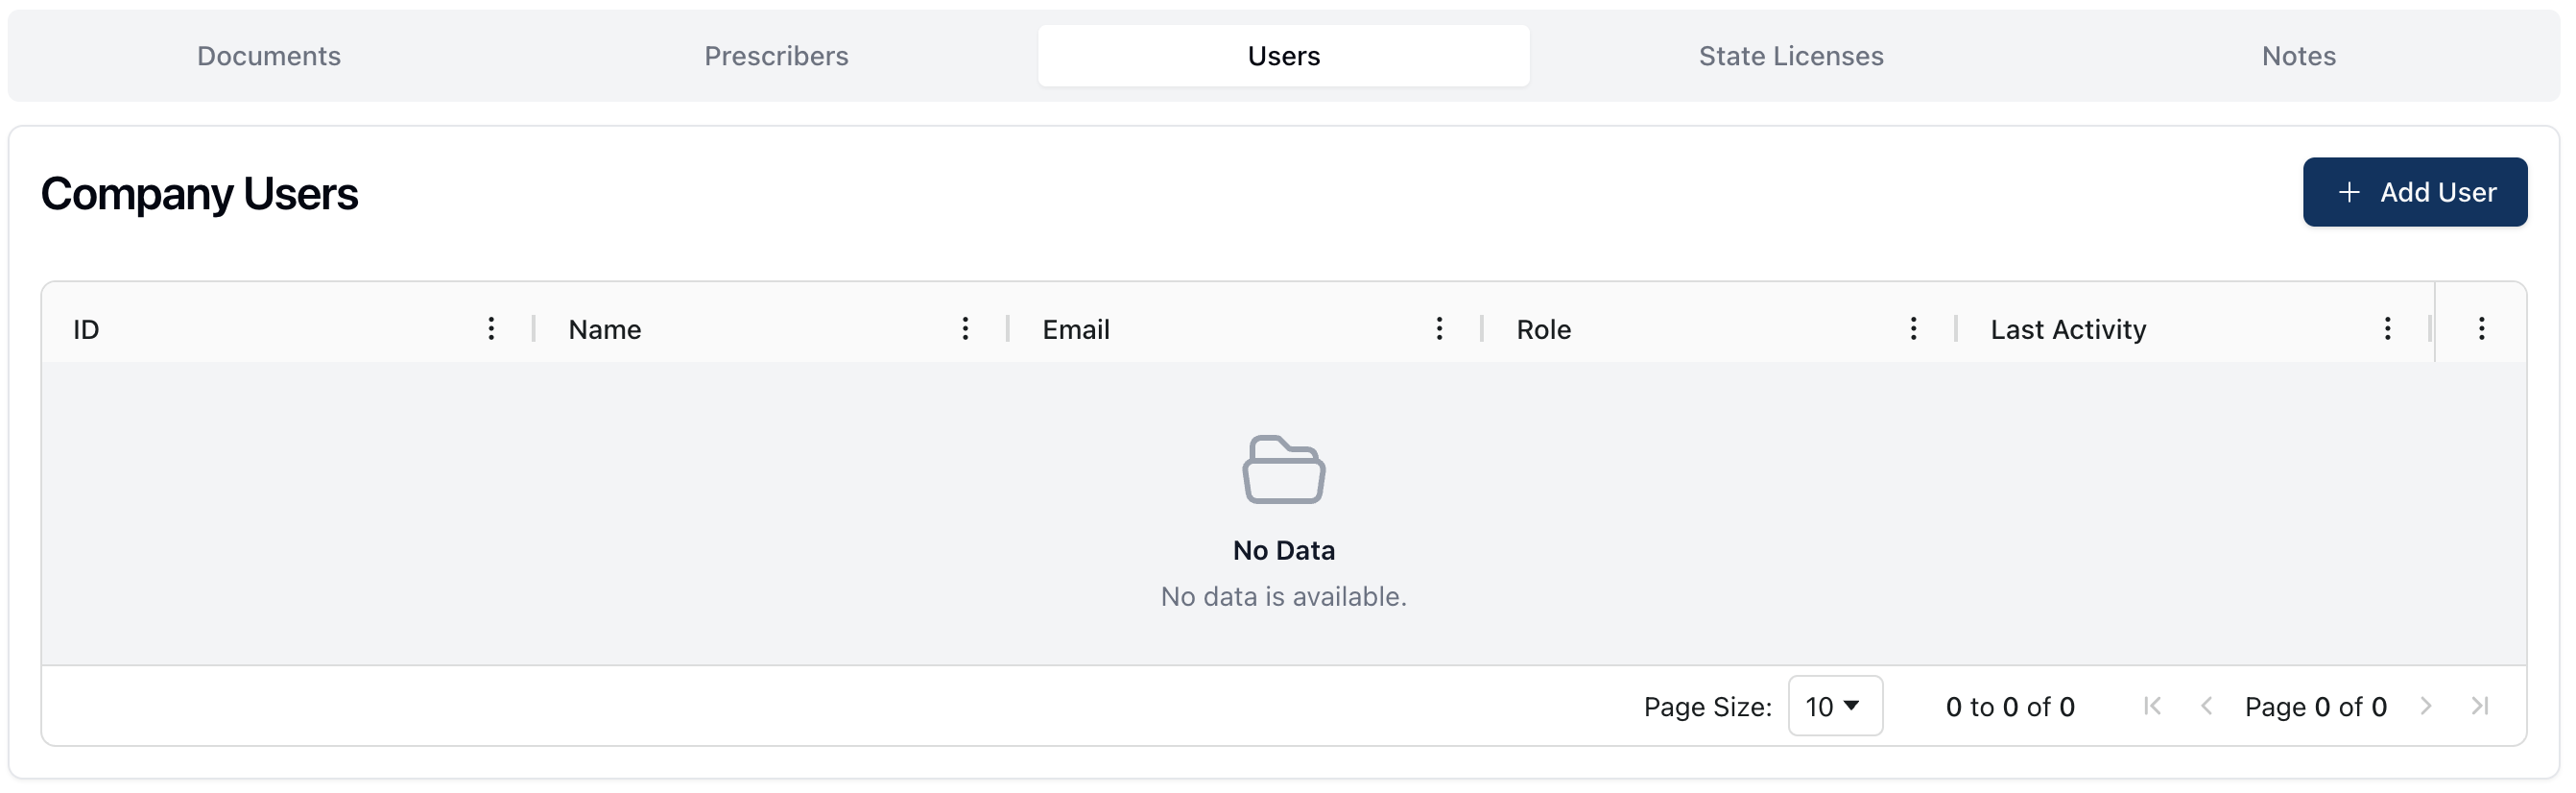 The Users tab displays all users related to the company, not including prescribers, with access to the system. This may include users such as the primary contact or company manager.
All users related to the company appear in the Company Users table. Each user includes the following information:
User ID | The user ID number, automatically generated by the system. |
Name | The user's name. |
The user's email address. | |
Role | The role assigned to the user. |
Last Active | The date and time the user was last active in the system. |
To view a user's information, scroll to the right of the Company Users table and click the actions menu ( ⠇) to the right of the user. Select View to navigate to the related Users page, which displays the user's latest activity.
You may also Edit a user's information or Delete a user from this menu.
For more information about user roles and profiles, visit User roles and permissions.
Adding a company user
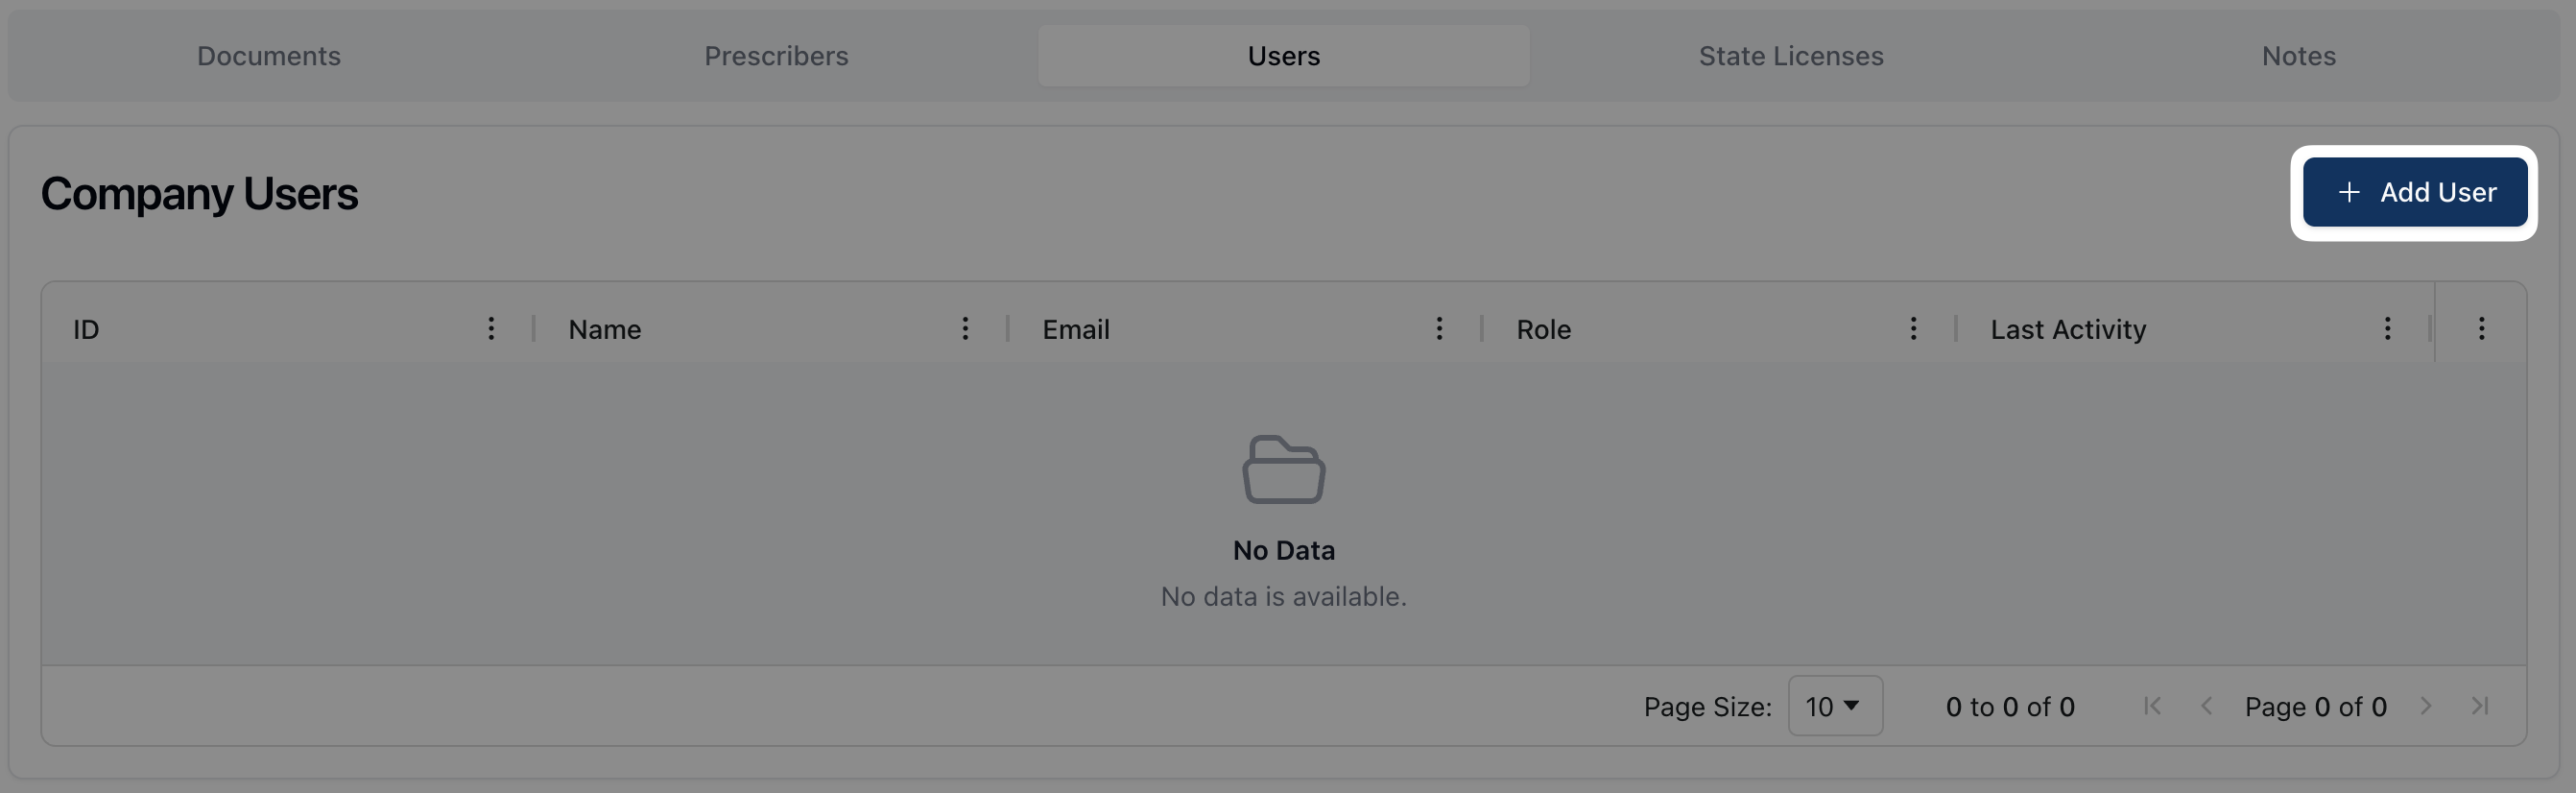 To add a new user to the company record, click the + Add User button in the upper right corner of the page.
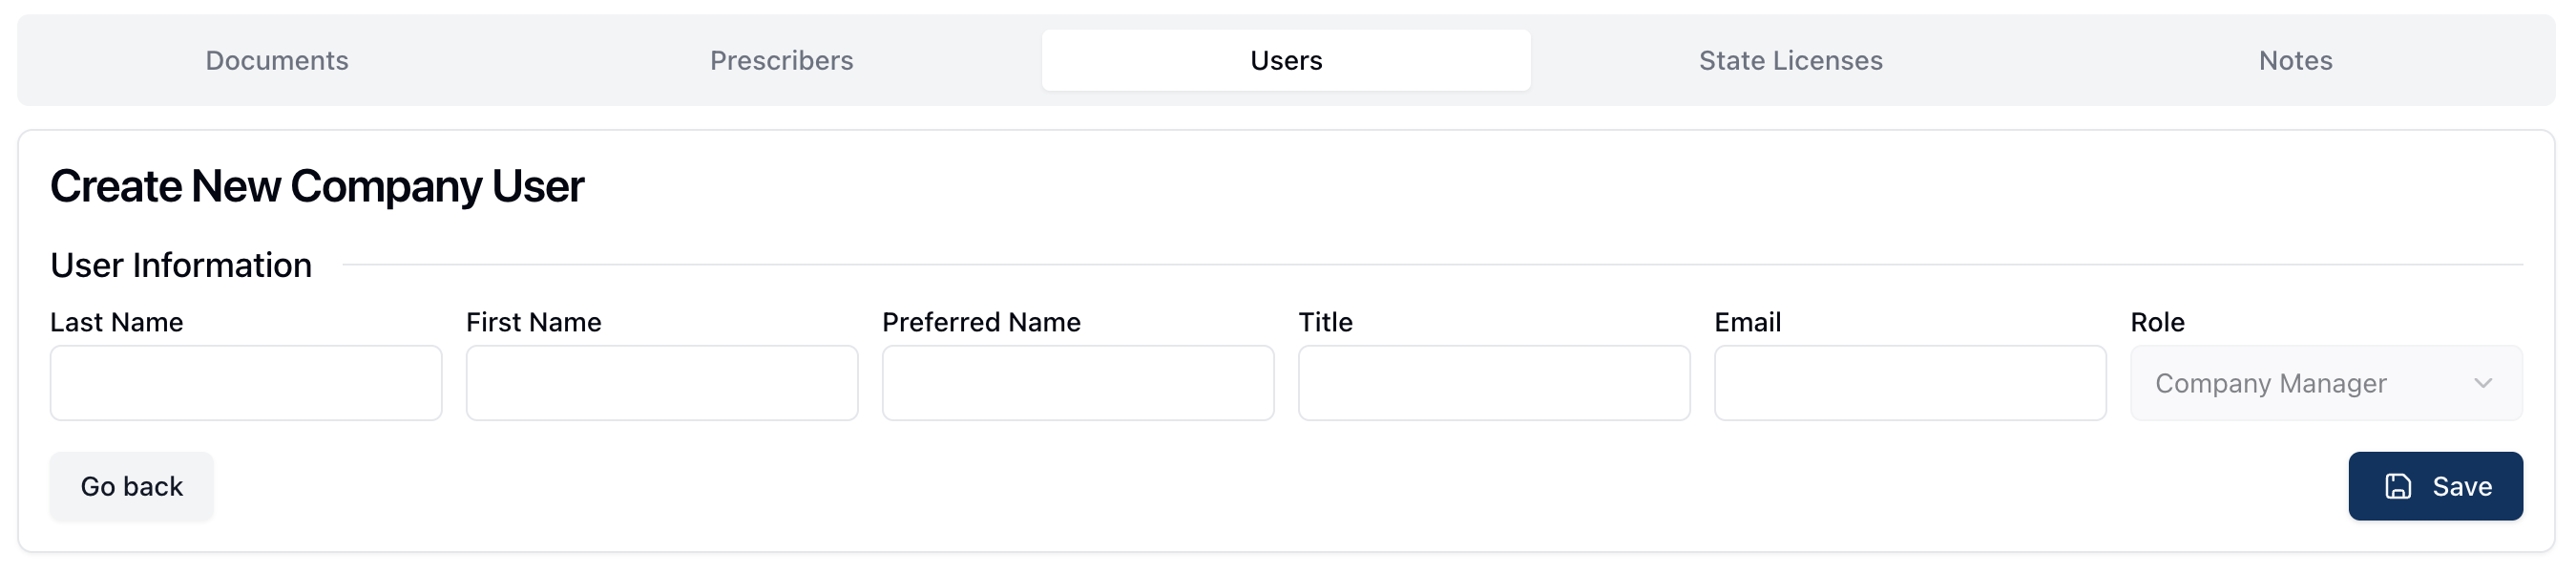 On the Create New Company User form, enter the following information:
Last Name: The user's last name.
First Name: The user's first name.
Preferred Name: The user's preferred name.
Title: The user's position or title at the company.
Email: The user's email address. Note that this email address is used for notifications and other account management communication.
User Role: The user role you would like to assign to the user.
For more information on user roles, visit User roles and permissions.
State Licenses
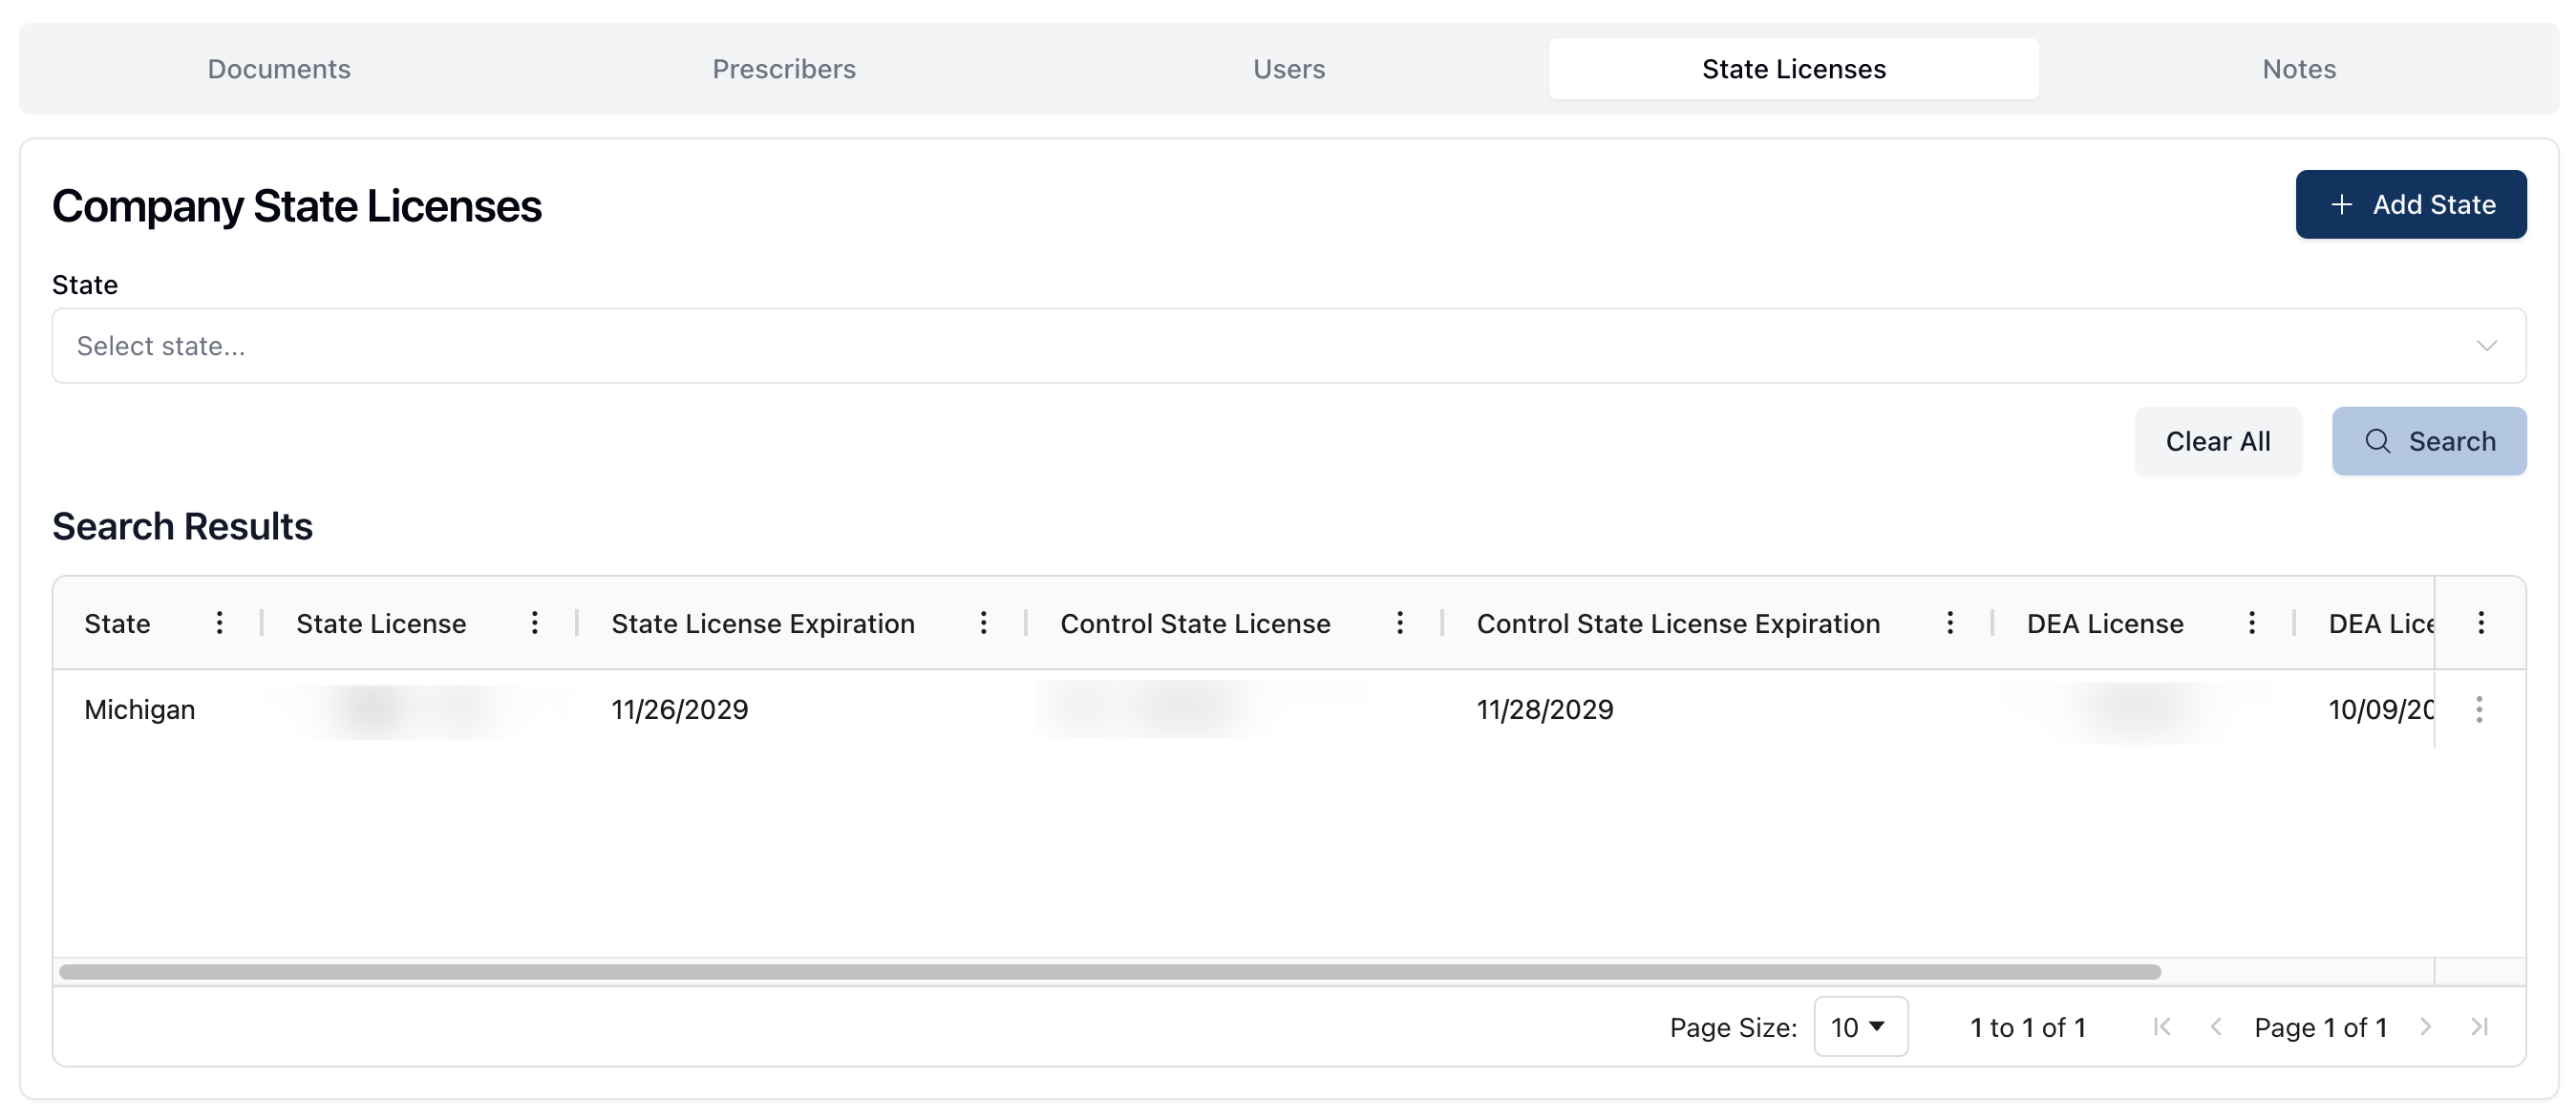 The State Licenses tab displays all state licenses related to the company. Each license displayed in the Search Results table includes the following:
State | The state that issued the license. |
State License | The related state license number. |
State License Expiration | The date the state license expires. |
Control State License | The control state license number. |
Control State License Expiration | The date the control state license expires. |
DEA License | The DEA license number, following the format displayed in the related field. |
DEA License Expiration | The date the DEA license expires. |
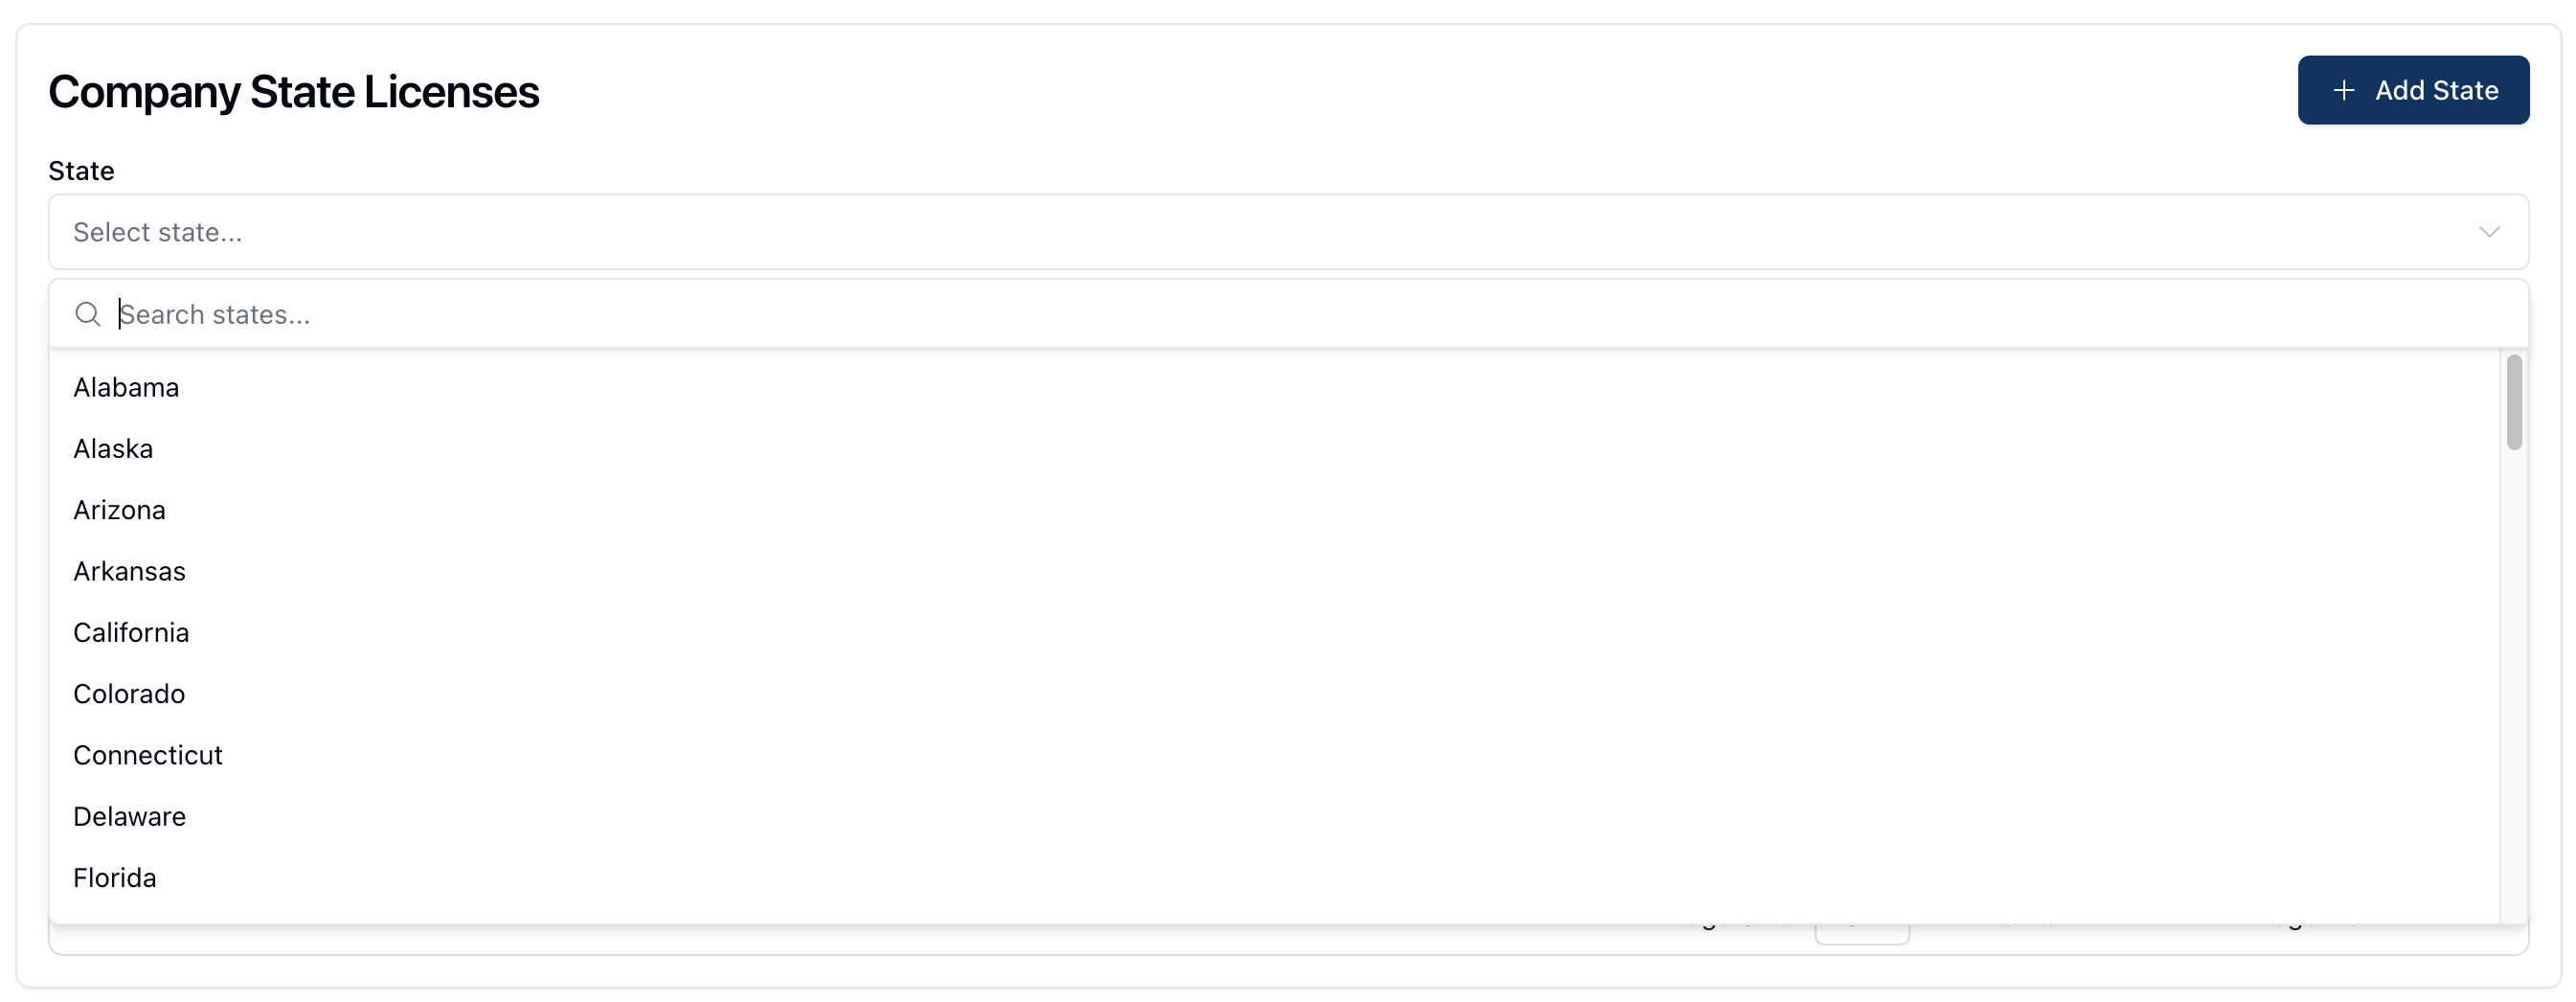 You can filter which licenses appear by state in the Search Results table. To do so, click the dropdown menu under State, below Company State Licenses.
Here, you can either scroll to find the relevant state or begin typing the state in the search field at the top of the dropdown menu. Select the relevant state, once it appears, click Search to filter the results.
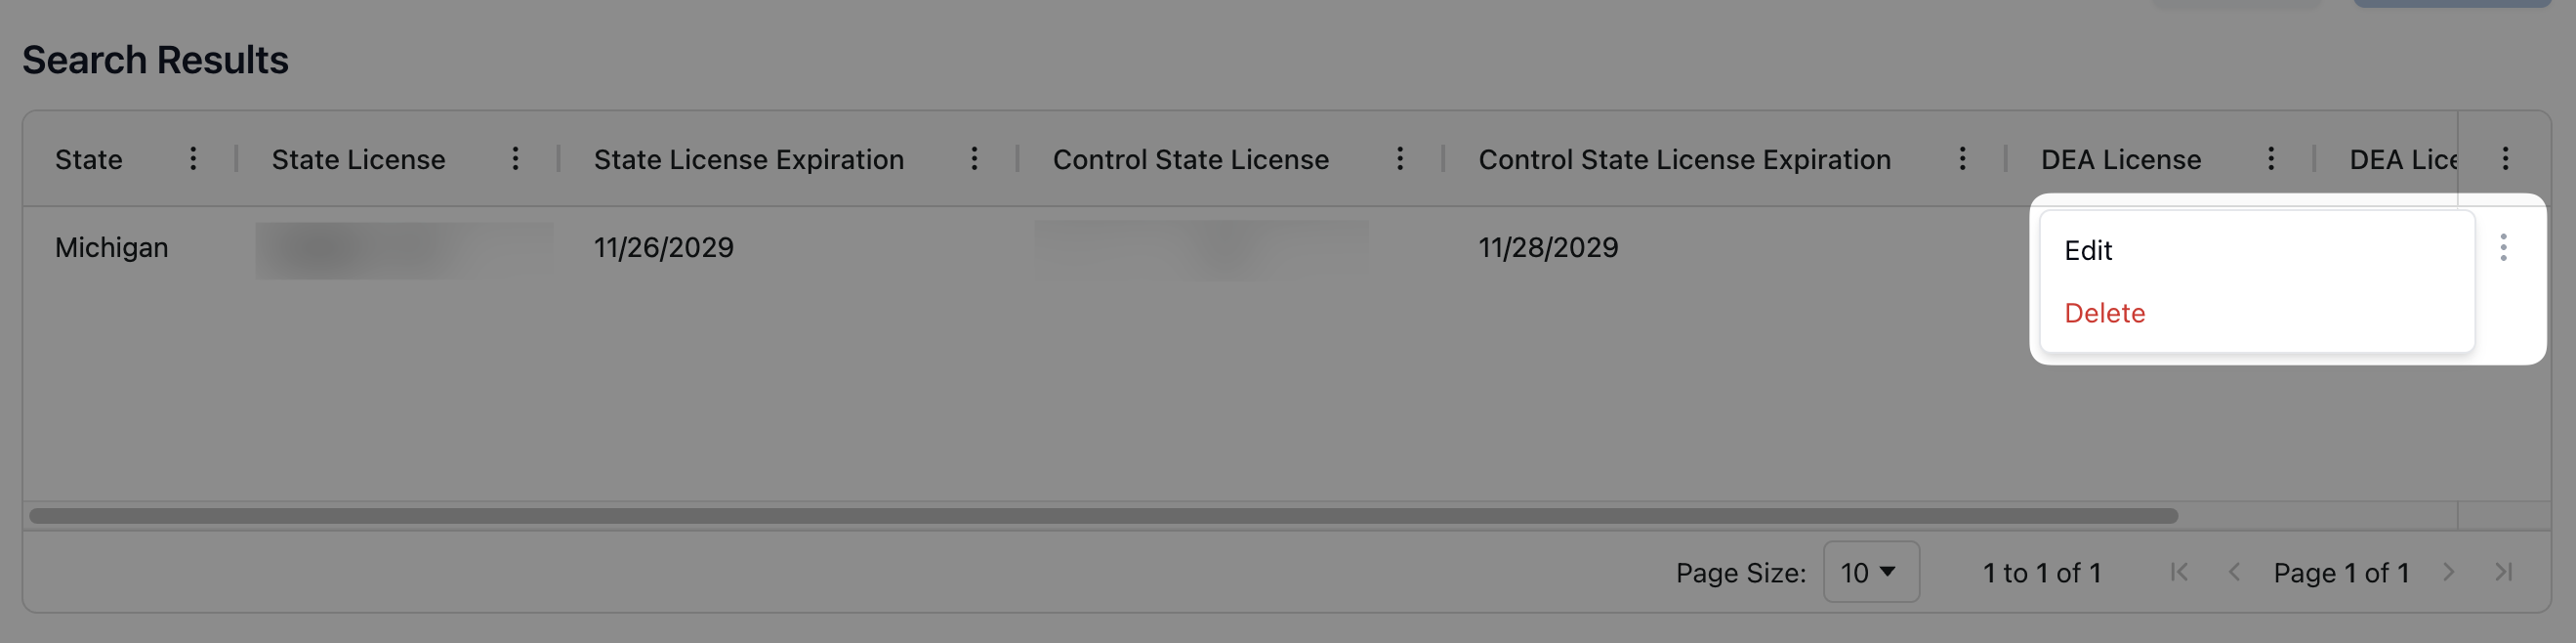 Clicking the actions menu ( ⠇) to the right of each state license allows you to Edit or Delete the related state license from the company record.
Adding a company state license
Looking for a shorter overview? Visit the how-to guide instead.
 To add a state license to the company profile, click the + Add State button in the upper right corner of the page.
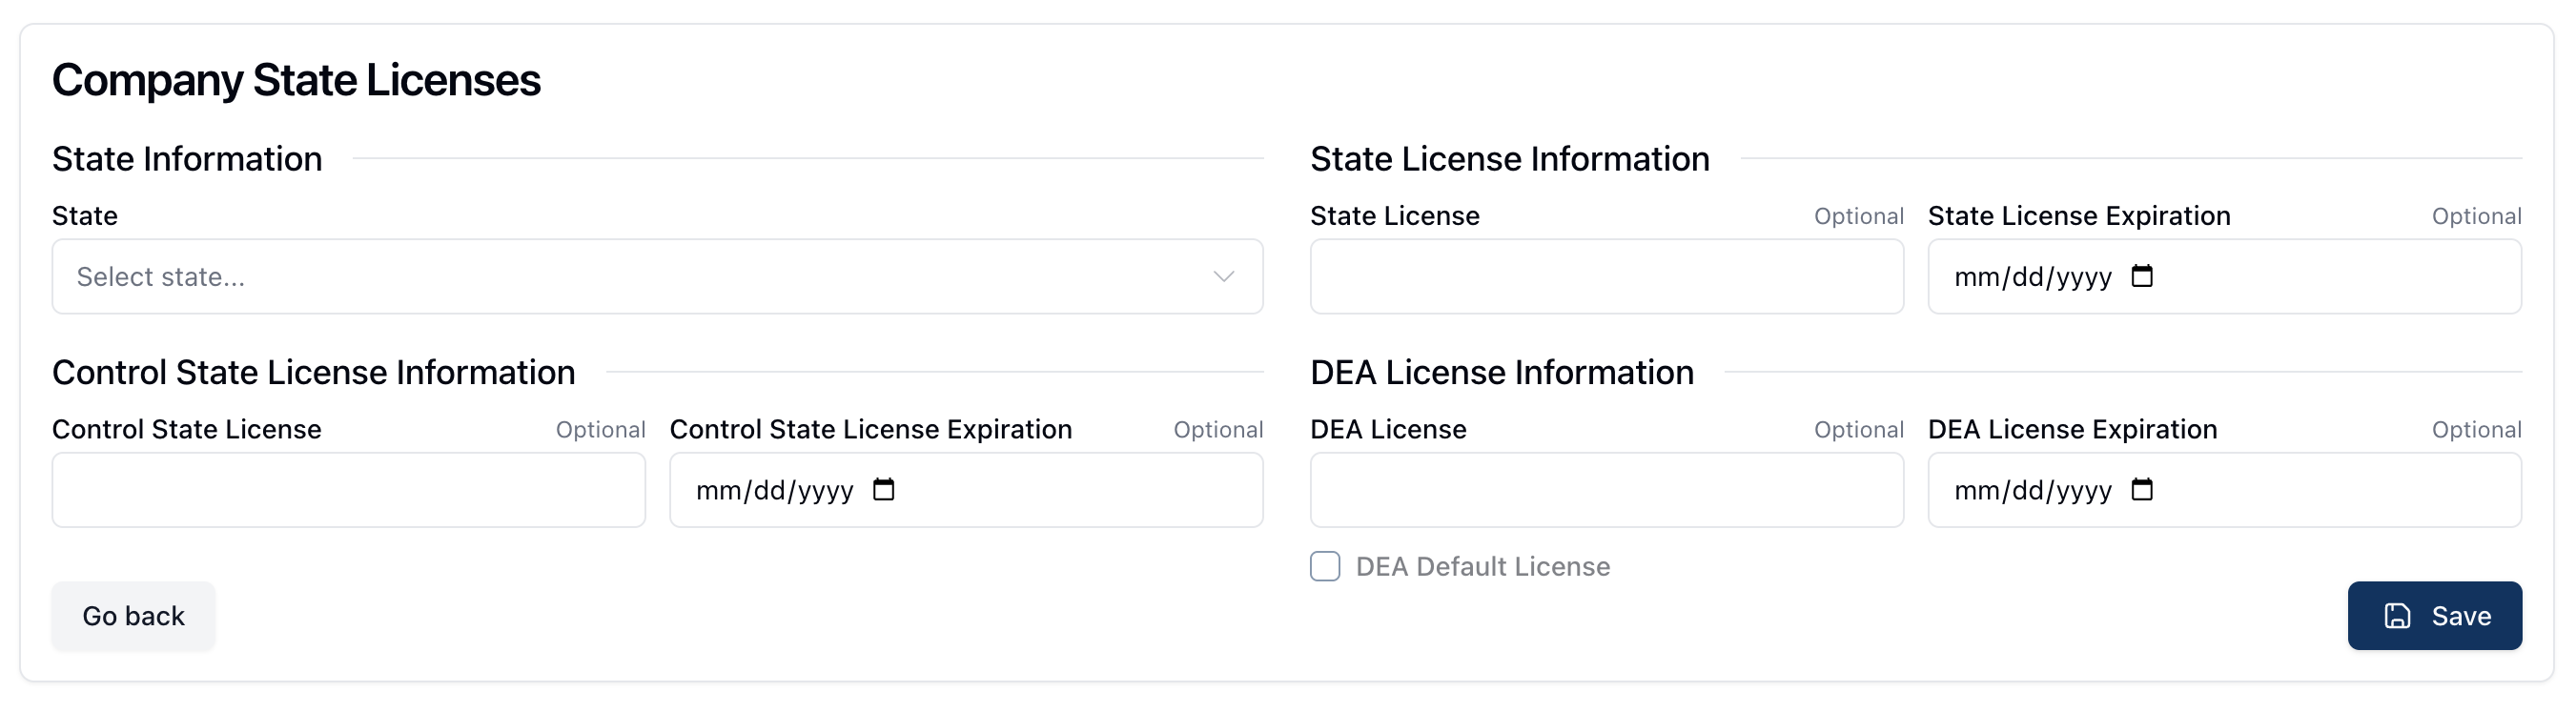 On the Company State Licenses form, select the state for which you are adding licenses from the dropdown below State Information. You can either scroll to select the appropriate state or begin typing the state into the search field at the top of the dropdown to filter the results below.
Once you select the state, enter all relevant information related to the license(s) for that state. This may include all or some of the following:
The state license and expiration date
The control state license and expiration date
The DEA license and expiration date
For the DEA license information, selecting the checkbox next to DEA Default License allows you to set this DEA license information as the default DEA license for the company.
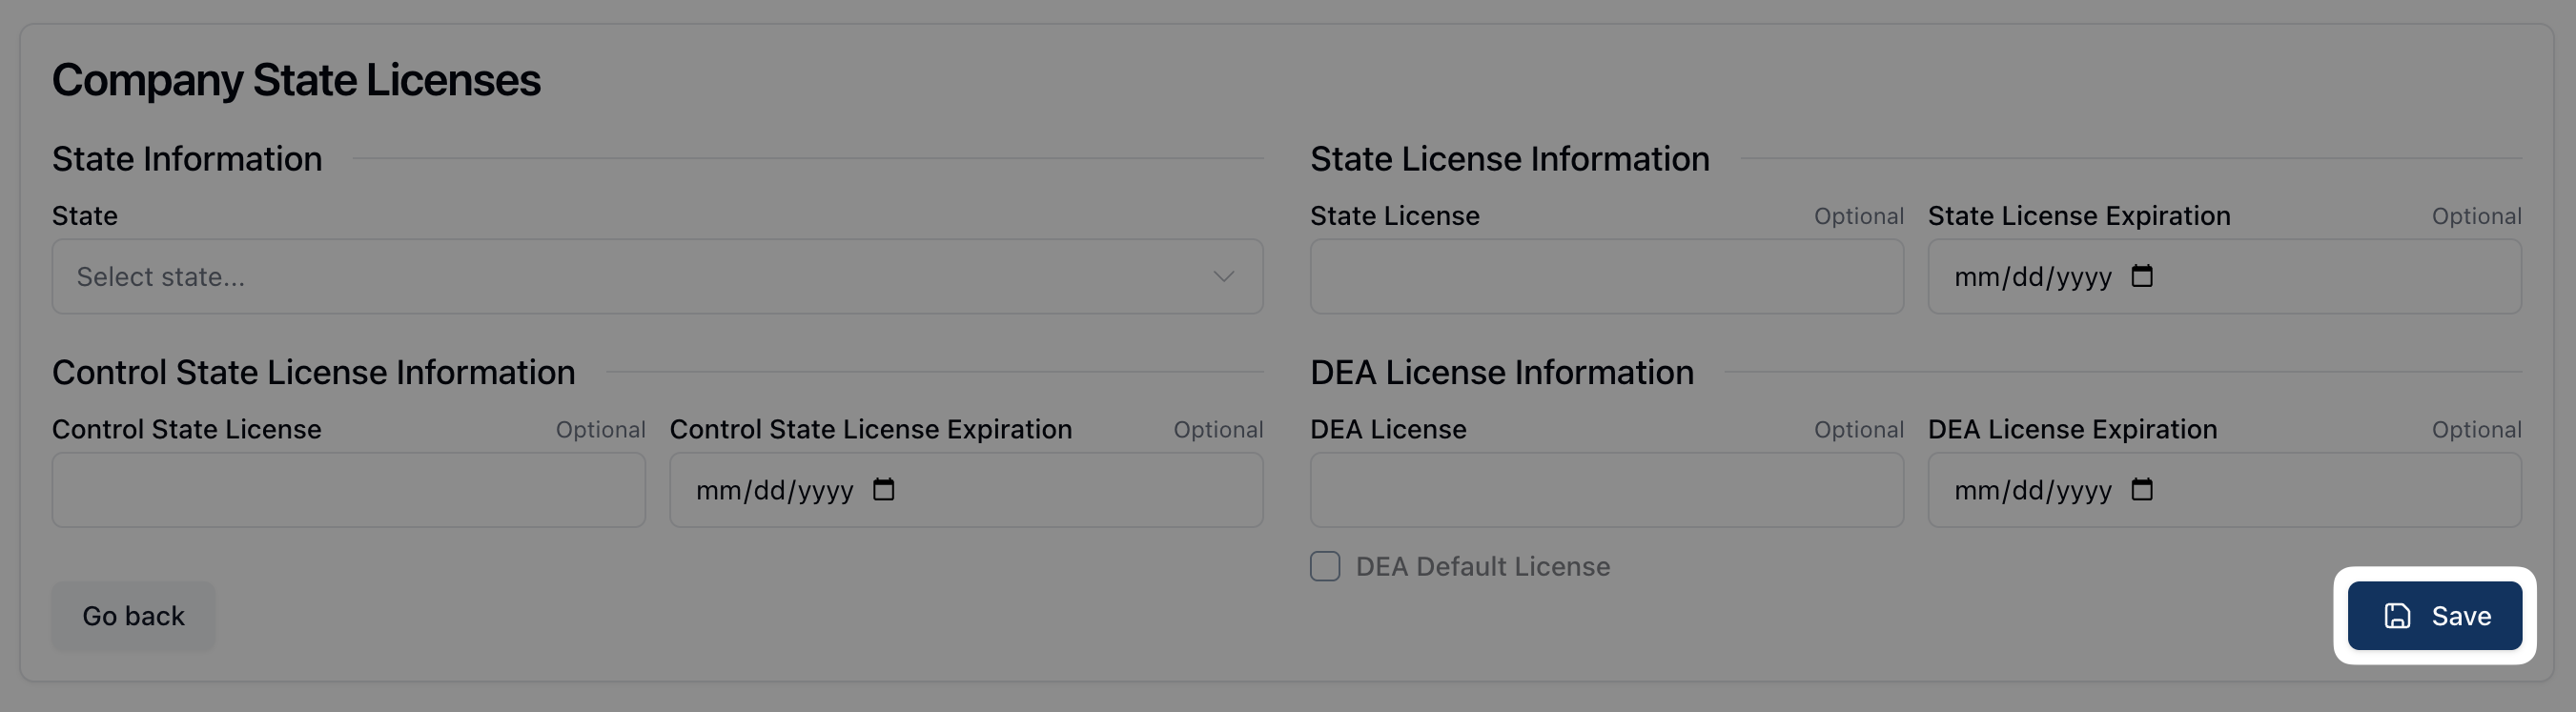 Once all the relevant fields are complete, click Save to save the related information to the company record.
Notes
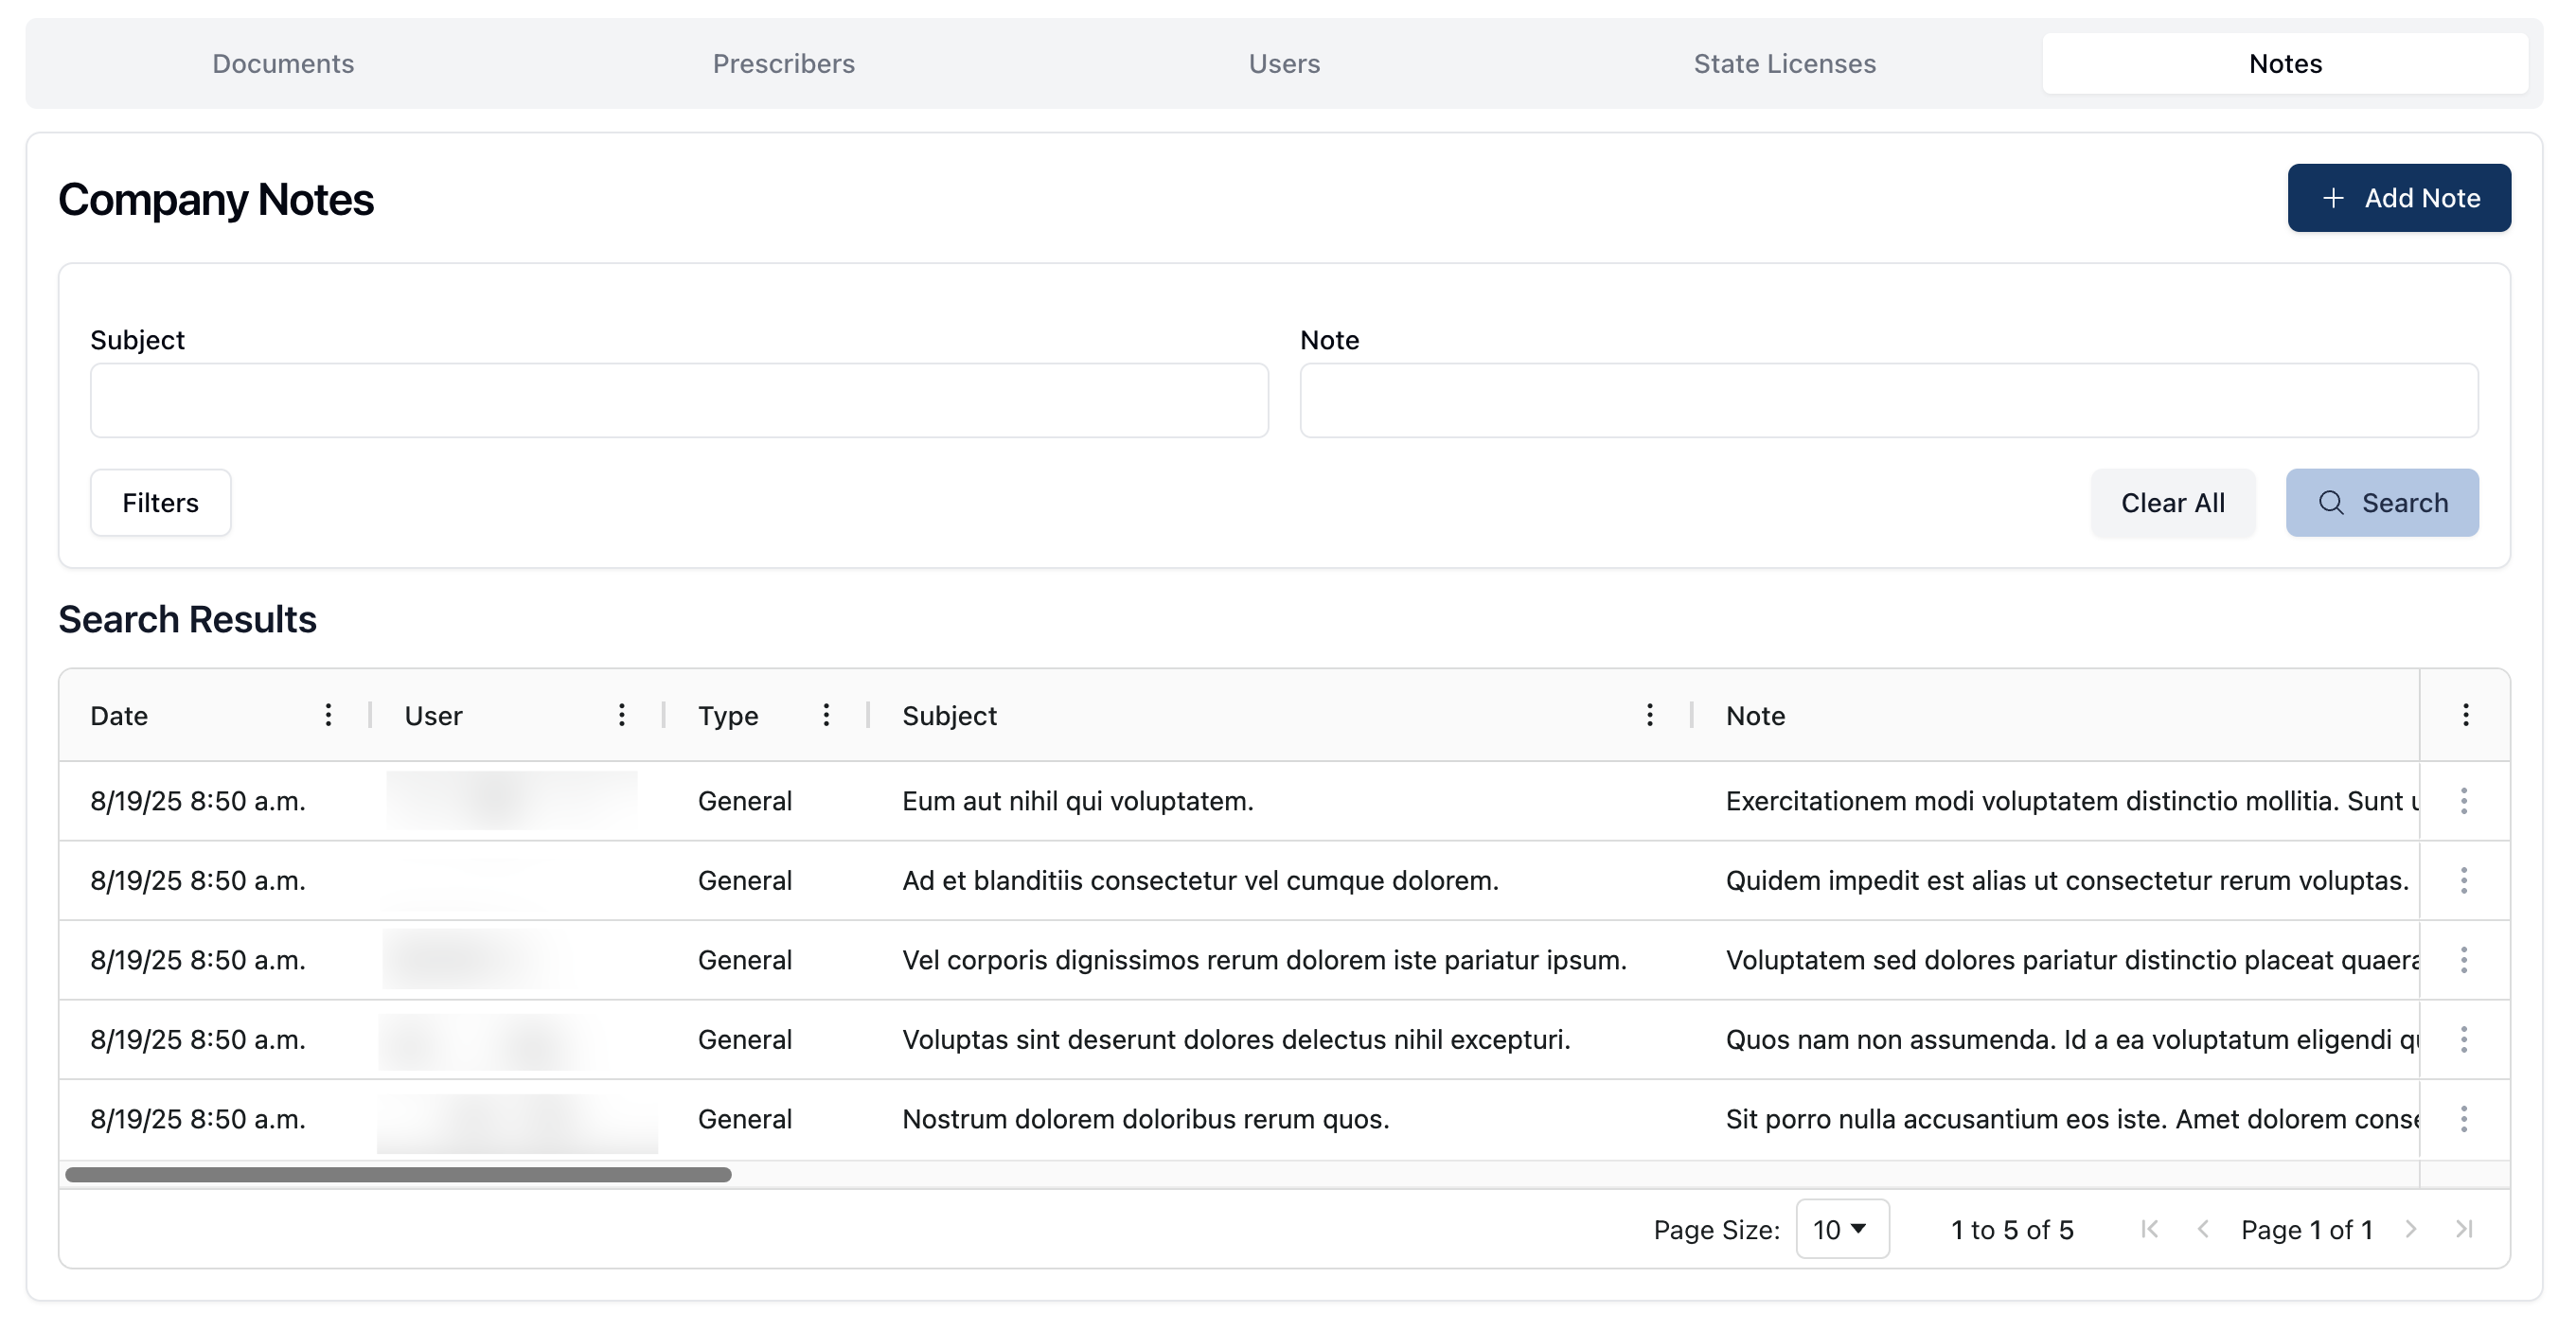 The Notes tab displays all notes related to the company. By default, the Search Results table displays all notes, listed in the order they were added to the system.
 Using the search fields at the top of the page, you can filter the search results by the subject line of the note or the content of the note itself, using the Subject and Note fields respectively. Once you've entered the relevant search terms, click Search to filter the results below.
 Using the Filters button, you can also filter your search results by the following options:
Show Deactivated Notes, which allows you to display only deactivated notes related to the company.
Priority Notes, which filters the search results to only display Priority Notes.
To remove any filters from the page, including search terms, click the Clear All button to reset the Search Results table.
The Search Results includes the following information about each note:
Date | The date and time the note was entered into the system. |
User | The user who added the note to the company profile. |
Type | The type of note, Clinical or General. |
Subject | The note's subject line. |
Note | The note content. |
Priority Note | Whether or not the note is a priority note. Priority notes display a green checkmark in this field. |
Active | Whether or not the note is an active note. Active notes display a green checkmark in this field. |
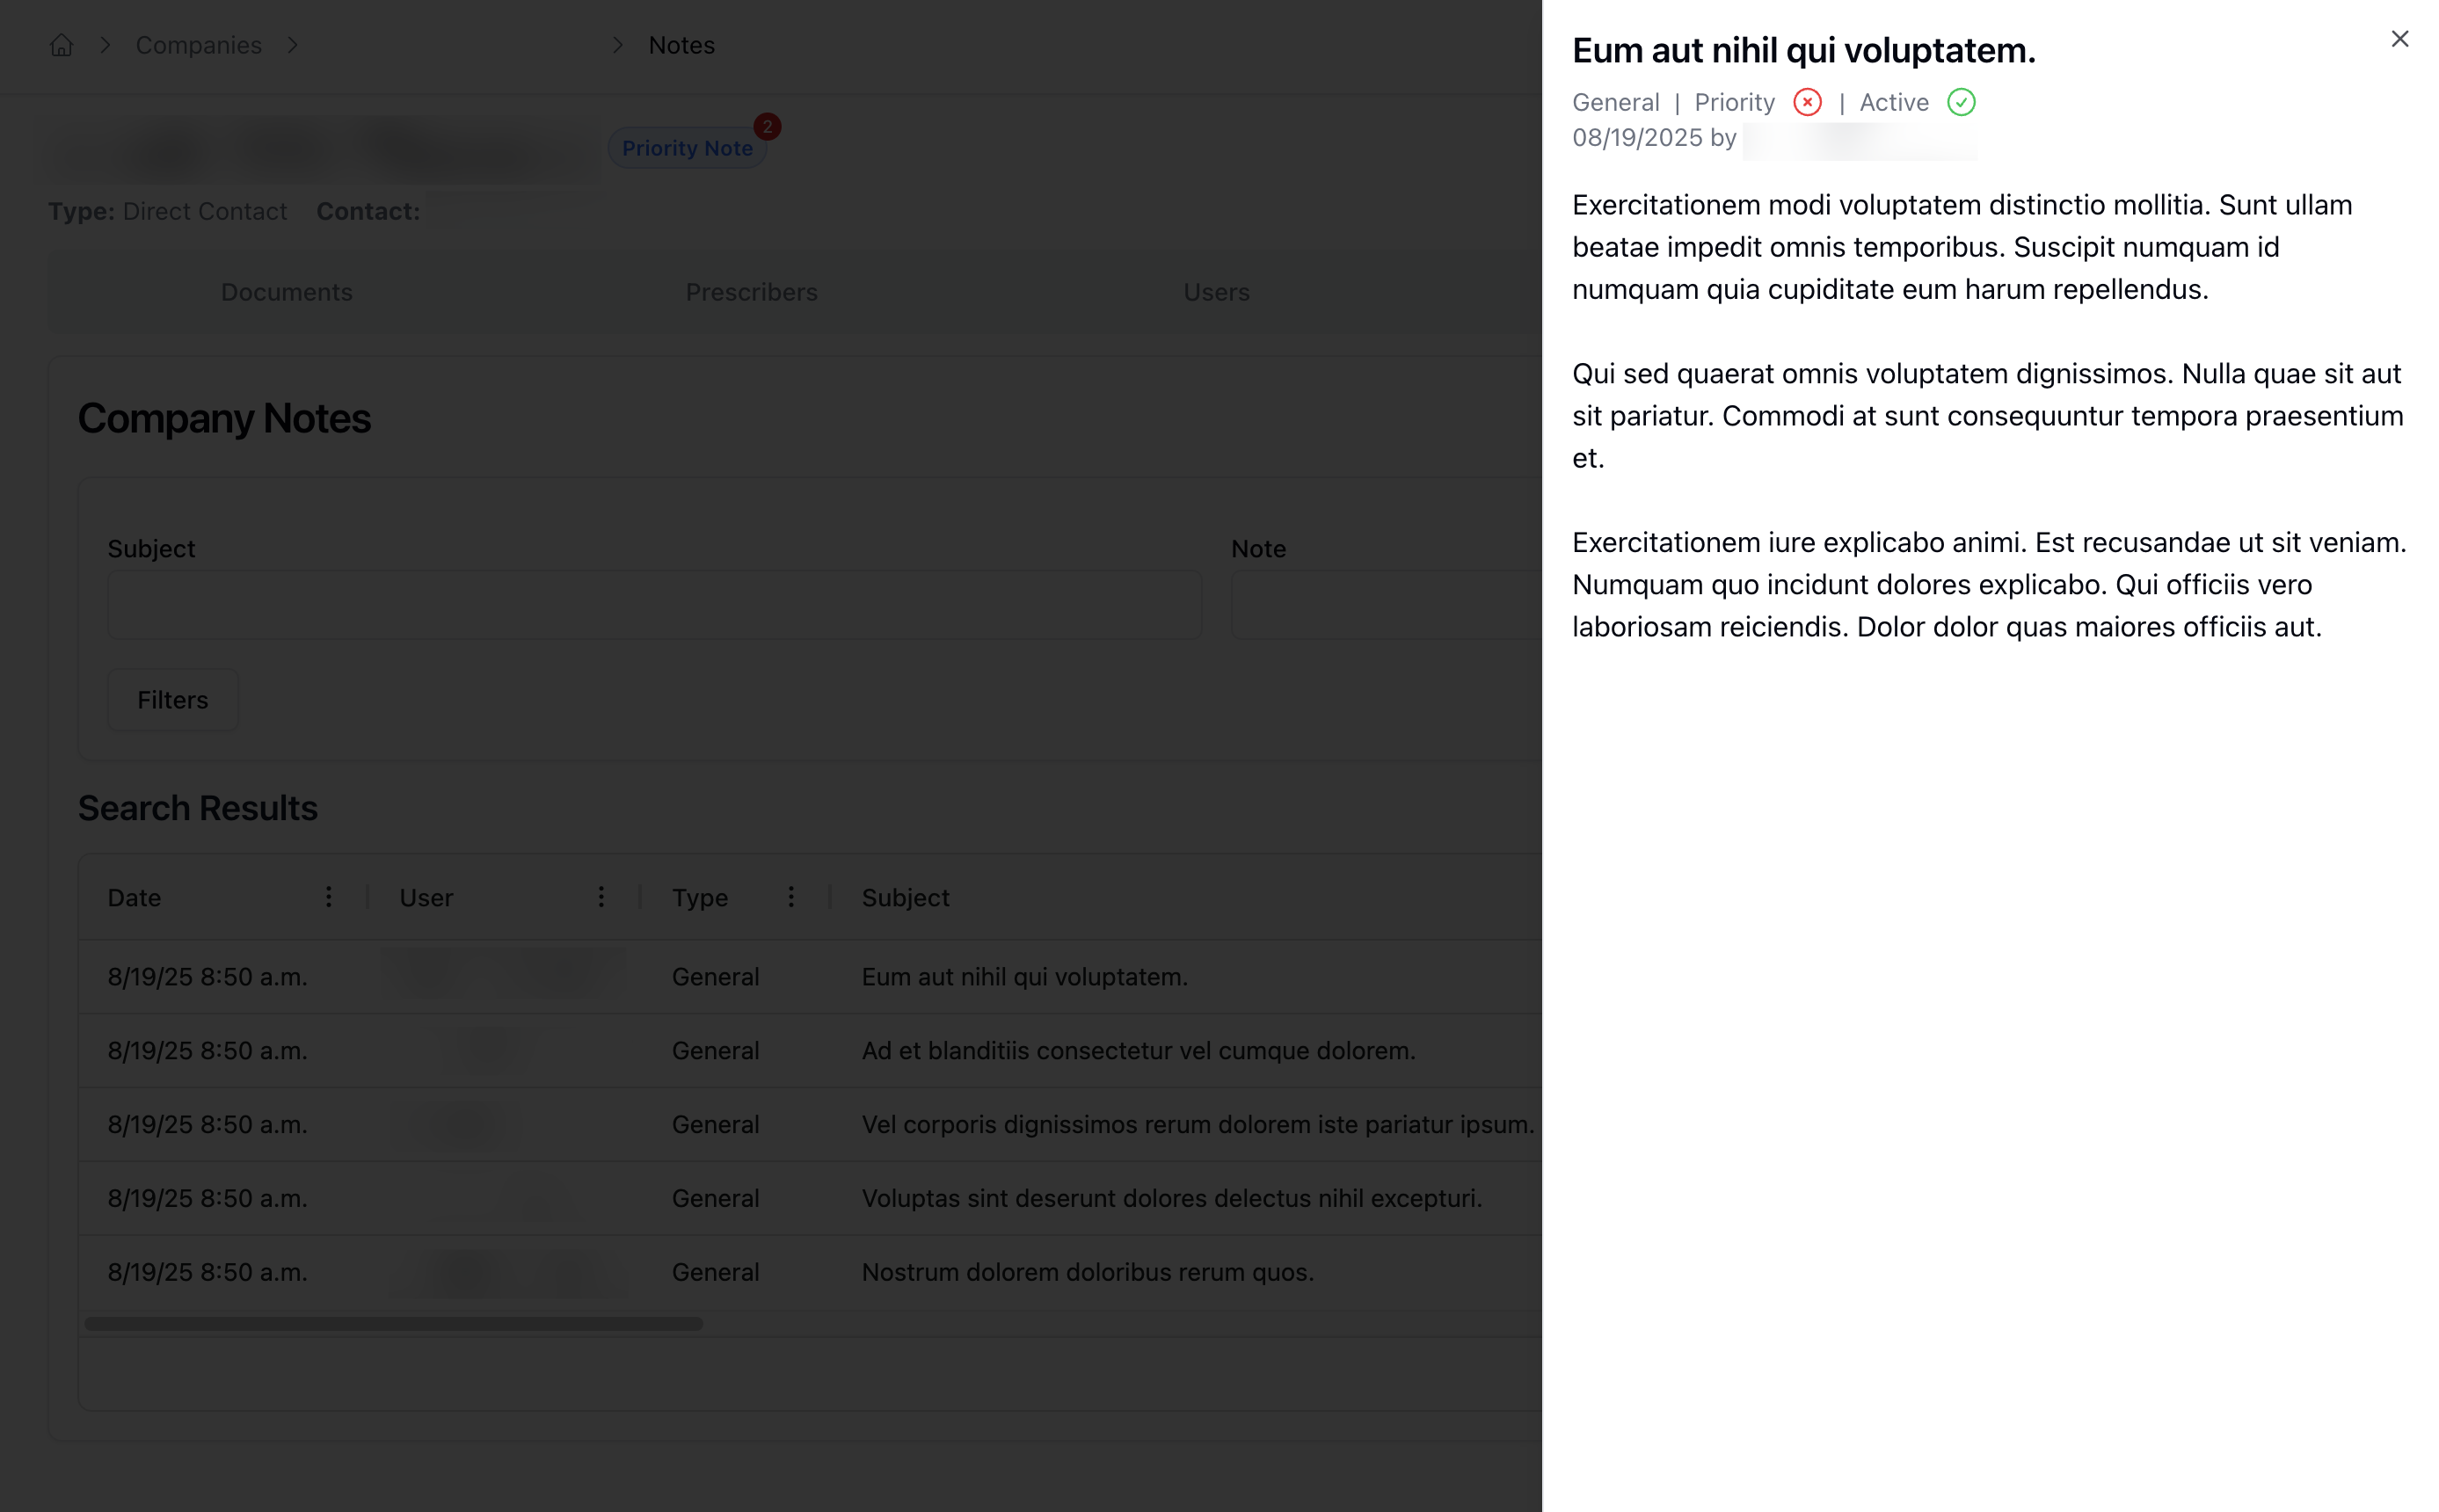 Clicking the actions menu ( ⠇) to the right of each note allows you to View the note, opening the note in a dynamic sidebar on the page. This view includes:
The note subject
The type of note
The note's priority status (Priority or non-priority)
The note's active status (Active or deactivated)
The date and author of the note
The content of the note itself
You may also Deactivate the note from this menu as well, which removes the note from the default Search Results view.Results view.
Adding a company note
Looking for a shorter overview? Visit the how-to guide instead.
 To add a new note to a company record, click the + Add Note button in the upper right corner of the page.
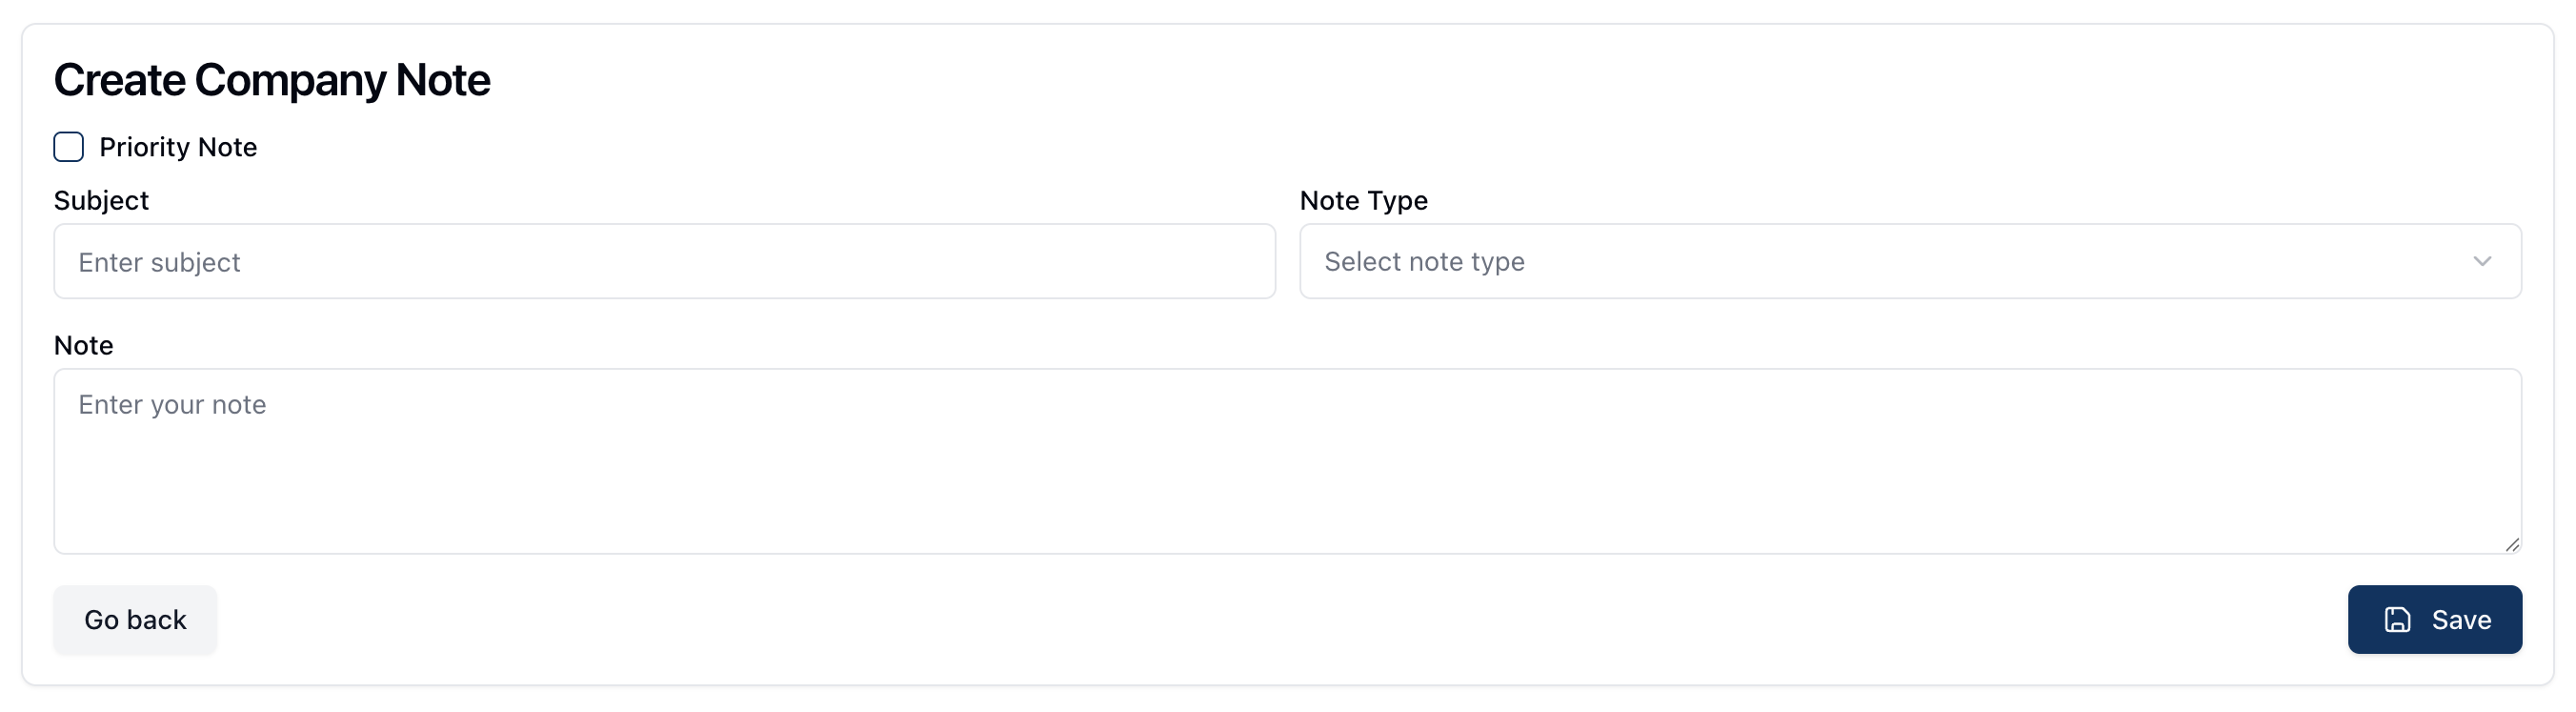 On the Create Company Note form, enter the following information:
Priority Note: If this is a priority note, click the checkbox next to *Priority Note**. For non-priority notes, leave this unchecked.
Subject: Enter the subject line of the note.
Type: Enter the note type. You can select either General or Clinical as the note type from the related dropdown menu.
Note: Enter the content of the note itself into this freeform text box.
 Once all fields are complete, click Save to save the note to the company record.
Adding a new company
Looking for a shorter overview? Visit the how-to guide instead.
 To add a new company, click the + Add Company button from the Companies landing page.
On the Create Company form, you can enter the relevant company information. In the Company Information section, enter the company's name and the primary contact at the company, as well as their preferred method of contact.
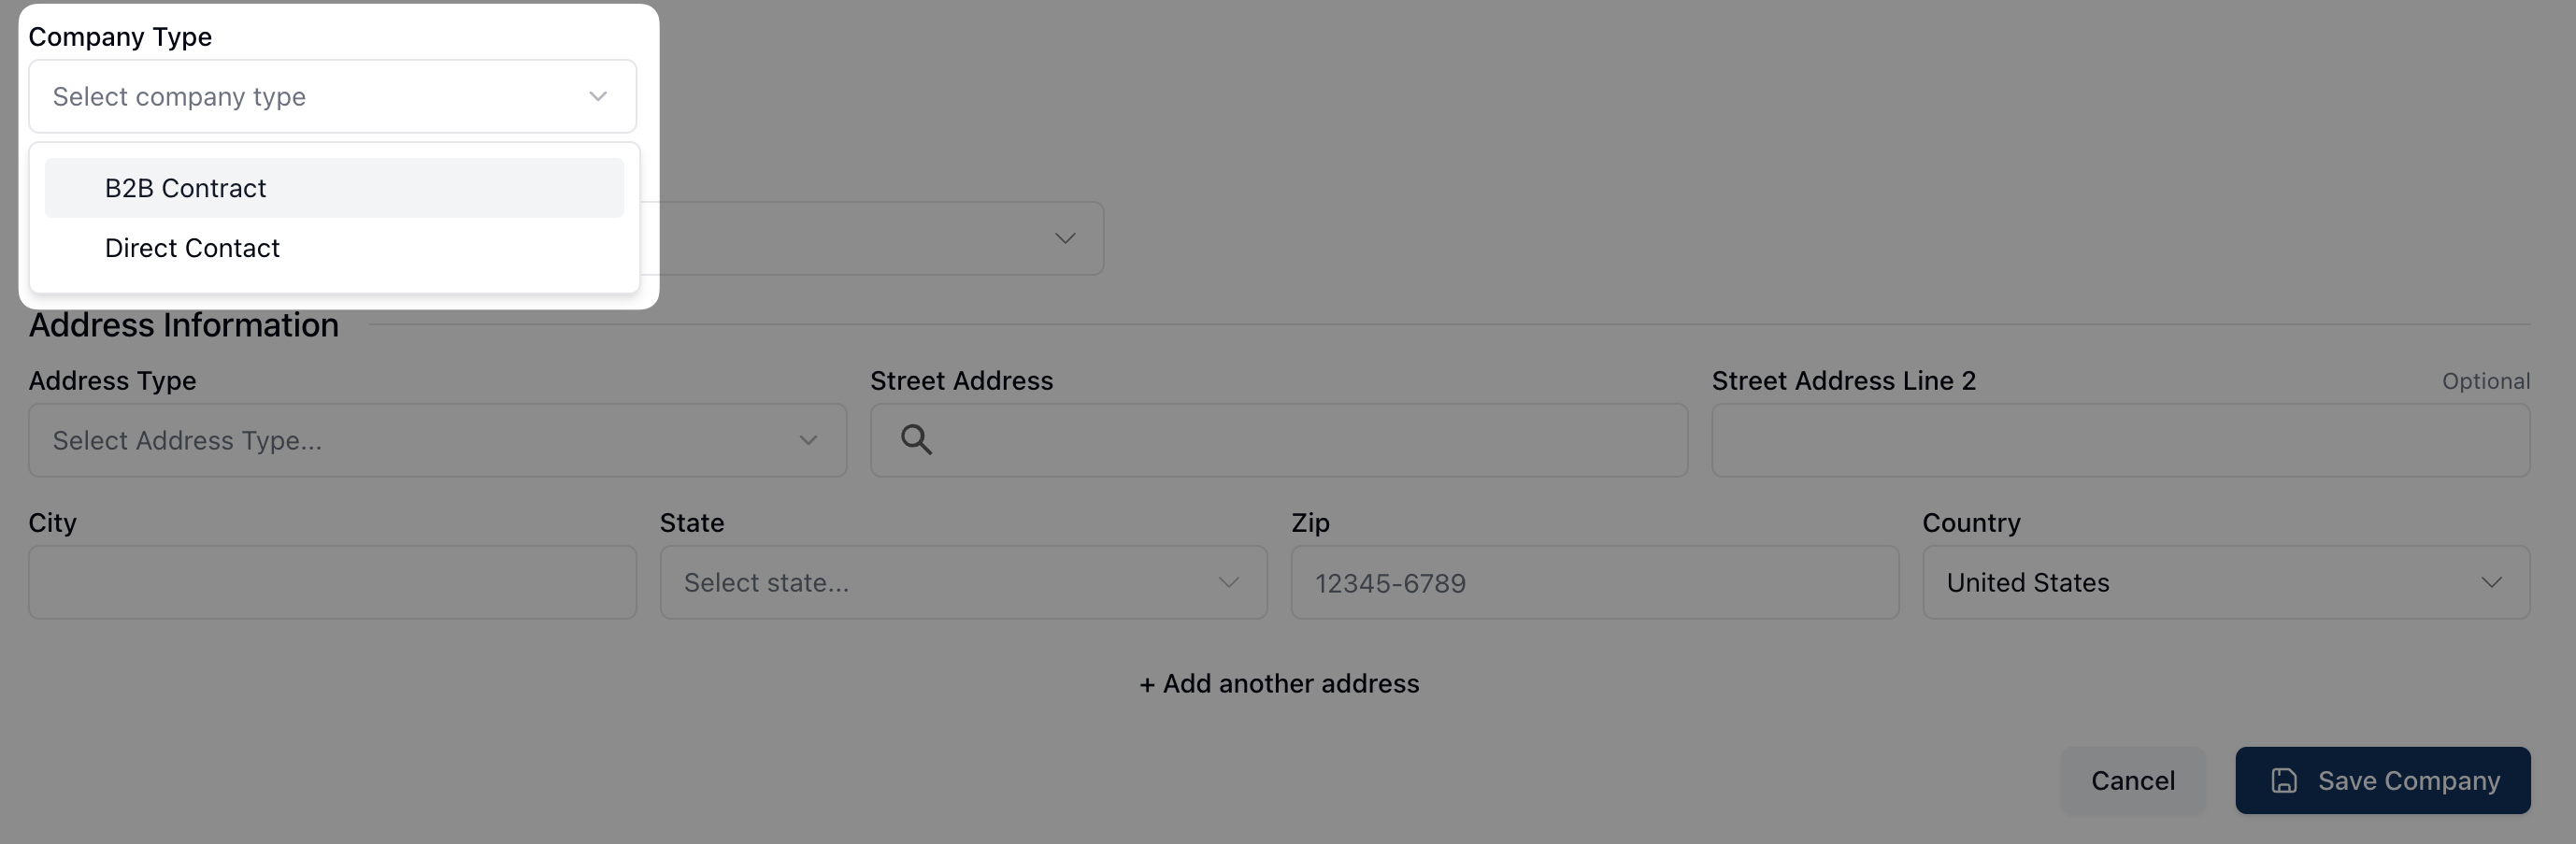 Under Company Type, select either B2B Contract or Direct Contact from the dropdown menu options.
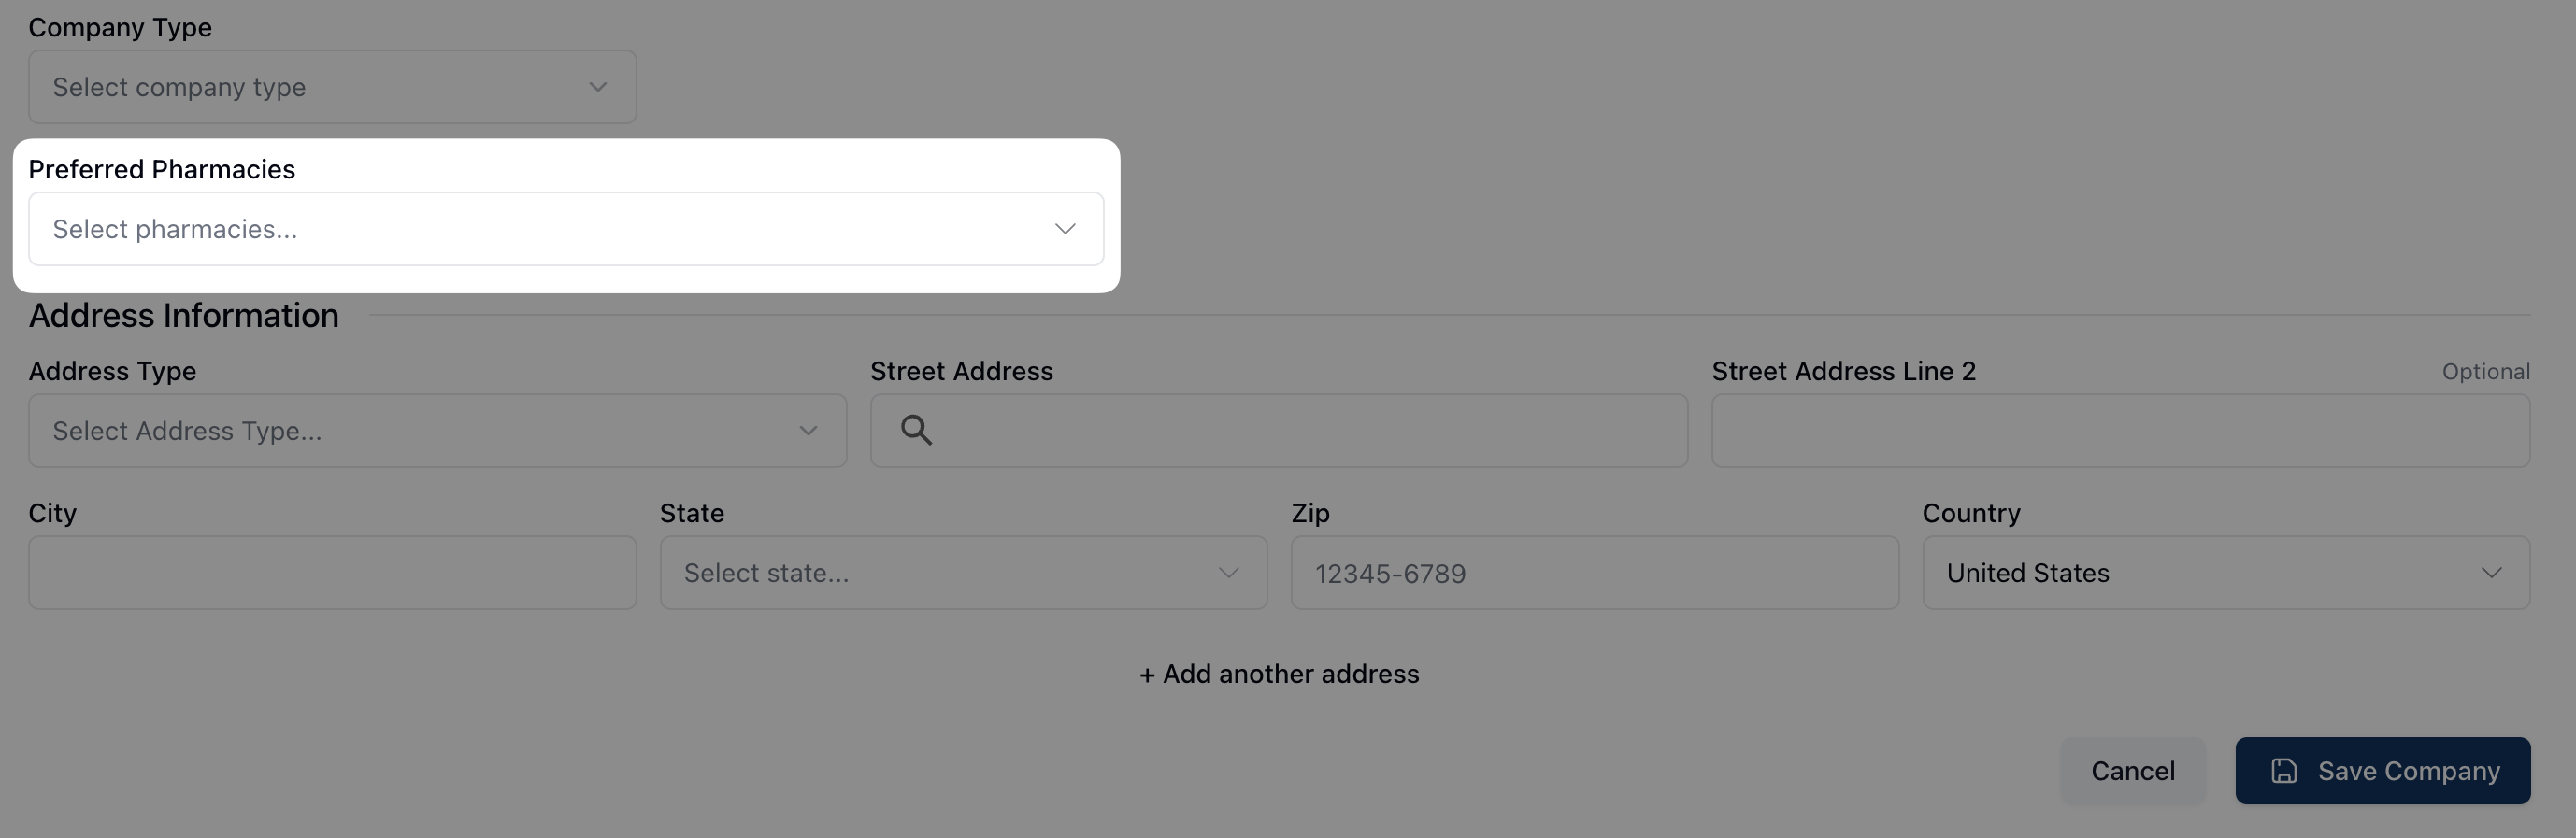 Preferred Pharmacies allows you to select the company's preferred pharmacies from the dropdown menu. Note that it's possible to include more than one pharmacy in this field.
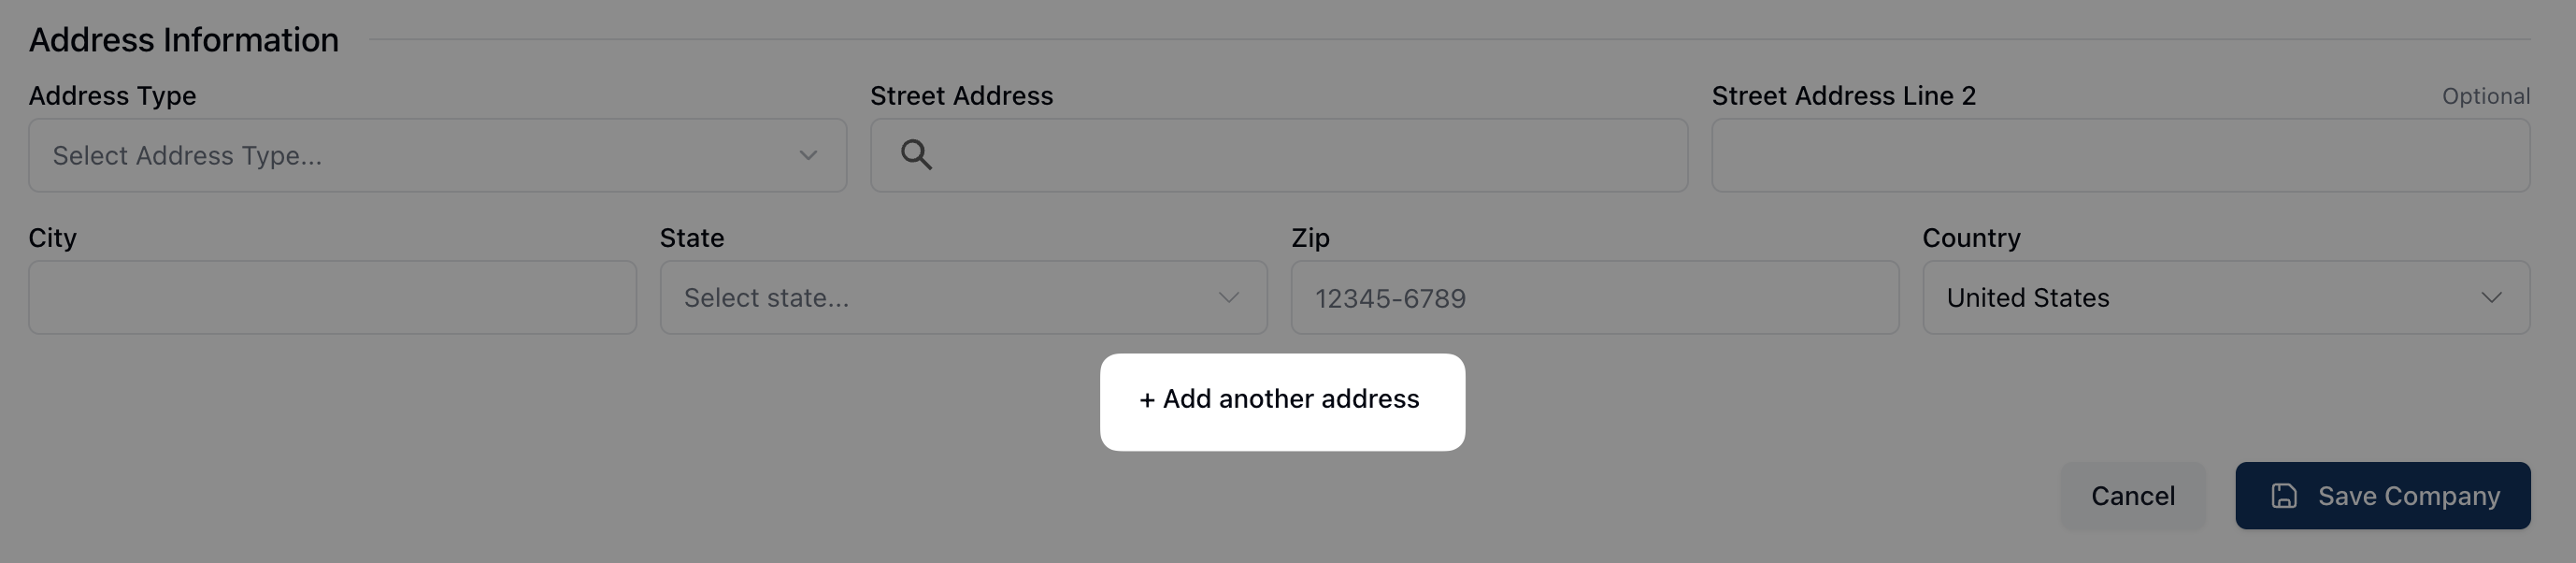 Finally, add the relevant address information for the company. Under Address Type, select the appropriate type of address. It's possible to add more than one address to a company's record by clicking the + Add another address link at the bottom of the form.
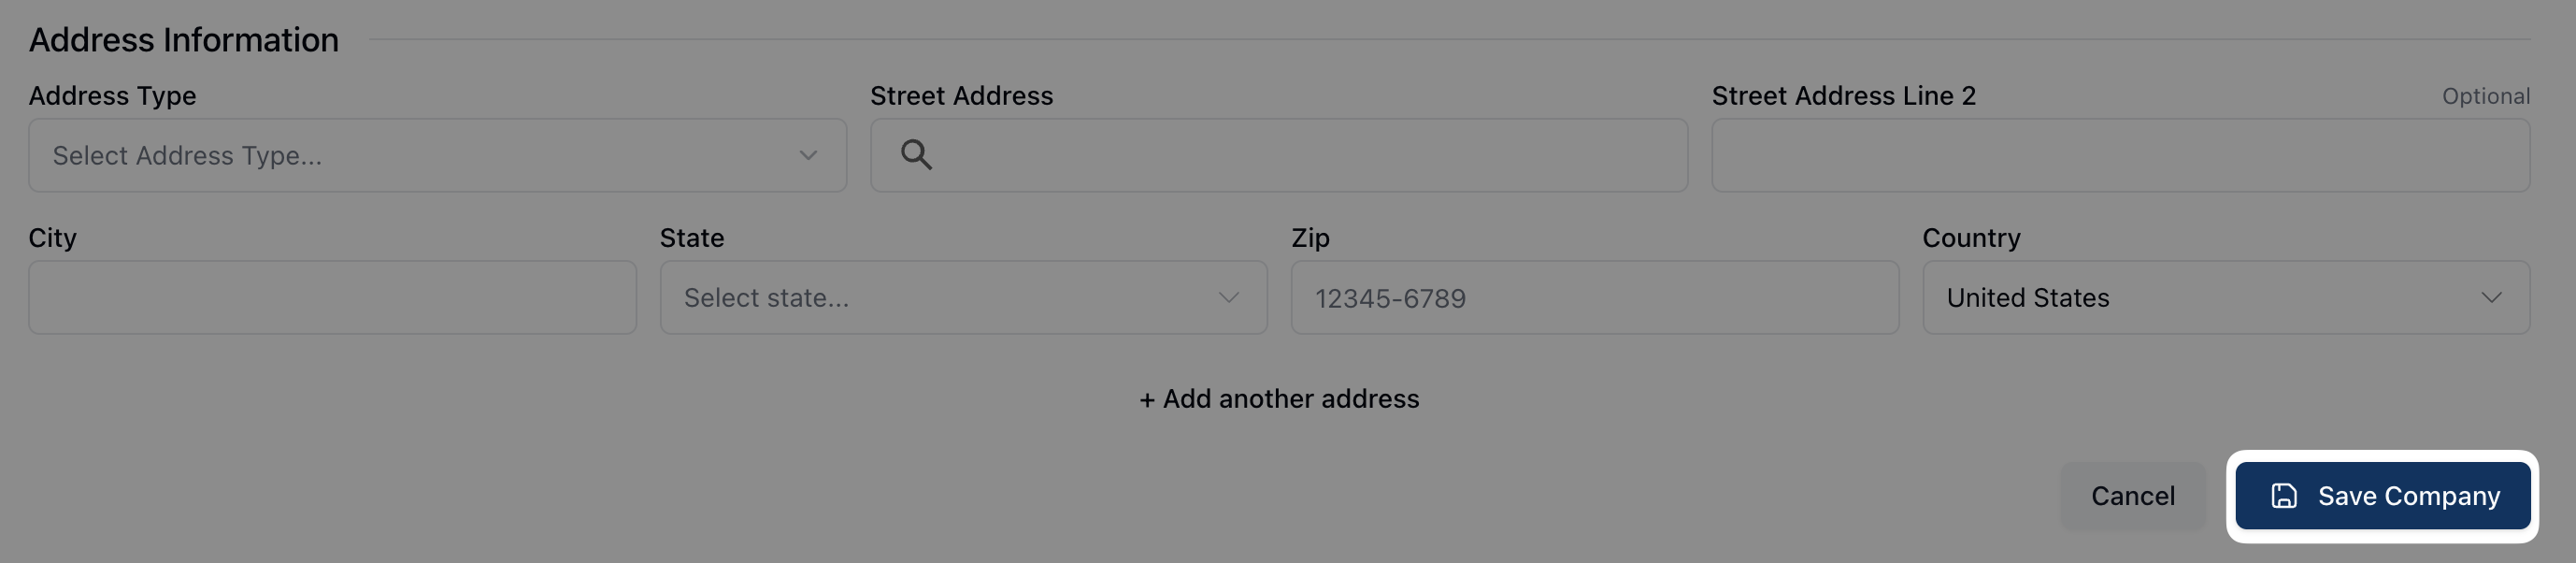 Once all fields are complete, click the Save Company button to add the company to the system.