Formulas
 The Formulas page allows you to view, modify, and manage all formulas in the app. Via this page, you can view and modify existing formulas, add new formulas, and manage formula inventory.
Formula records are also closely linked to batches or formula lots, which make up the overall inventory of any given formula. Creating a formula log provides a step-by-step guide to the lot creation process, which is also accessible via the Compounding Needed section of the dashboard.
Formula search and results
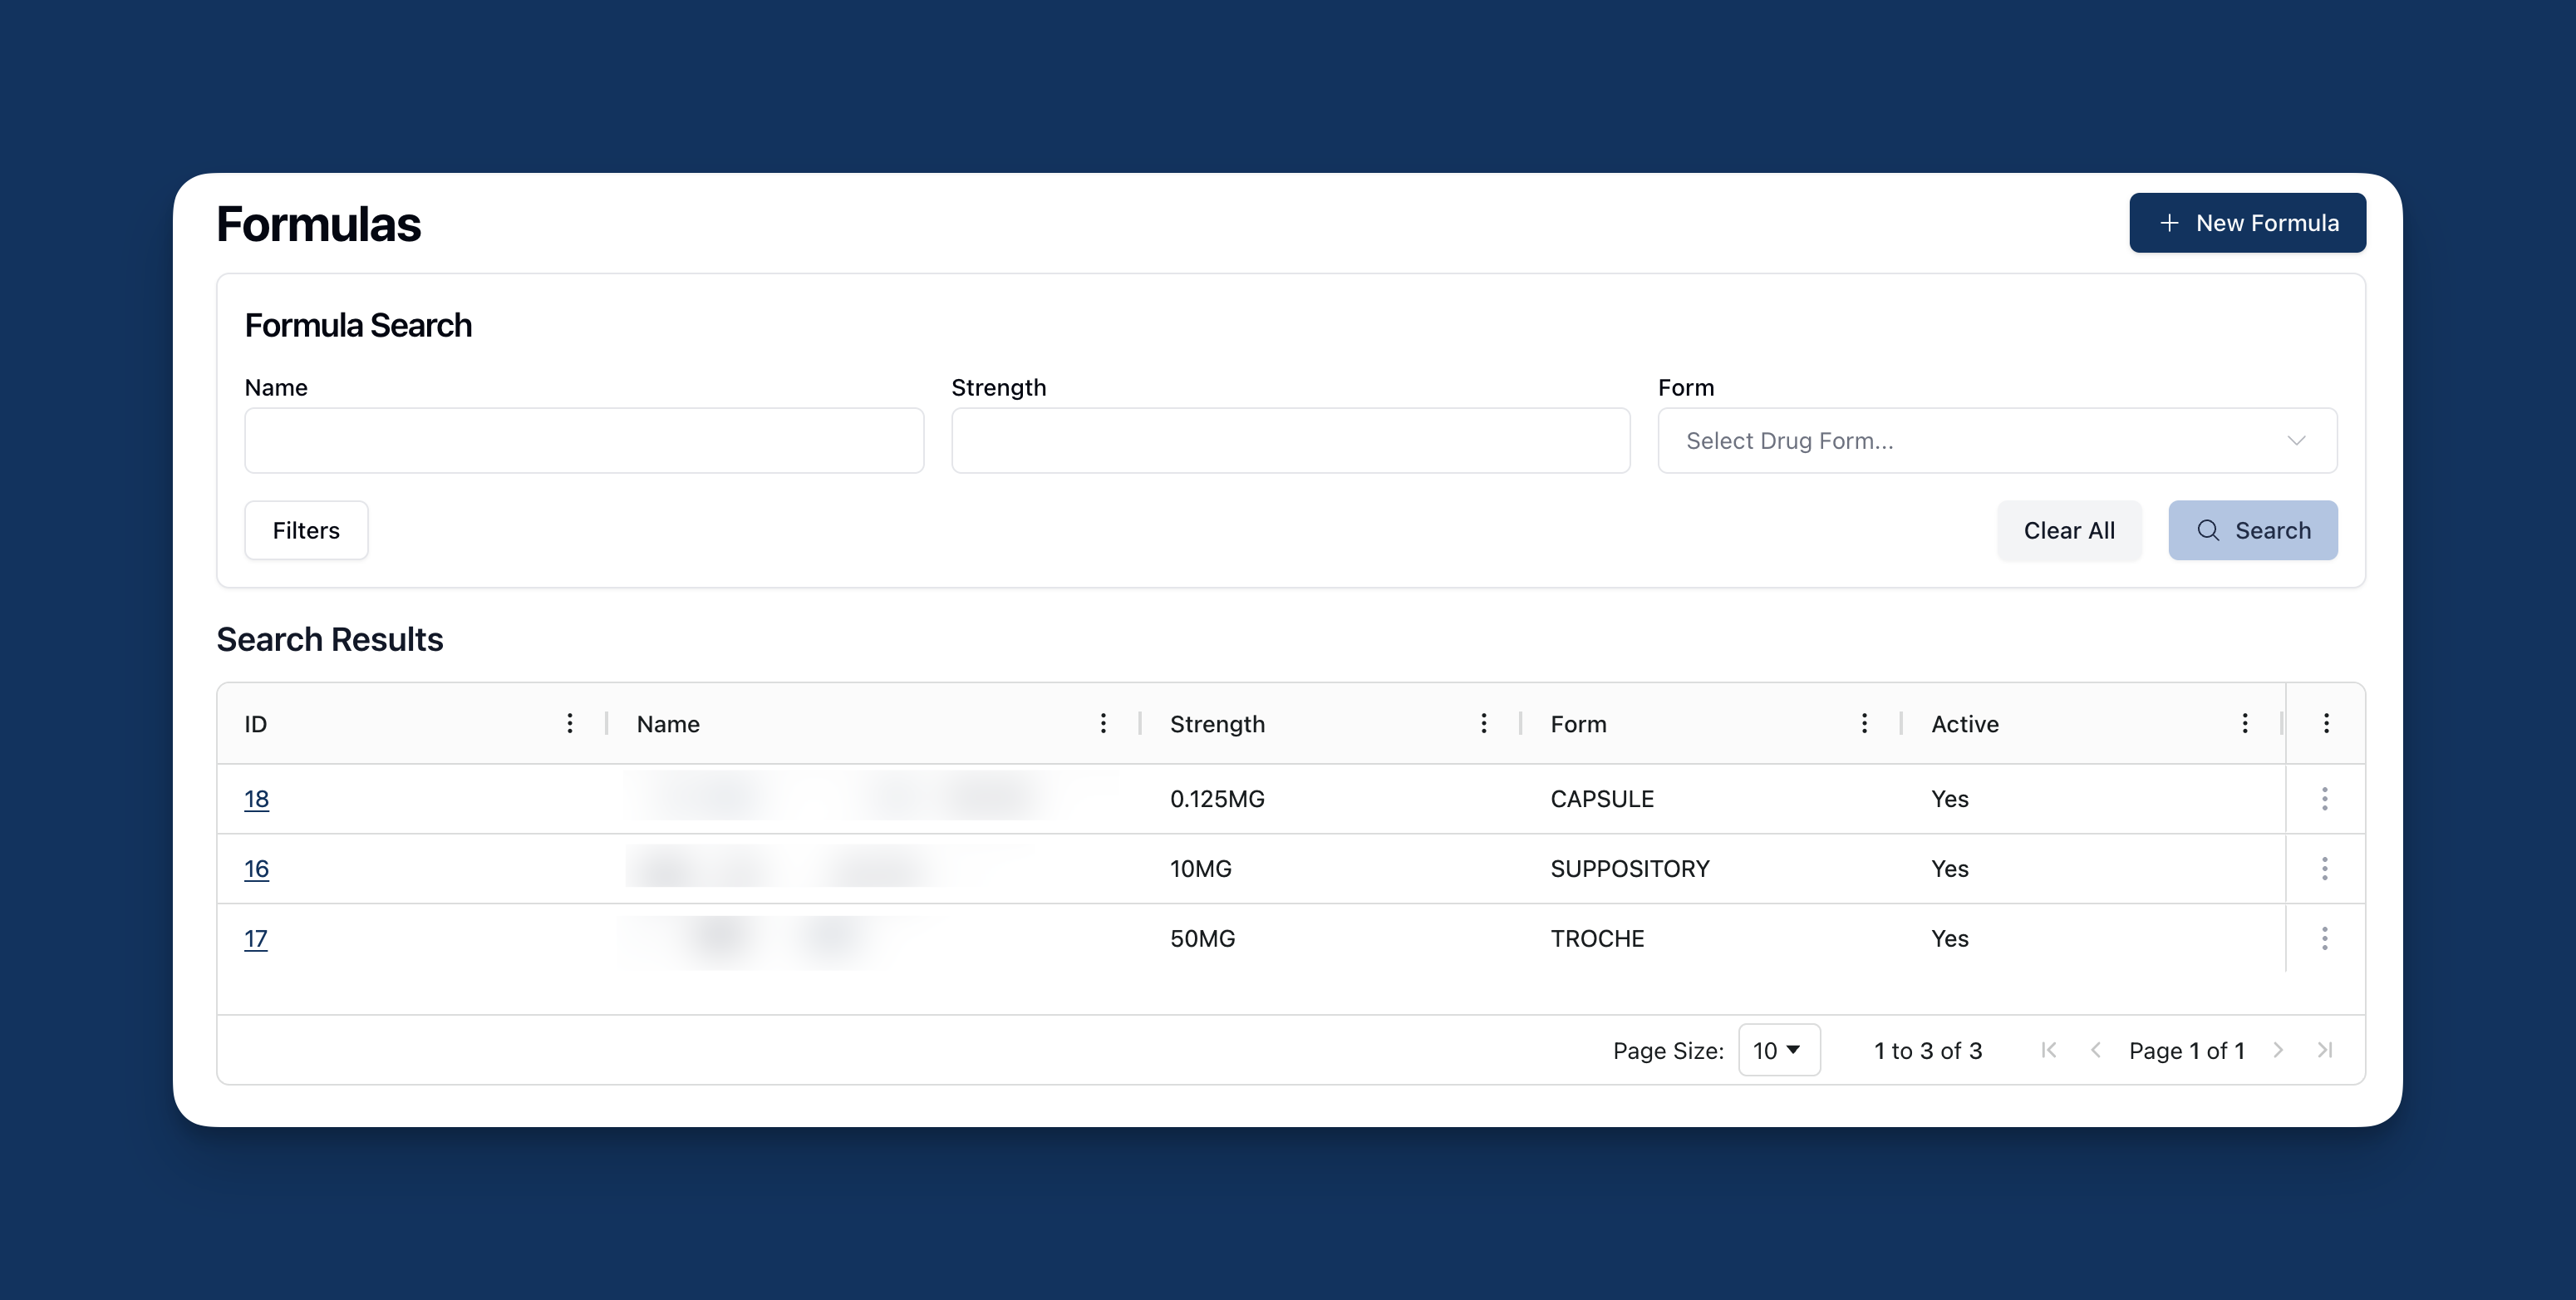
 The Formulas page displays the Formula Search and Search Results sections, which includes a list of formulas entered into the app.
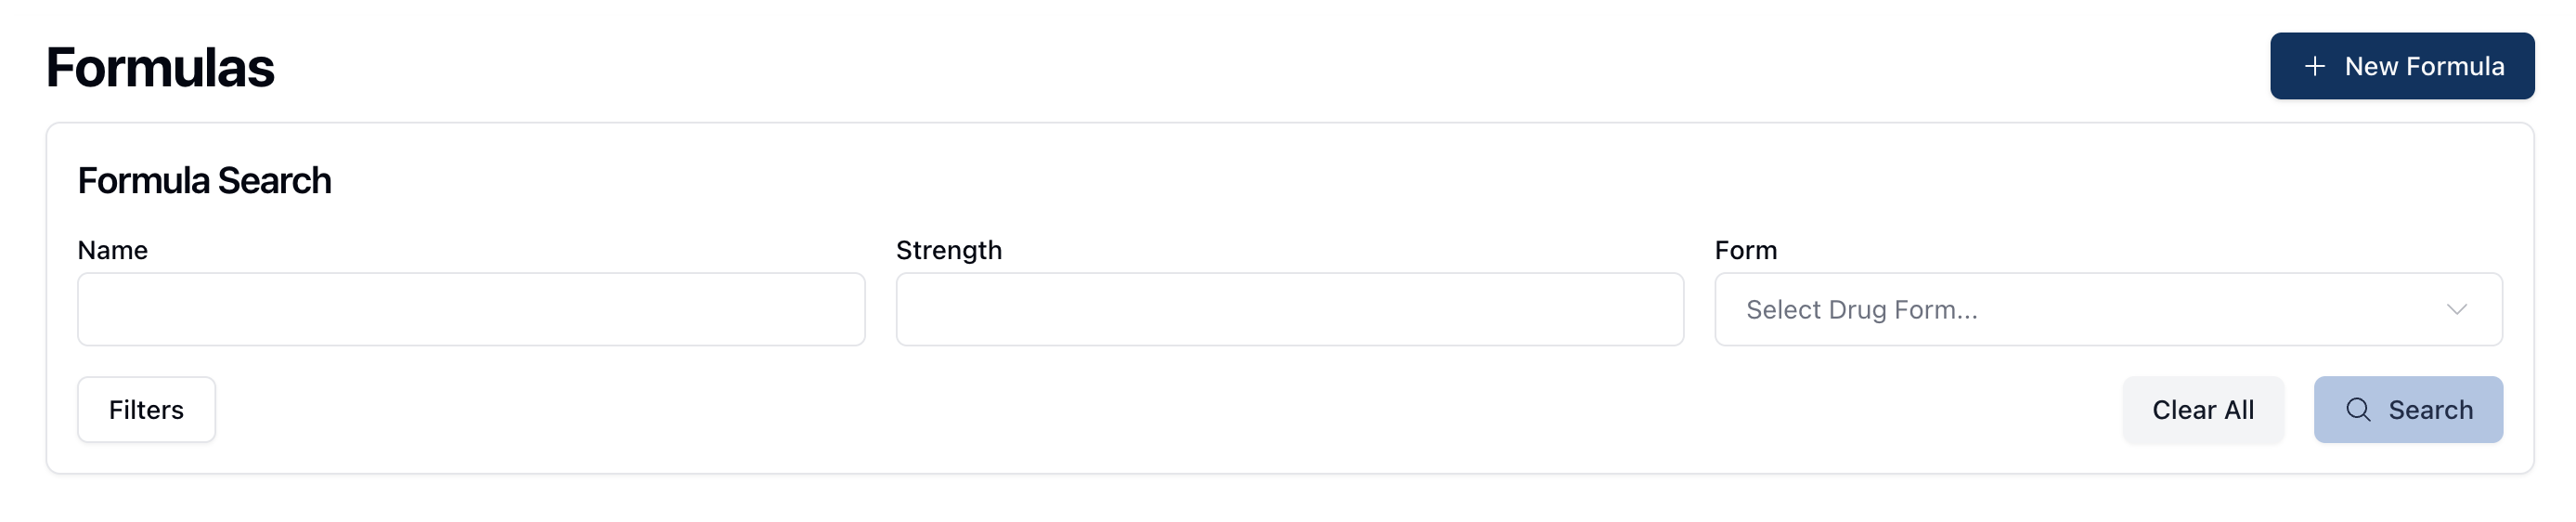
The Formula Search section includes a handful of fields that allow you to filter which formulas appear in the results below. These fields include:
Name | The formula name. |
Strength | The strength of the formula. (To do: Is there an expected format this query would be in?) |
Form | The drug form, such as patch, drops, or spray. |
Once you've entered the relevant search terms, click the Search button to filter the results appearing in the table below. If you'd like to reset the table back to its default, click the Clear All button to remove any search terms or filters.
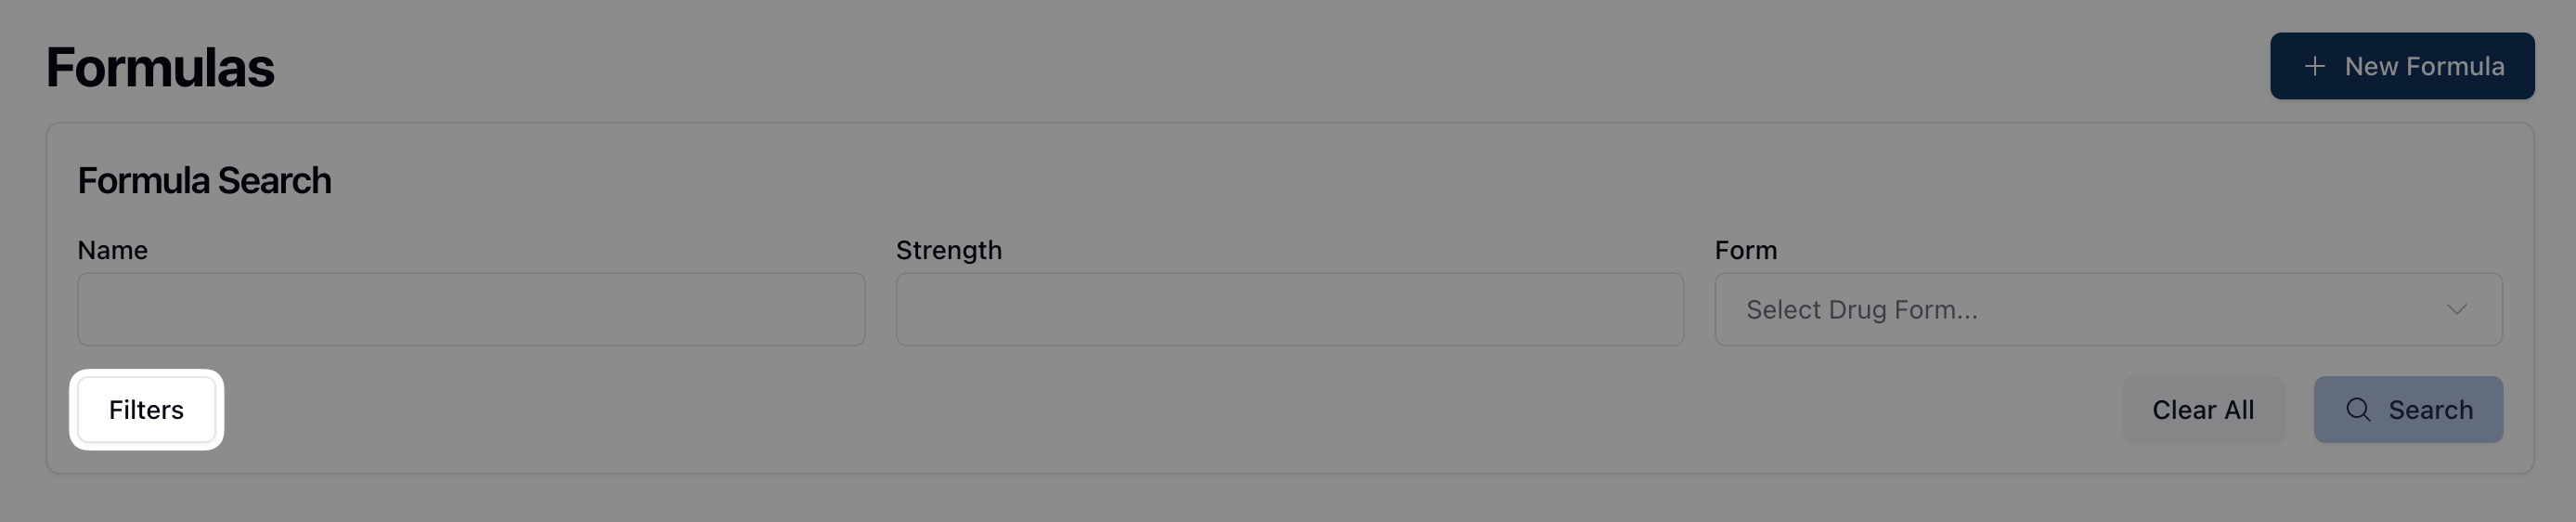 It's also possible to include inactive or deactivated formulas in the search results by clicking on the Filters button and selecting the appropriate option from the dropdown menu.
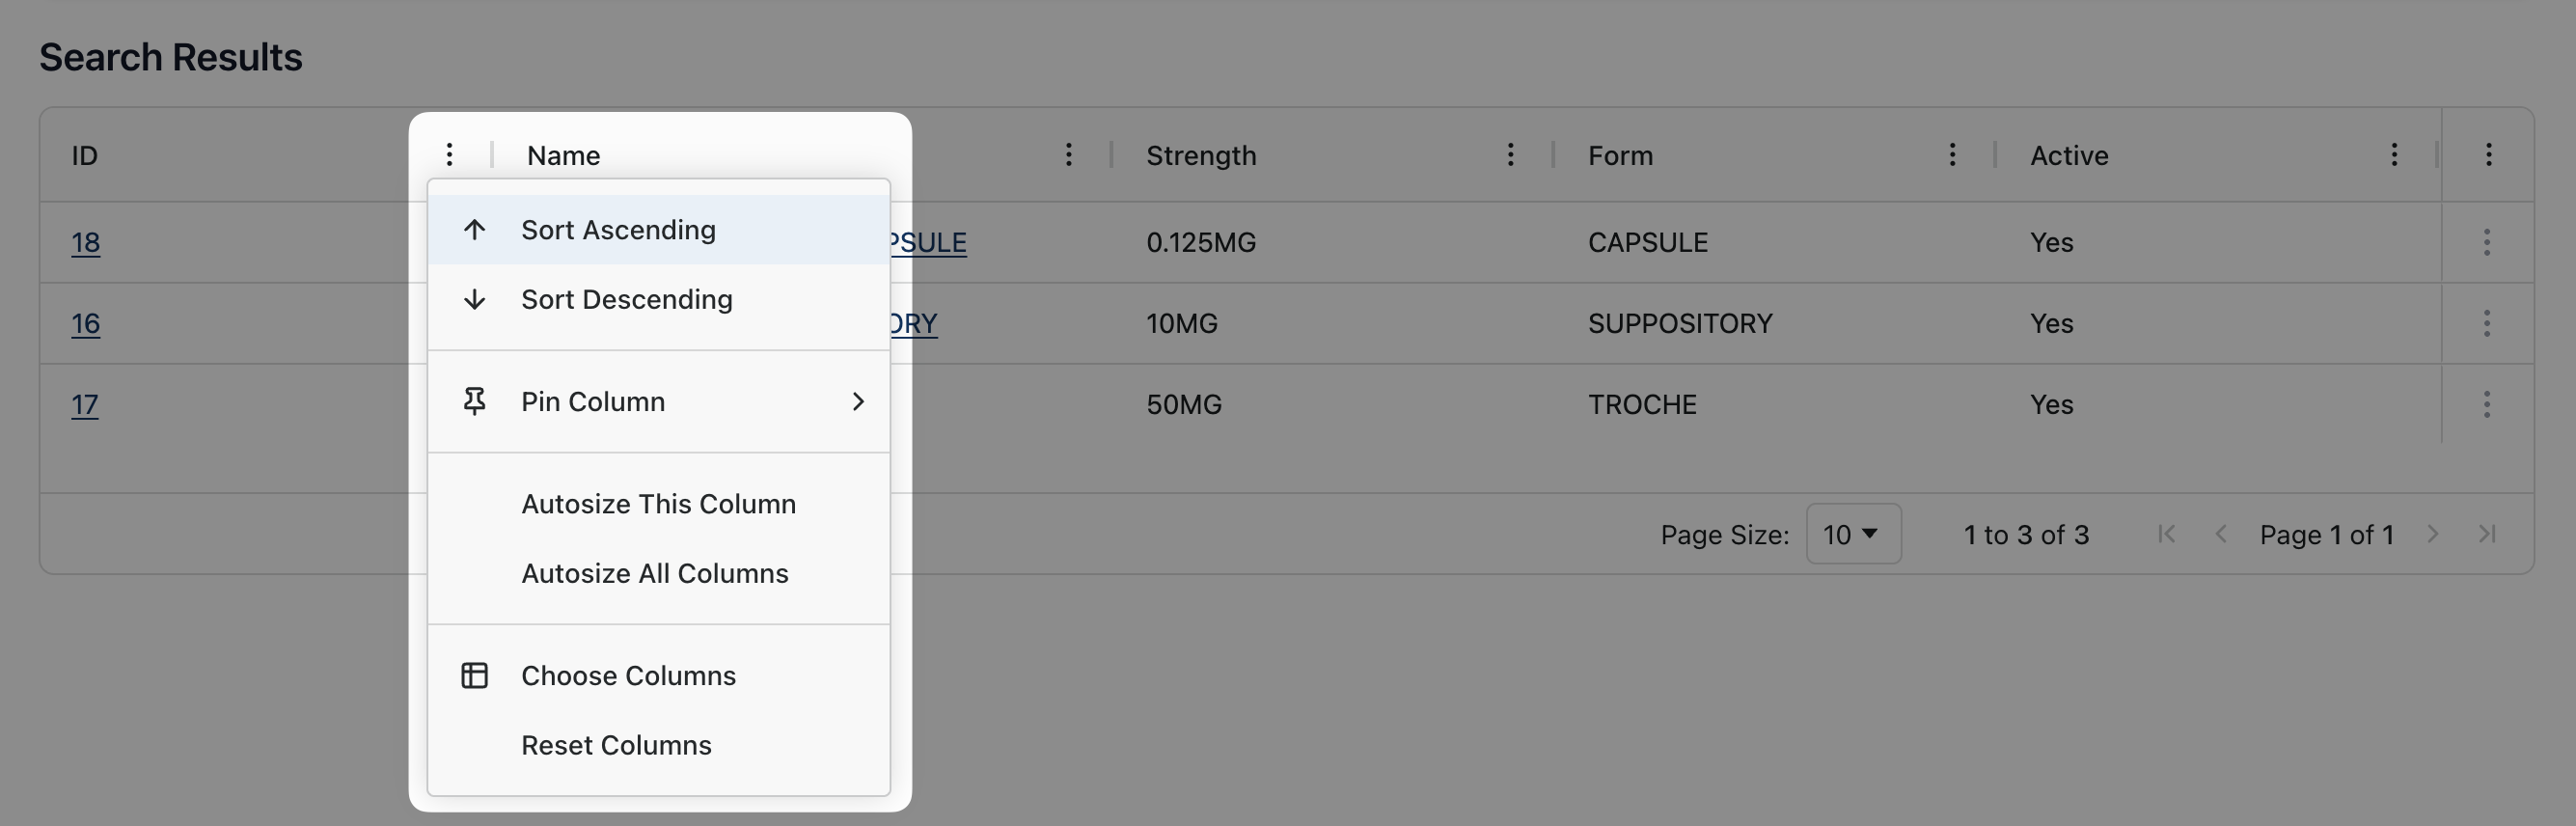
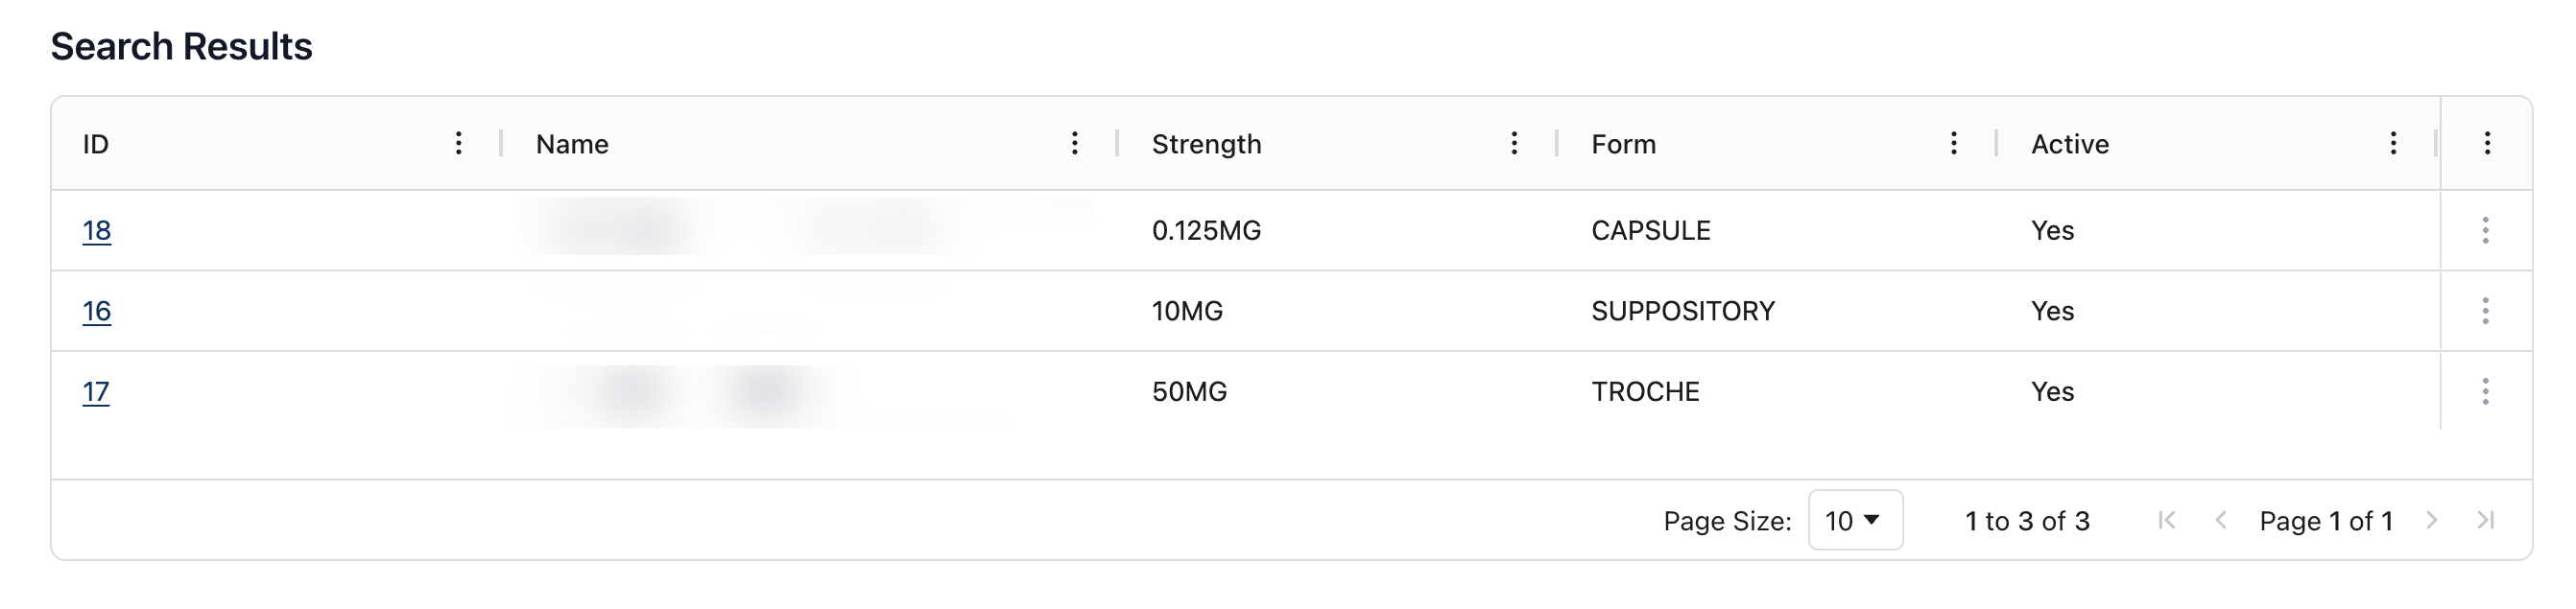 The Search Results displays formulas in the order of [TBD], including the following information:
Name | The formula name. |
Strength | The formula strength. |
Form | The drug form of the related formula. |
Active | Whether or not the formula is active or inactive. Active formulas display a “Yes” in this column. |
You can sort search results according to the categories listed at the top of the table by clicking on the three dots ( ⠇) to the right of each column title.
 For more information on ways in which you can customize the table view and sorting options, visit Table options and sorting.
Viewing a formula
 To view a formula record, click the underlined formula name in the Search Results table. The formula record loads the Ingredients/Instructions tab by default.
At the top of the page, you can view basic information about the formula just below the formula name, including:
Form | The resulting drug form of the formula. |
Schedule | The formula's drug schedule classification, selected from a dropdown list. |
Dispensable Medication | Whether or not the formula is dispensable as a medication. |
In Stock | Whether or not the formula is available and in stock. |
Created | The date the formula was created, including the time and system user who added the formula. |
To the right of the formula name, the following buttons appear: Show Details, Create Log Entry, Edit Formula, Deactivate, and Activity Log.
Show Details
 Clicking the Show Details button displays additional information about the formula. This information includes details such as:
Administration Route | The intended administration route for the produced formula. |
Common Uses | Common uses for the formula, selected from a dropdown list. |
Strength | The formula strength. |
Flavor | The formula's flavor, if applicable. |
Tall Man Lettering | Tall man lettering for the chemical, if applicable. |
Drug Type | The formula drug type, selected from a dropdown list. (To do: This field is still marked as TODO. Check for changes.) |
Therapeutic Class | The therapeutic class for this formula, selected from a dropdown list. |
Packaging | The type of packaging used for the formula. |
Days to Expire | The number of days until the formula expires. |
Time to Make | The estimated time it takes to create the formula. (To do: Is this how long it's expected to make the formula? Or how long it took? (I believe the latter is just for formula logs.)) |
Active | Whether or not the formula is active. |
Sterile Item | Whether or not the formula is a sterile item. (To do: Is this more like the formula must be kept sterile vs. being produced in a sterile environment?) |
Specified Pack | (To do: Toggle option. What is a Specified Pack?) |
Formula Used in Other | Whether or not this formula is used as an ingredient in another formula. |
Total Quantity Used | The total quantity of the formula used. (To do: Does this refer to a dispensable quantity or something else?) |
(Rx) Last date used | (To do: Is this the last date this particular formula was used for a prescription?) |
Last cleared | (To do: Likewise, is this the last date that the formula was cleared for dispensing? Or something else?) |
Dispensable | Whether or not the formula is dispensable. |
 To hide the additional details from display, click the Hide Details button to revert back to the basic formula view.
Create Log Entry
To do: Currently a lot of these features are in-progress. Re-review when complete, following step-by-step for accuracy.
 The Create Log Entry button allows you to create and track a new formula lot. Clicking this button opens a popup, requesting the following information:
Quantity to Make: The quantity of formula made.
Date Made: The date the formula was made.
Drug/Formula Stock Levels (To do: To be completed pending TODOs.)
Note that the Formula Log Entry popup displays an informational note regarding Best Pharmacy Practice, displayed in blue.
Once all relevant fields are complete, click Create Log to open the Making Log page.
At the top of this page, a timer appears in the upper right corner. This timer starts automatically once the page loads and, later, provides the value for the Time Made field. It's possible to pause the timer by clicking on the red pause icon and to edit the total time by clicking on the pencil icon.
 Below the timer, the Making Log page includes a Details section. Here, the page displays basic information about the formula, including the name and generic name, relevant tall man lettering information, the drug schedule, and the formula expiration date. Below Temp Lot is a toggle button, which you can turn on, if applicable. (To do: Just to be more specific in the description, what is a Temp Lot in this case?)
All information related to the specific log entry appears in the Log Details section. This includes the date made and the total time to make, automatically filled with the value calculated by the page's running timer. (To do: Confirm it is automatically filled.) Under Beyond Use Date and Beyond Use Time, enter the date and time that the formula lot expires to calculate the full expiration date.
While the Technician name is automatically populated based on the user who opened the log entry, you can select the supervising pharmacist from the dropdown menu below Pharmacist.
The Instructions section, highlighted in a gray background, displays the Instructions/Method of Preparation for the related formula. This section displays the relevant step-by-step guide for creating the formula, based on the information entered in the formula record.
At the bottom of the page, four tabs display the formula Ingredients, Devices, Cost, and Docs & Images. By default, the Making Log page loads the Ingredients tab. This table displays each formula ingredient, as well as information such as the expected quantity.
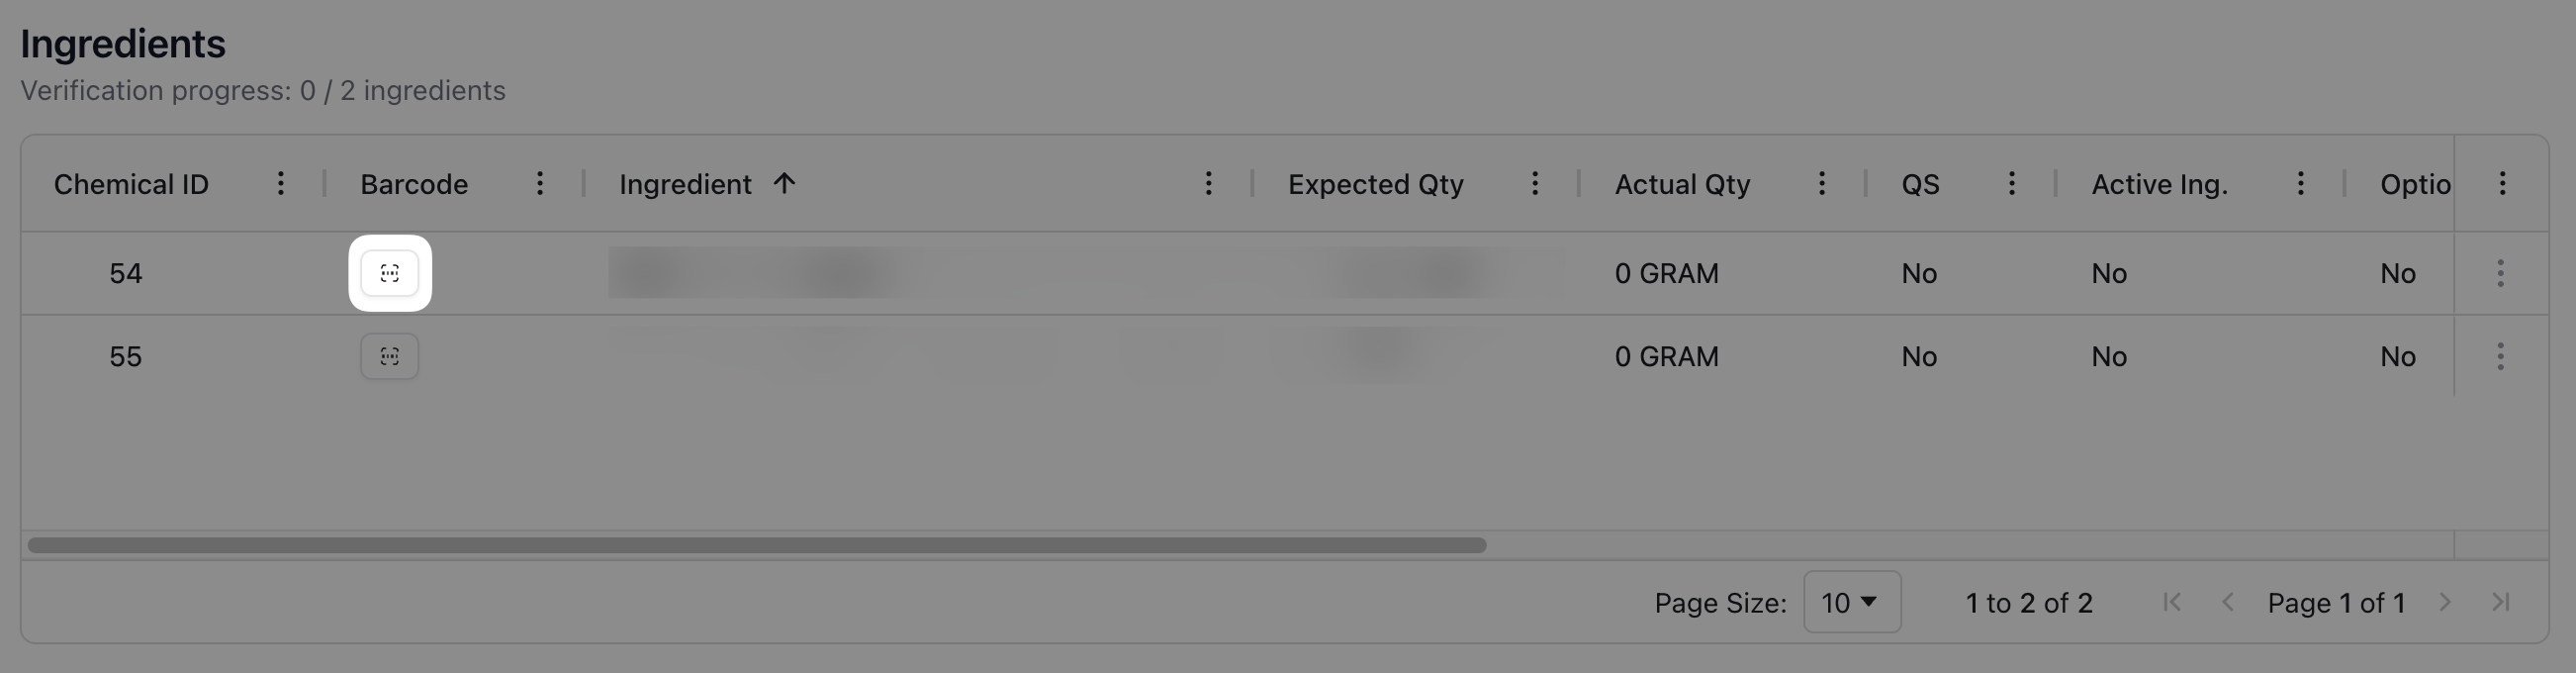 During the formula lot creation process, all ingredients require verification. For each ingredient, click the barcode icon to open the Chemical Barcode Validation popup, which allows you to verify each ingredient. The popup window displays basic information about the chemical, such as the chemical name and ID, as well as an area to enter the relevant chemical inventory information. (To do: Note: This may include photos as well in the future. Check for process updates.)
To scan the chemical, select Barcode as the input method. When Barcode is selected as the input method, the app displays a green Awaiting Scan notice. (To do: Should we include best practices here or stick to description? In other words, I believe scanning is best practice, but wondering if we should leave that decision/recommendation at a pharmacy level.)
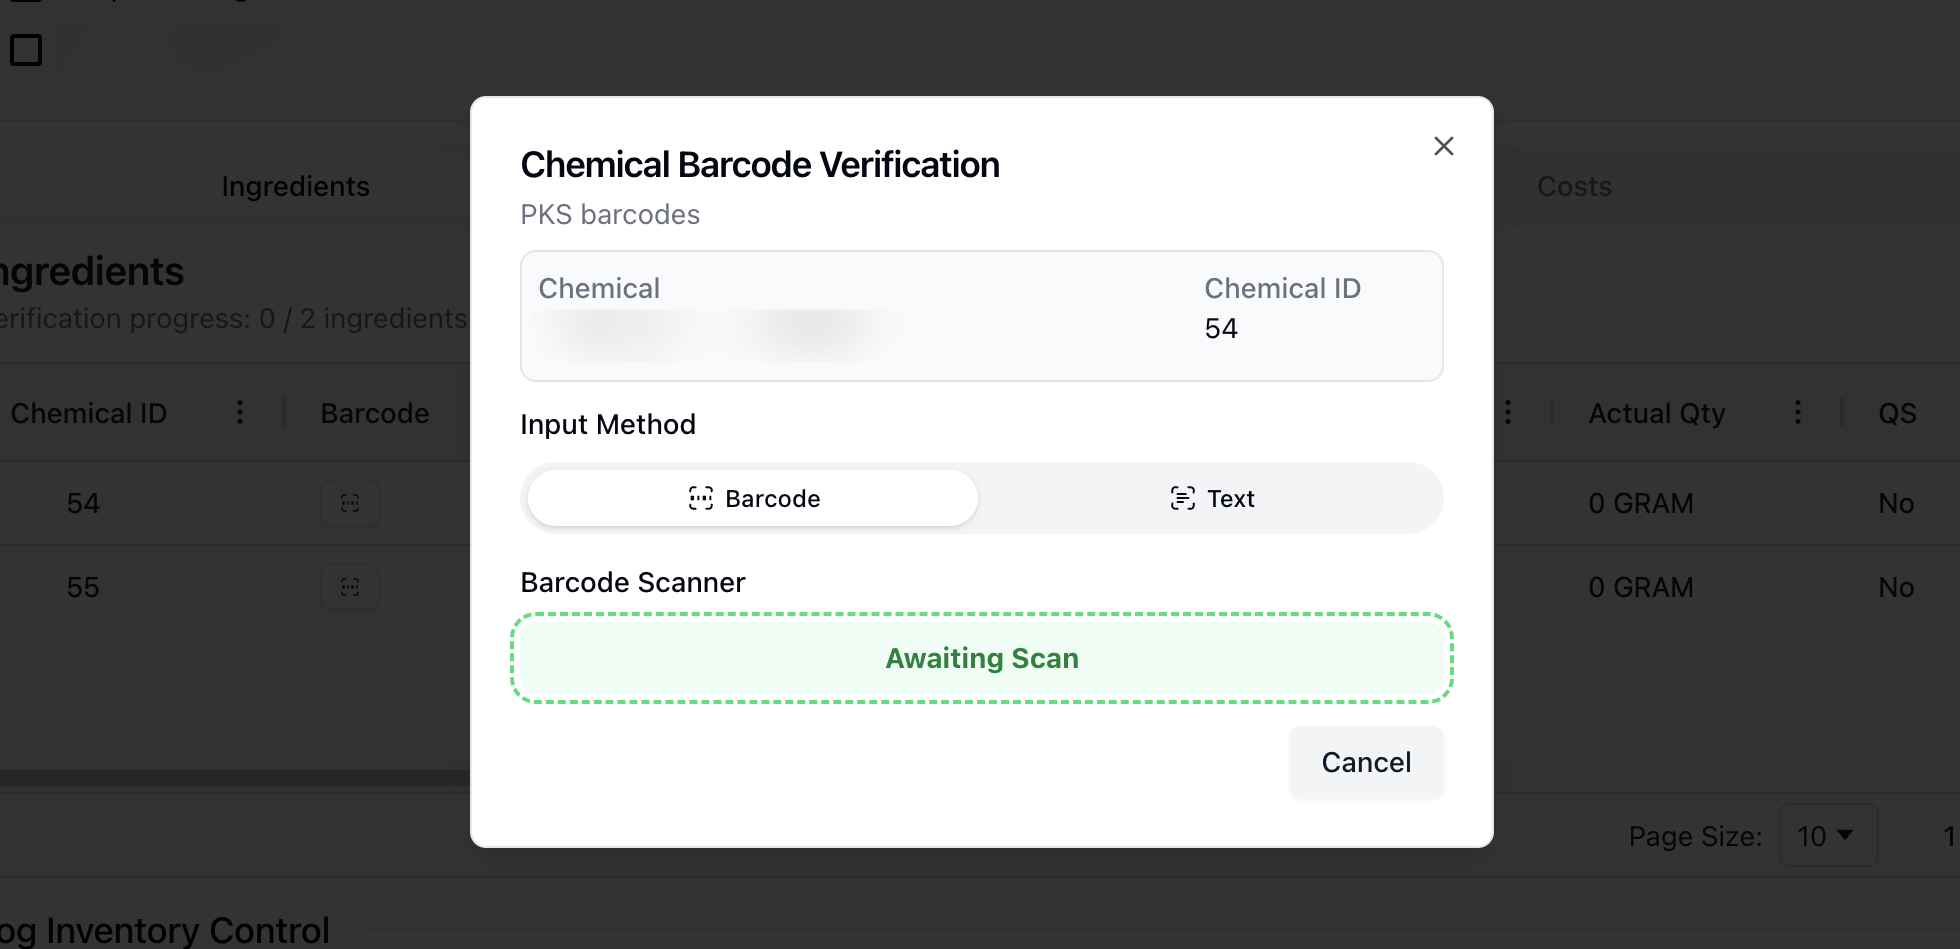 Alternatively, you can verify the chemical using the Text input method instead. Selecting this method displays a field that accepts the barcode number or chemical inventory ID.
(To do: Insert information on process/expectation once all ingredients have been scanned, e.g. color scheme and icons.)
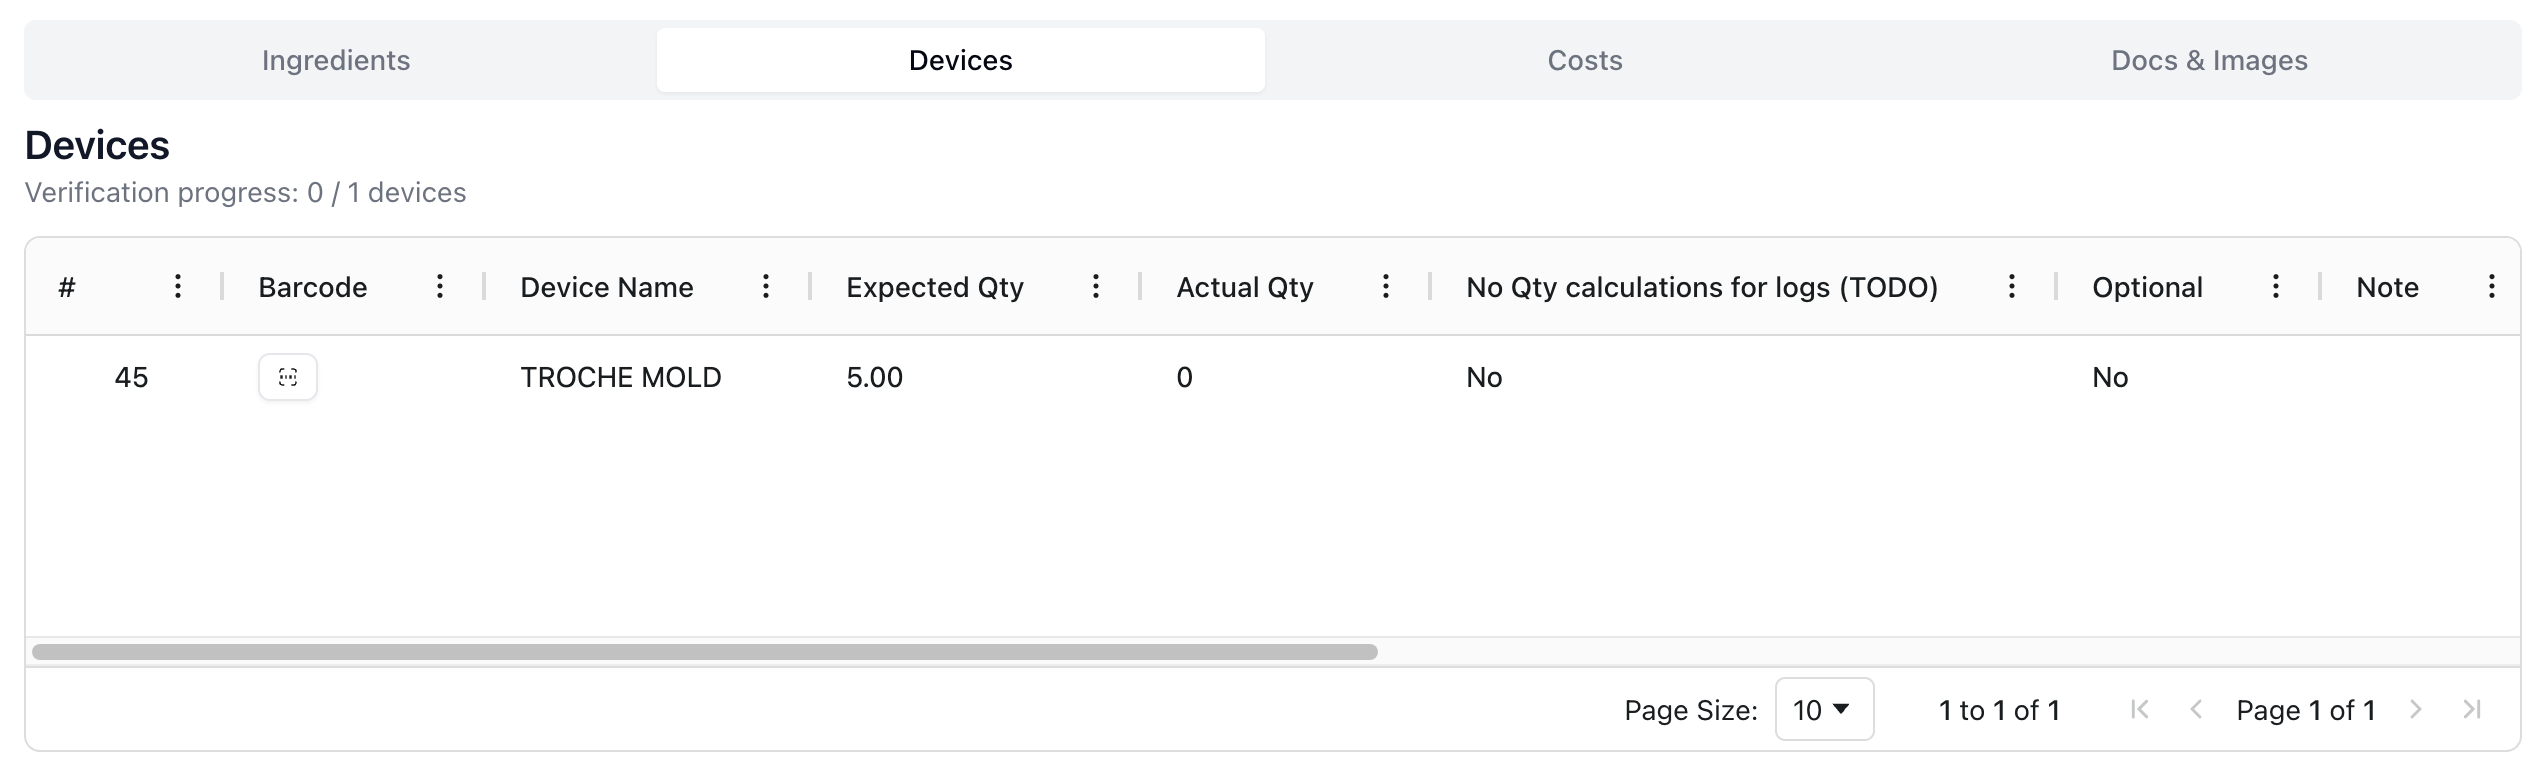 To verify the formula devices, click the Devices tab. Similar to the Ingredients tab, you must verify each device. Click the barcode icon to open the Device Barcode Verification popup, which includes basic information about the device, such as the name and relevant ID number.
To verify the device, select the verification Input Method. To scan the device's barcode, select Barcode and scan the relevant device inventory to input the verification information. Alternatively, it's possible to manually enter the device barcode or inventory ID by clicking the Text input method.
 Once you've verified all ingredients and devices, navigating to the Costs tab allows you to modify and view information related to the formula lot, such as the total cost and inventory control. On this tab, the cost of ingredients, devices, and time determine the Total Cost, which is filled automatically. (To do: Review once complete.)
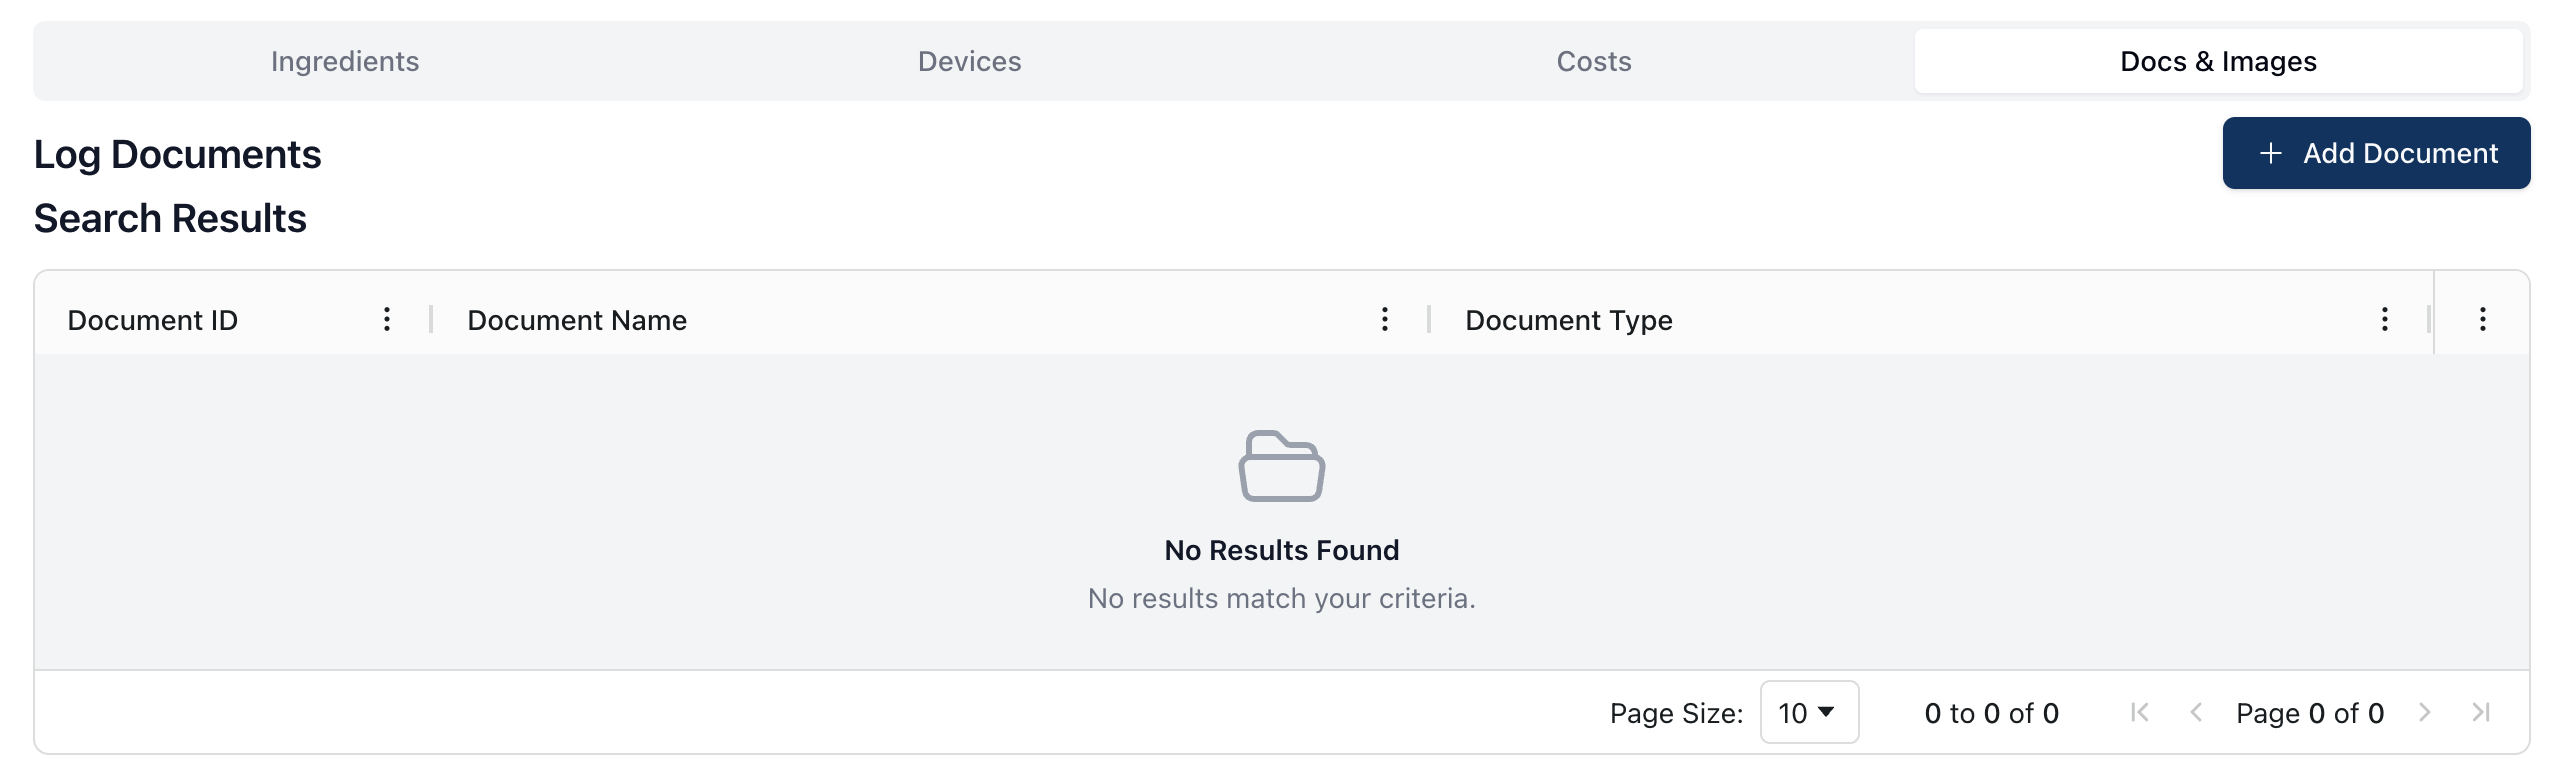 Finally, you can upload any relevant documents or images via the Docs & Images tab. Log Documents appear in a table view, including the document ID, name, and type. (To do: Review pending clarification on the types of documents and images that may be stored here.)
To add a document to the formula log, click the + Add Document button. In the popup that appears, enter the document name and type. Then, upload the file by dragging and dropping it into the outlined area or click inside of the upload area to select and upload the files directly from your computer.
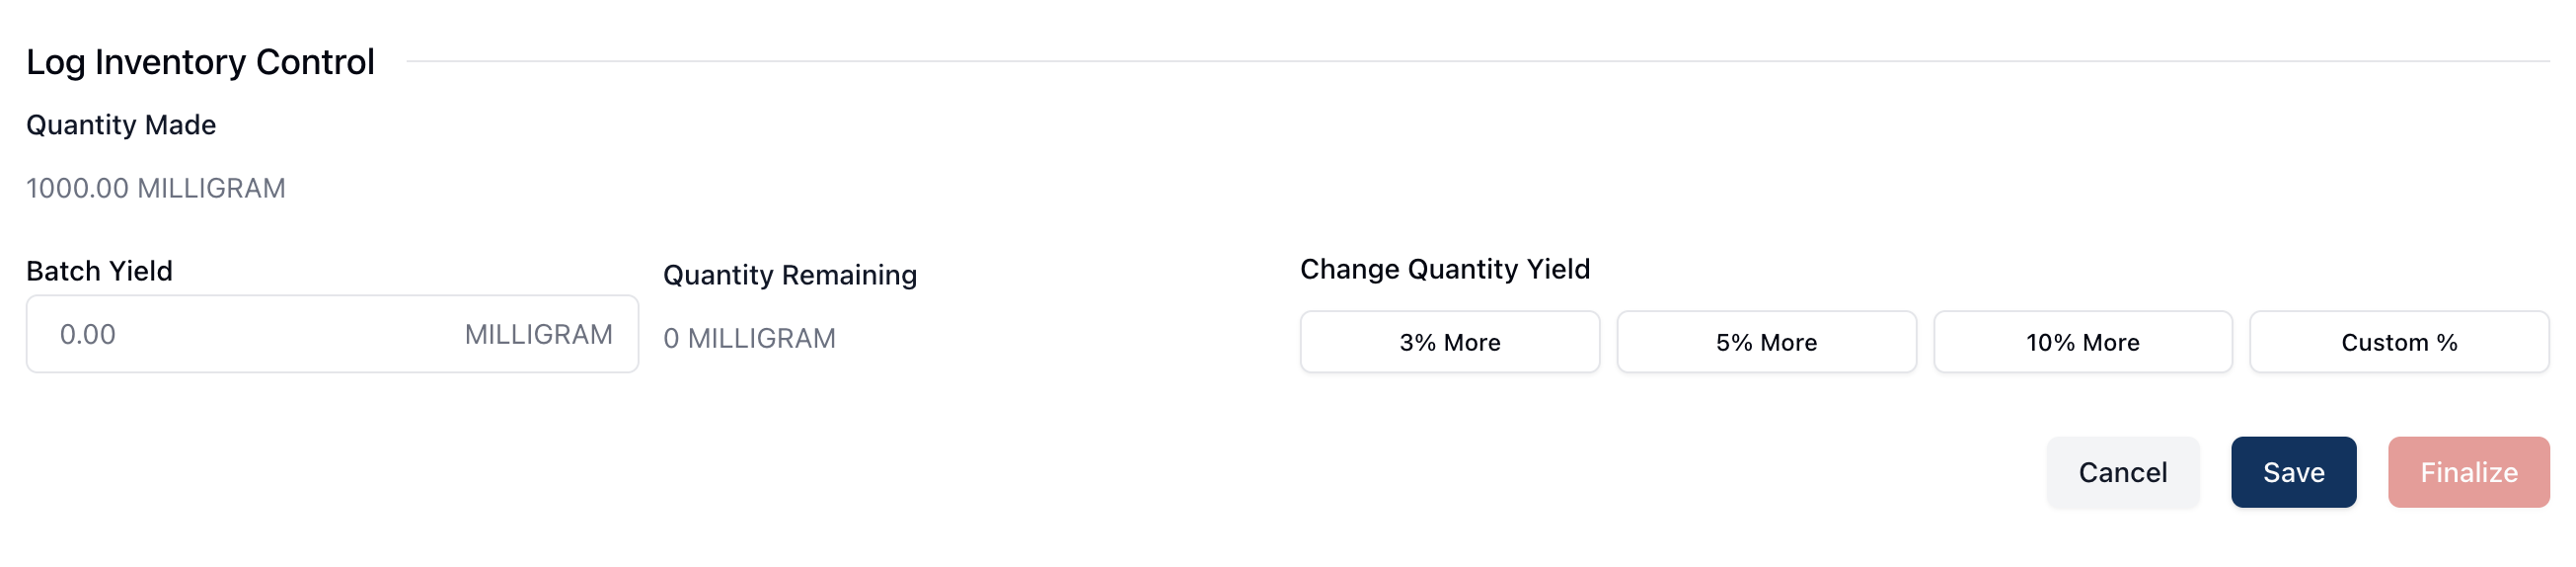 The Log Inventory Control section at the bottom of the page includes both expected and actual outputs for the formula log entry. The Quantity Made field is read-only and displays the expected yield for the formula. Under Batch Yield, enter the actual amount made during the process. This information is also used to update the relevant formula inventory. (To do: Review once complete. Pending clarification on the need for "quick action" buttons.)
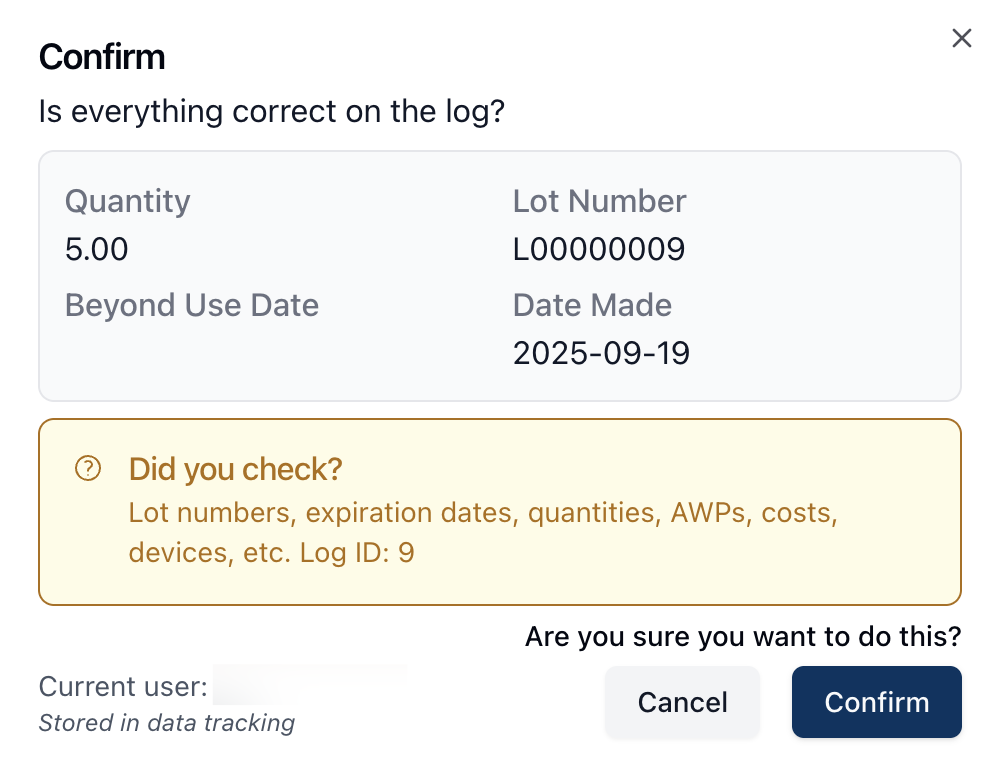 Once all fields and steps are complete, the Finalize button saves the formula lot and apply the quantity produced to the overall formula stock. If the lot isn't yet finalized but you need to save your progress, click the Save button. (To do: Review once workflow is confirmed.)
Scan an ingredient or device
To do: TBD. Pending workflow - may be able to use manual entry for testing/documentation as well.
Edit Formula
 The Edit Formula button allows you to edit and update the formula record.
Clicking the Edit Formula button opens the Edit Formula page, where you can modify a number of editable text fields to update any information related to the formula record. For more information on each field available when creating or editing a formula, visit Adding a new formula.
Once all you have added or updated all the relevant fields, click Save Formula to save any changes. Otherwise, click Cancel to return to the formula record.
Deactivate
 To deactivate a formula record, click the Deactivate button in the upper right corner of the page. When a formula is deactivated, both the table view on the Formulas page and the details of the formula record indicate that the formula is no longer active.
Note that it's possible to include inactive records in search results using the Filters button in the Formula Search.
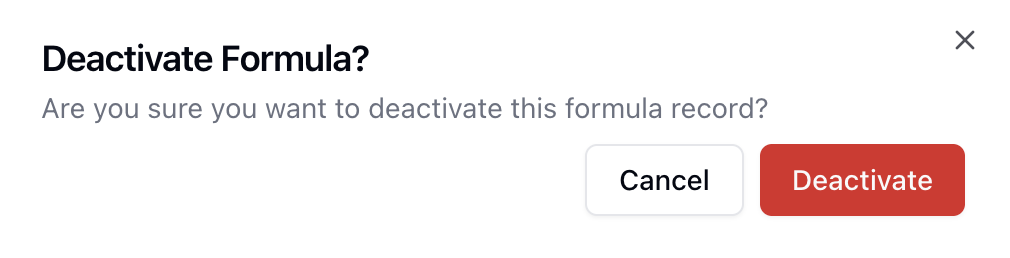 After clicking the Deactivate button, a popup appears to confirm the action. To move forward with deactivating a formula, click the Deactivate button once more. Otherwise, click Cancel to return to the previous screen.
Activity Log
 You can view the system Activity Log by clicking on the clock icon in the upper right corner of the page.
For more information about the Activity Log, visit Activity Log.
Ingredients/Instructions
The formula record displays the Ingredients/Instructions tab by default. This tab includes the Instructions/Method of Preparation and Ingredients sections.
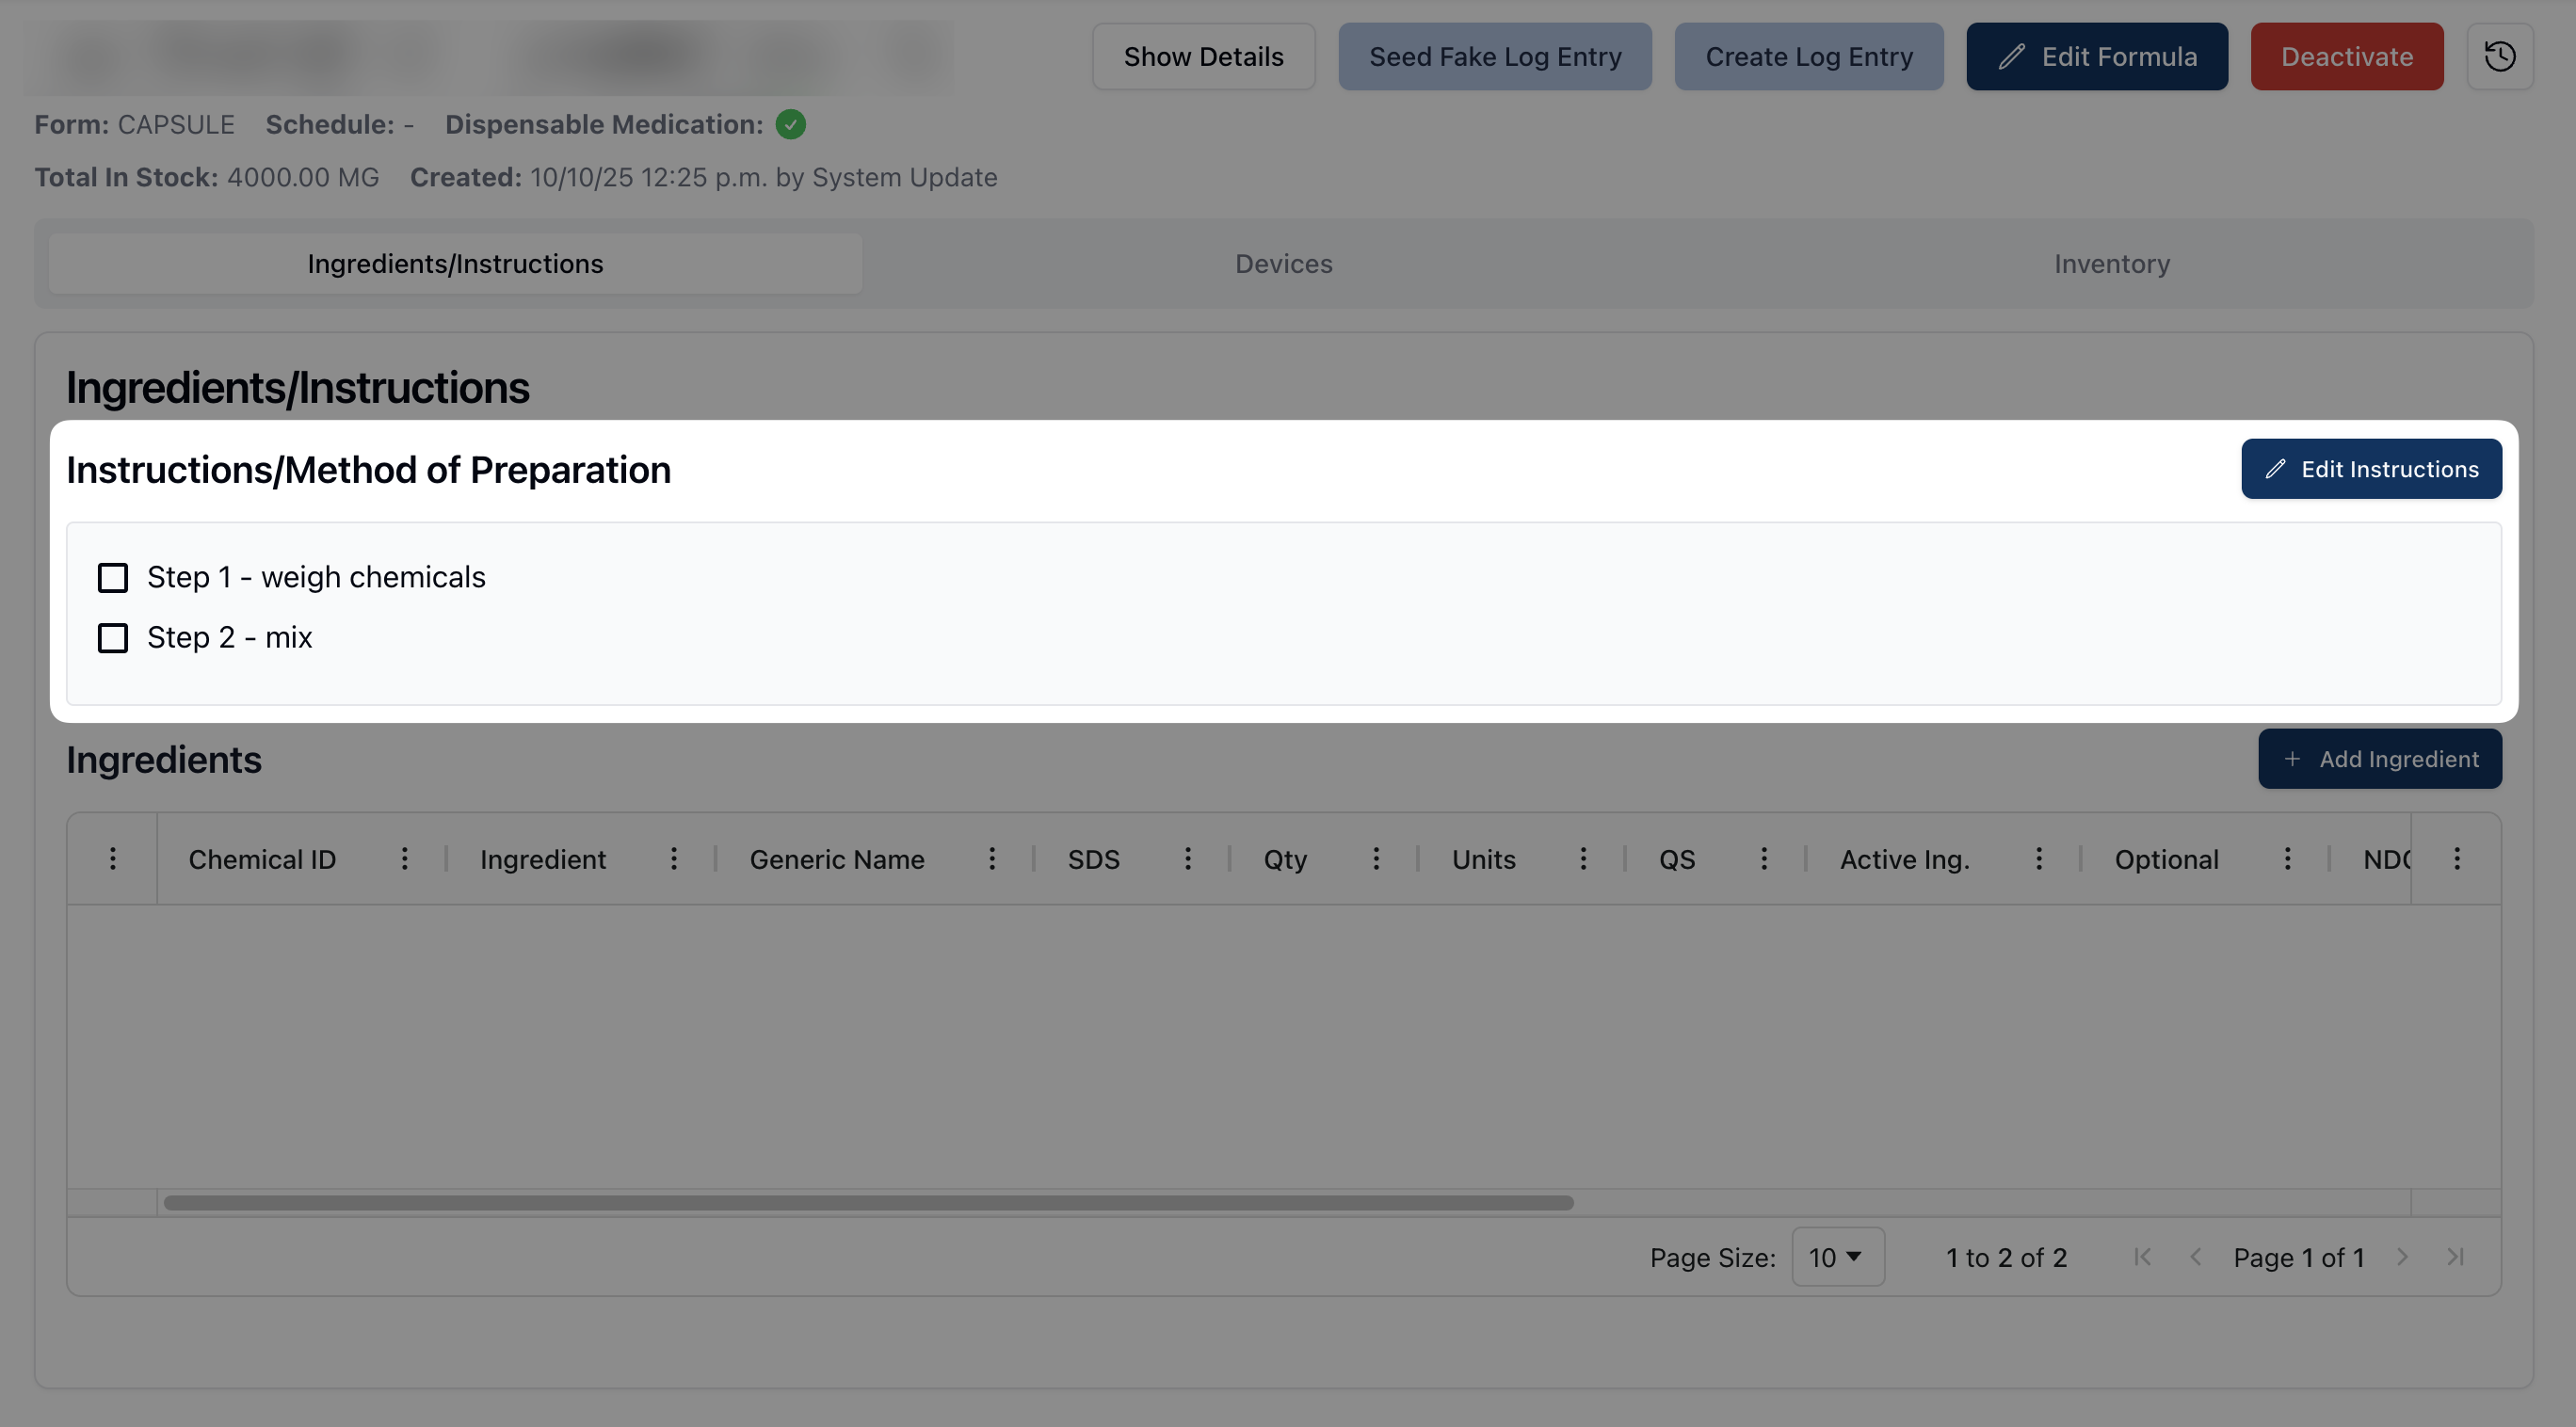 The Instructions/Method of Preparation section displays the written instructions for creating the formula in a scrollable text field. Below, the Ingredients table displays the list of ingredients used in the formula.
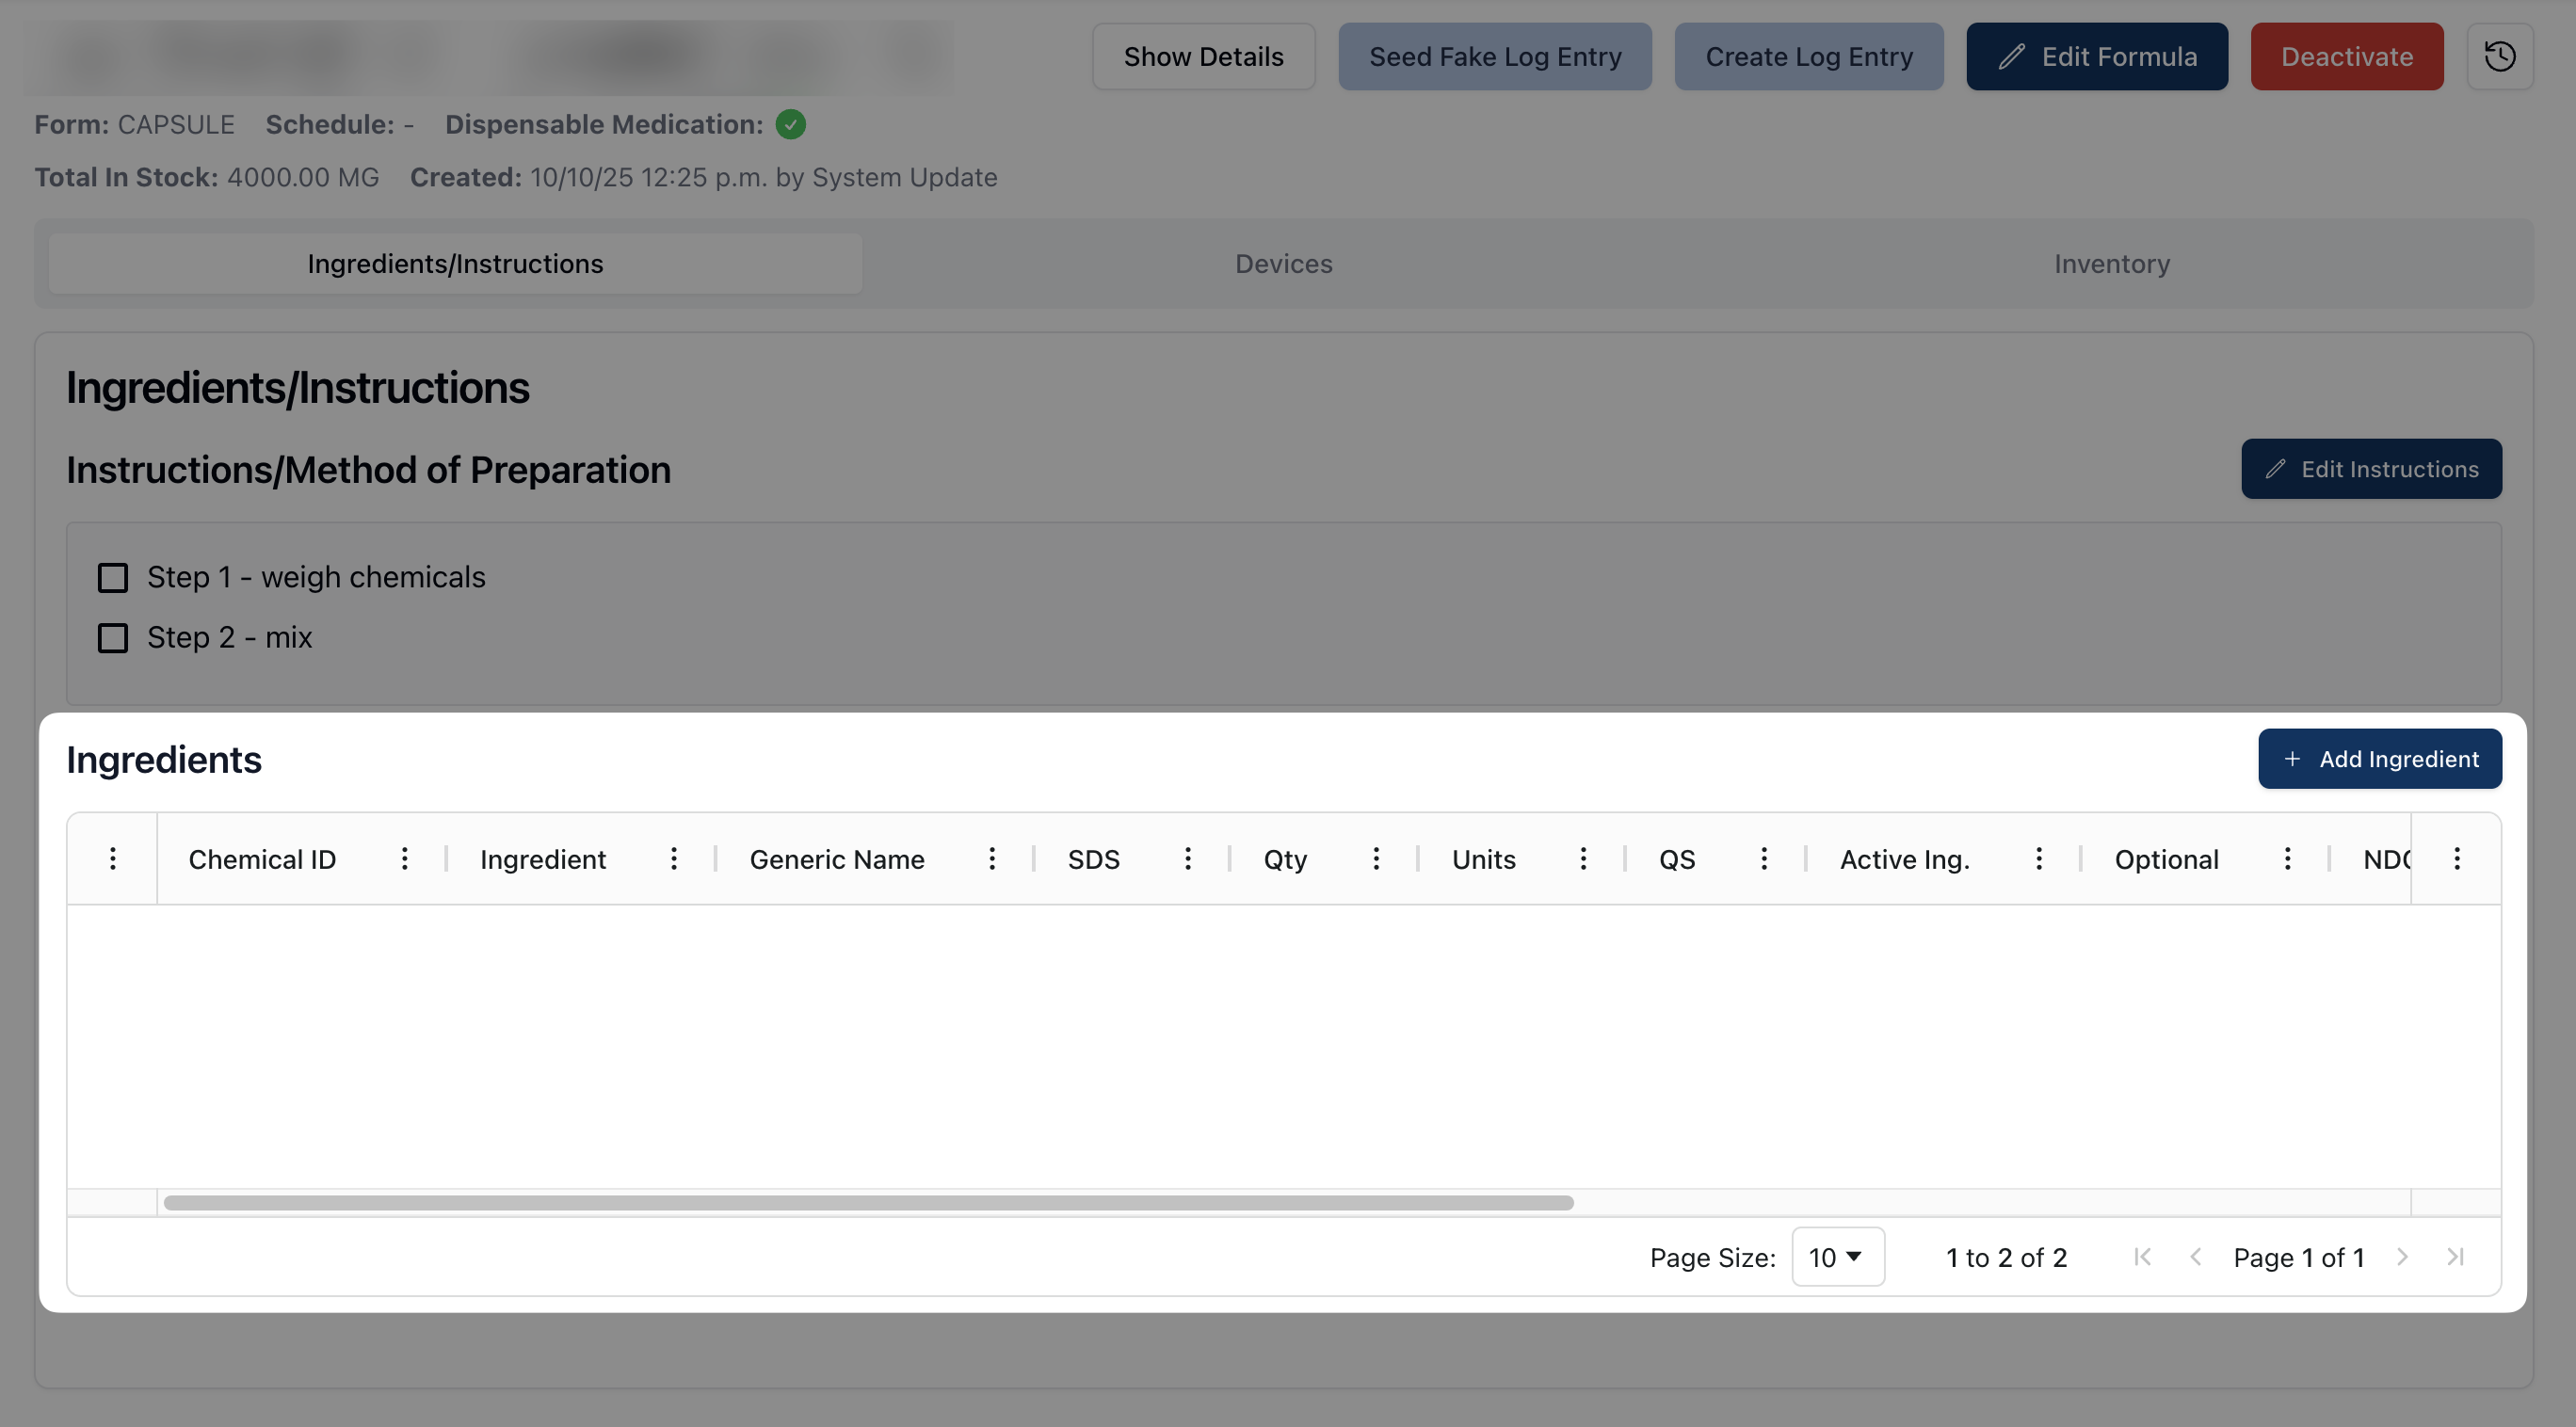 When viewing the Ingredients table, the following information is visible for each ingredient:
# | The chemical ID for the ingredient, automatically generated by the system. (To do: Confirm that this is the chemical ID number.) |
Ingredient | The ingredient name. |
Generic Name | The ingredient's generic name. |
SDS | When a Safety Data Sheet is uploaded to the related chemical record, a clickable page icon appears. Clicking this icon downloads and display the related Safety Data Sheet. |
Qty | The quantity of the ingredient included in the formula. (To do: Confirm that quantity and units are related, e.g. 2.5 (quantity) vials (units).) |
Units | The unit measurement of the ingredient quantity. |
QS | (To do: Quantity Sufficient. Confirm QS meaning.) |
Active Ingredient | Whether or not the ingredient is an active ingredient in the formula. (To do: Is "an active ingredient" accurate? Or is there typically just one active ingredient?) |
Optional | Whether or not the ingredient is optional. (To do: Confirm best phrasing. If "Yes," the ingredient is optional.) |
NDC | The National Drug Code for the chemical. |
Contains NIOSH Hazardous Ing | Whether or not the chemical is considered a NIOSH hazardous ingredient. (To do: Does selecting this trigger a NIOSH badge on the formula?) |
Stock | How much of the ingredient is in stock. (To do: How would this typically be displayed? Is there a set unit type?) |
Ingredient Breakdown | (To do: What would be an example that might appear here? Is it primarily a notes field?) |
You can sort ingredients according to the categories listed at the top of the table by clicking on the three dots ( ⠇) to the right of each column title, as described in Table options and sorting.
 Each ingredient also has its own actions menu, including the following options:
View Chemical: A link to navigate to the chemical record.
Edit: To edit the related ingredient.
Delete: To delete the related ingredient.
Clicking Edit opens the Edit Ingredient form. From this page, it's possible to edit the name, quantity, and other relevant information about the related formula ingredient. Once you have made any necessary changes, click Update Ingredient. Alternatively, click Cancel to return to the formula record.
 Deleting the ingredient removes it from the Ingredients table on the formula record. This also removes the ingredient from the ingredients list when creating a formula log.
Edit instructions
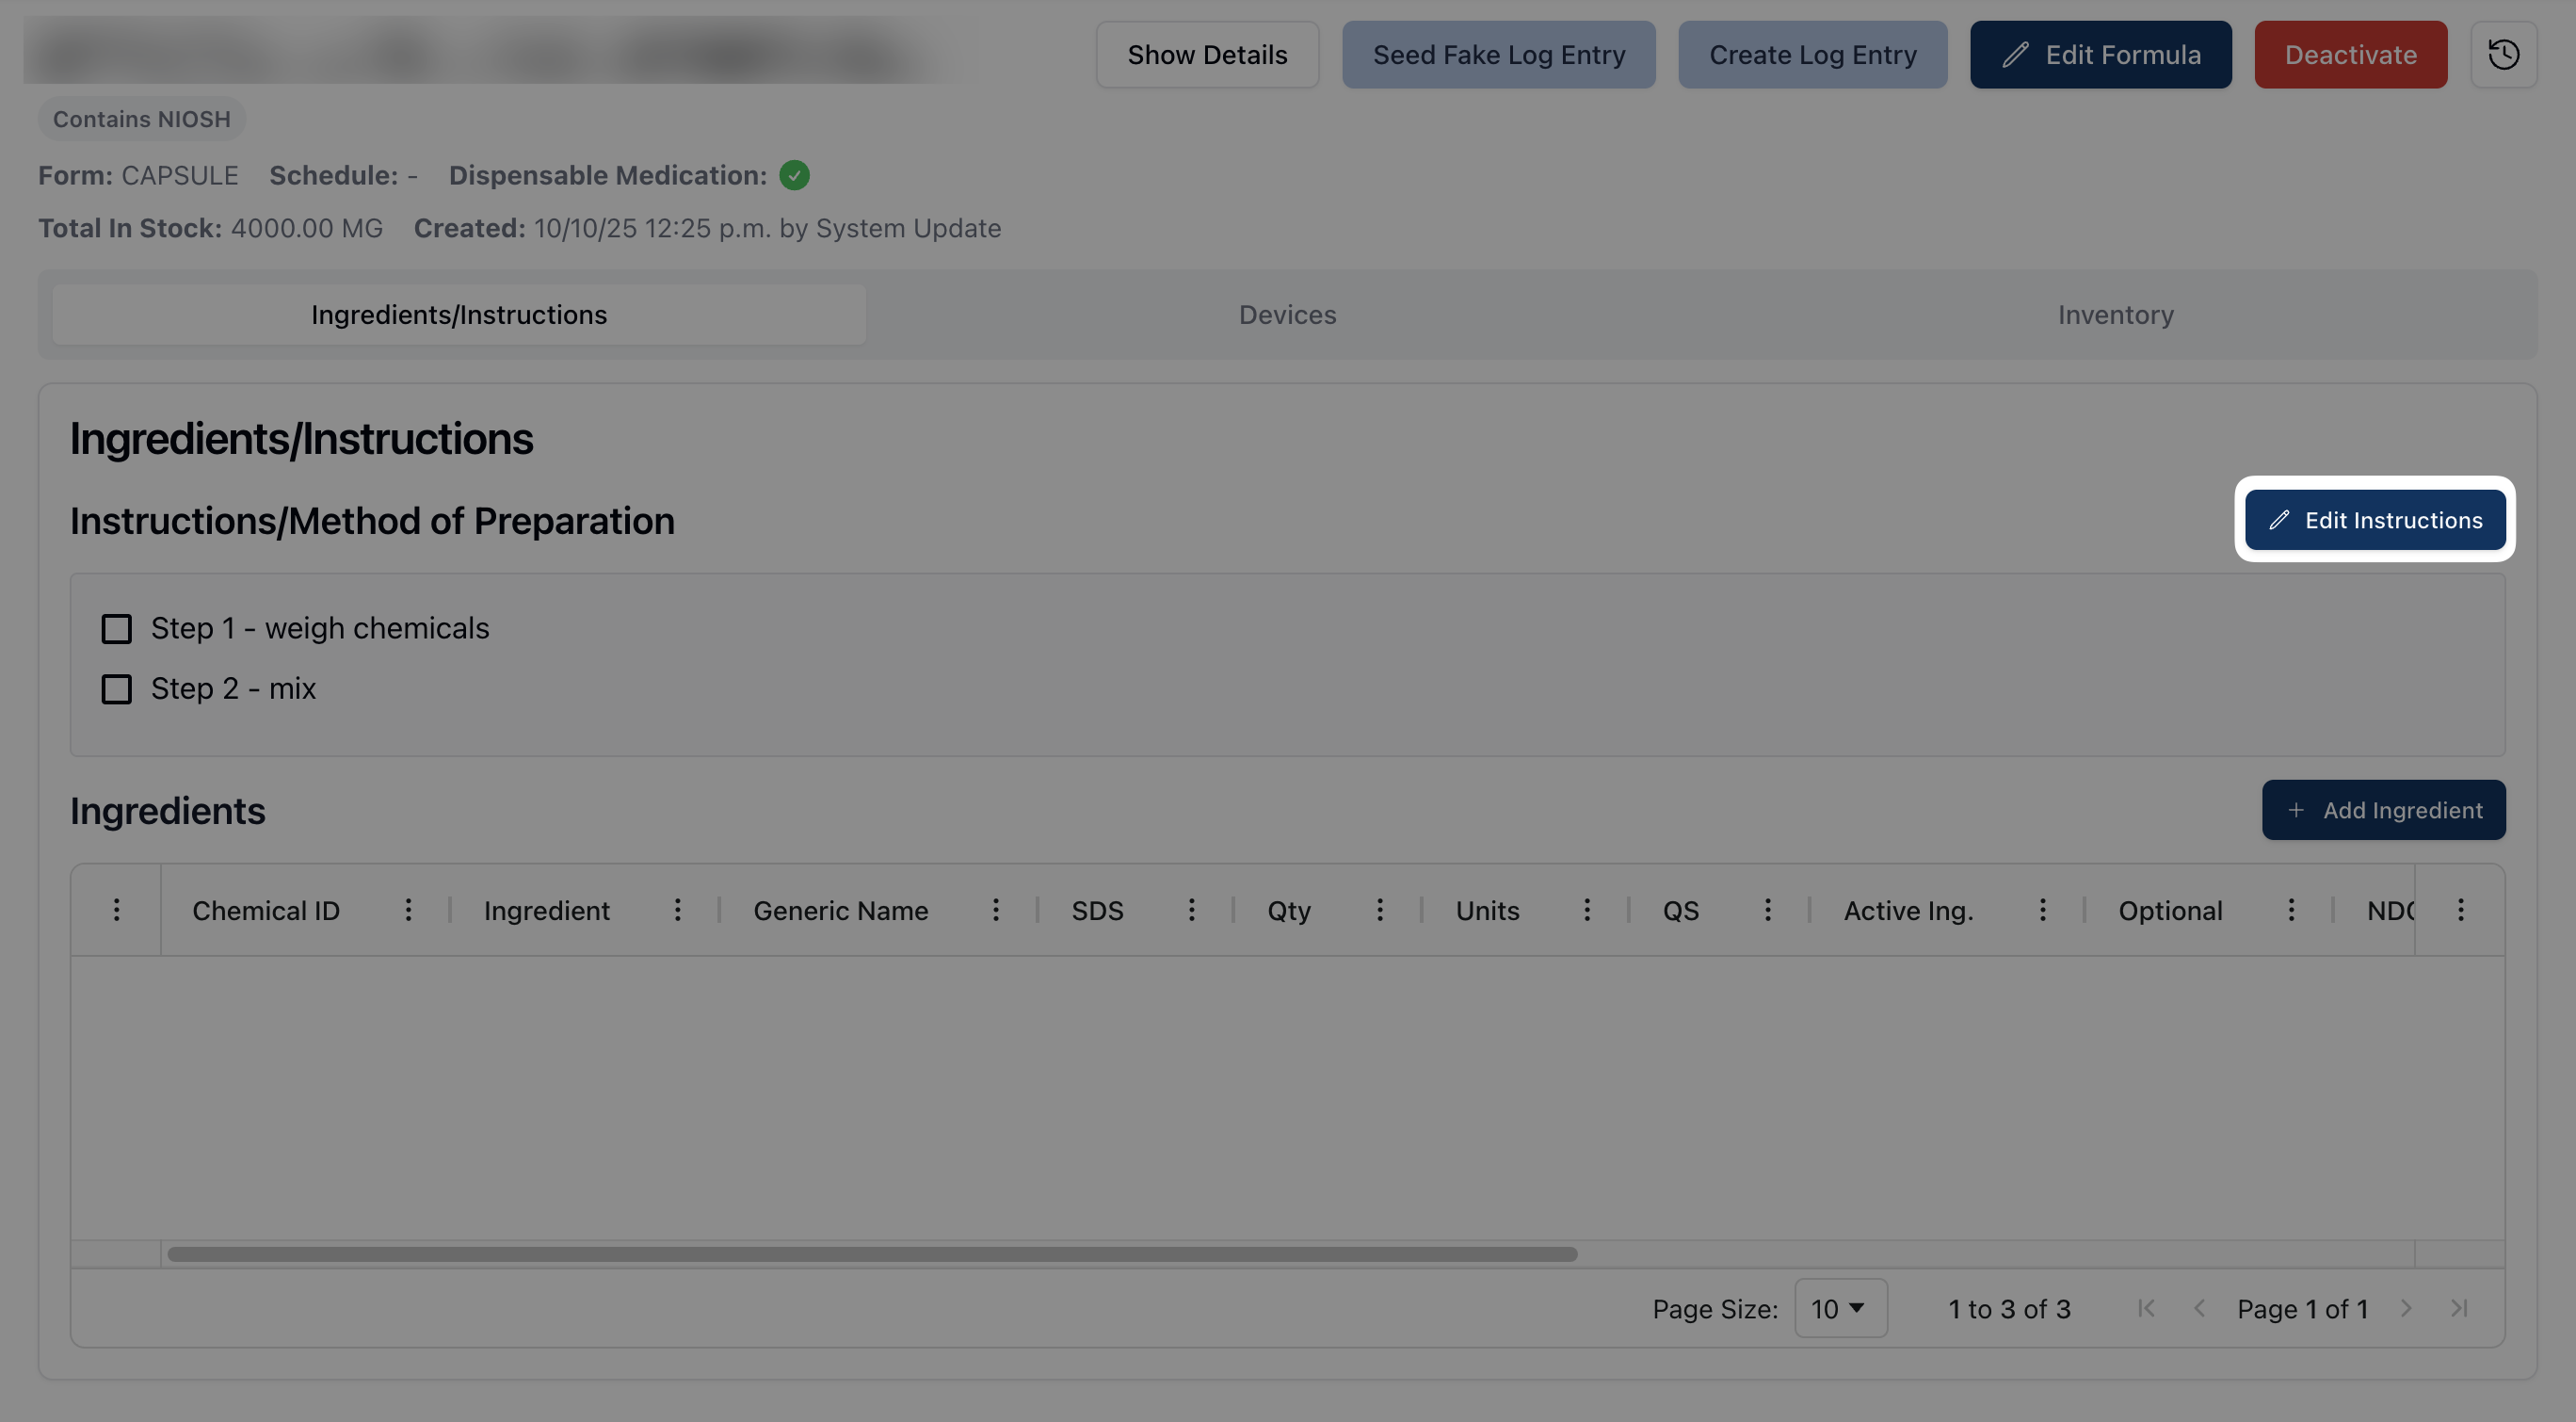 To edit the Instructions/Method of Preparation from the formula record, click the Edit Instructions button. This button switches the instructions text field from view-only to a rich text editor.
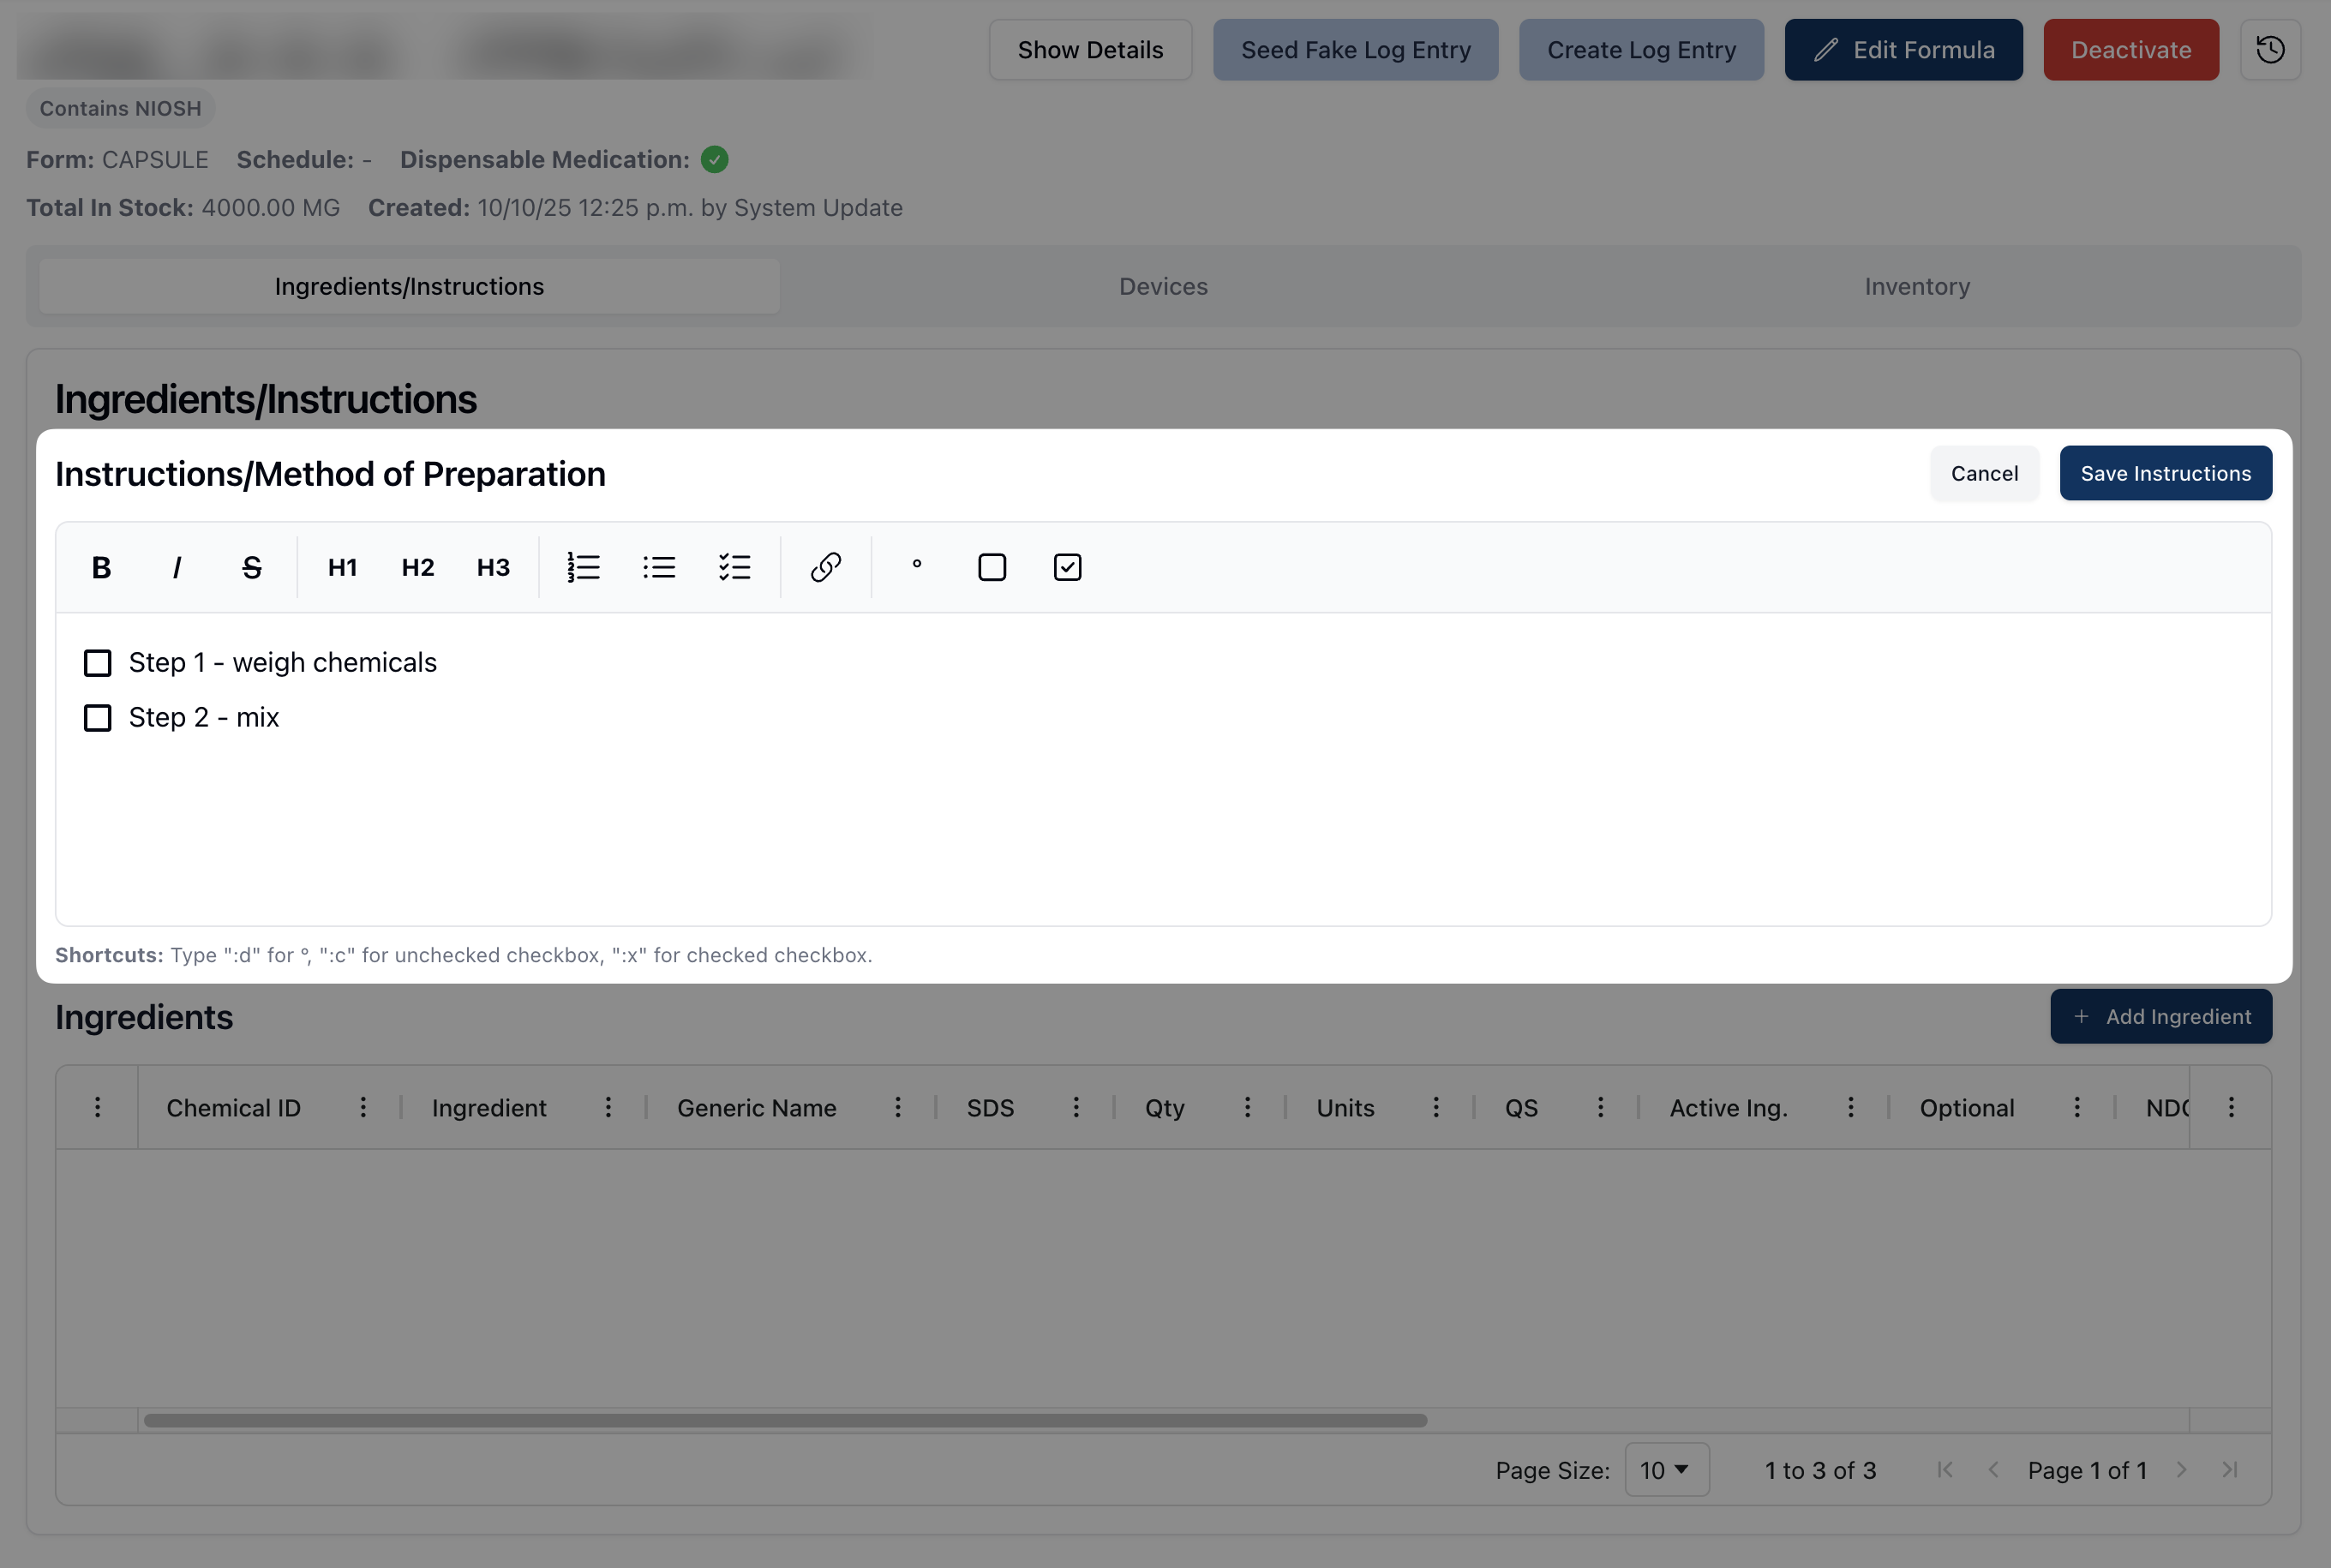 While the field is editable, you may directly edit, delete, or update any of the text visible. As a reminder, the Ingredients/Method of Preparation field includes rich text formatting, using the formatting toolbar, as described in Adding a new formula.
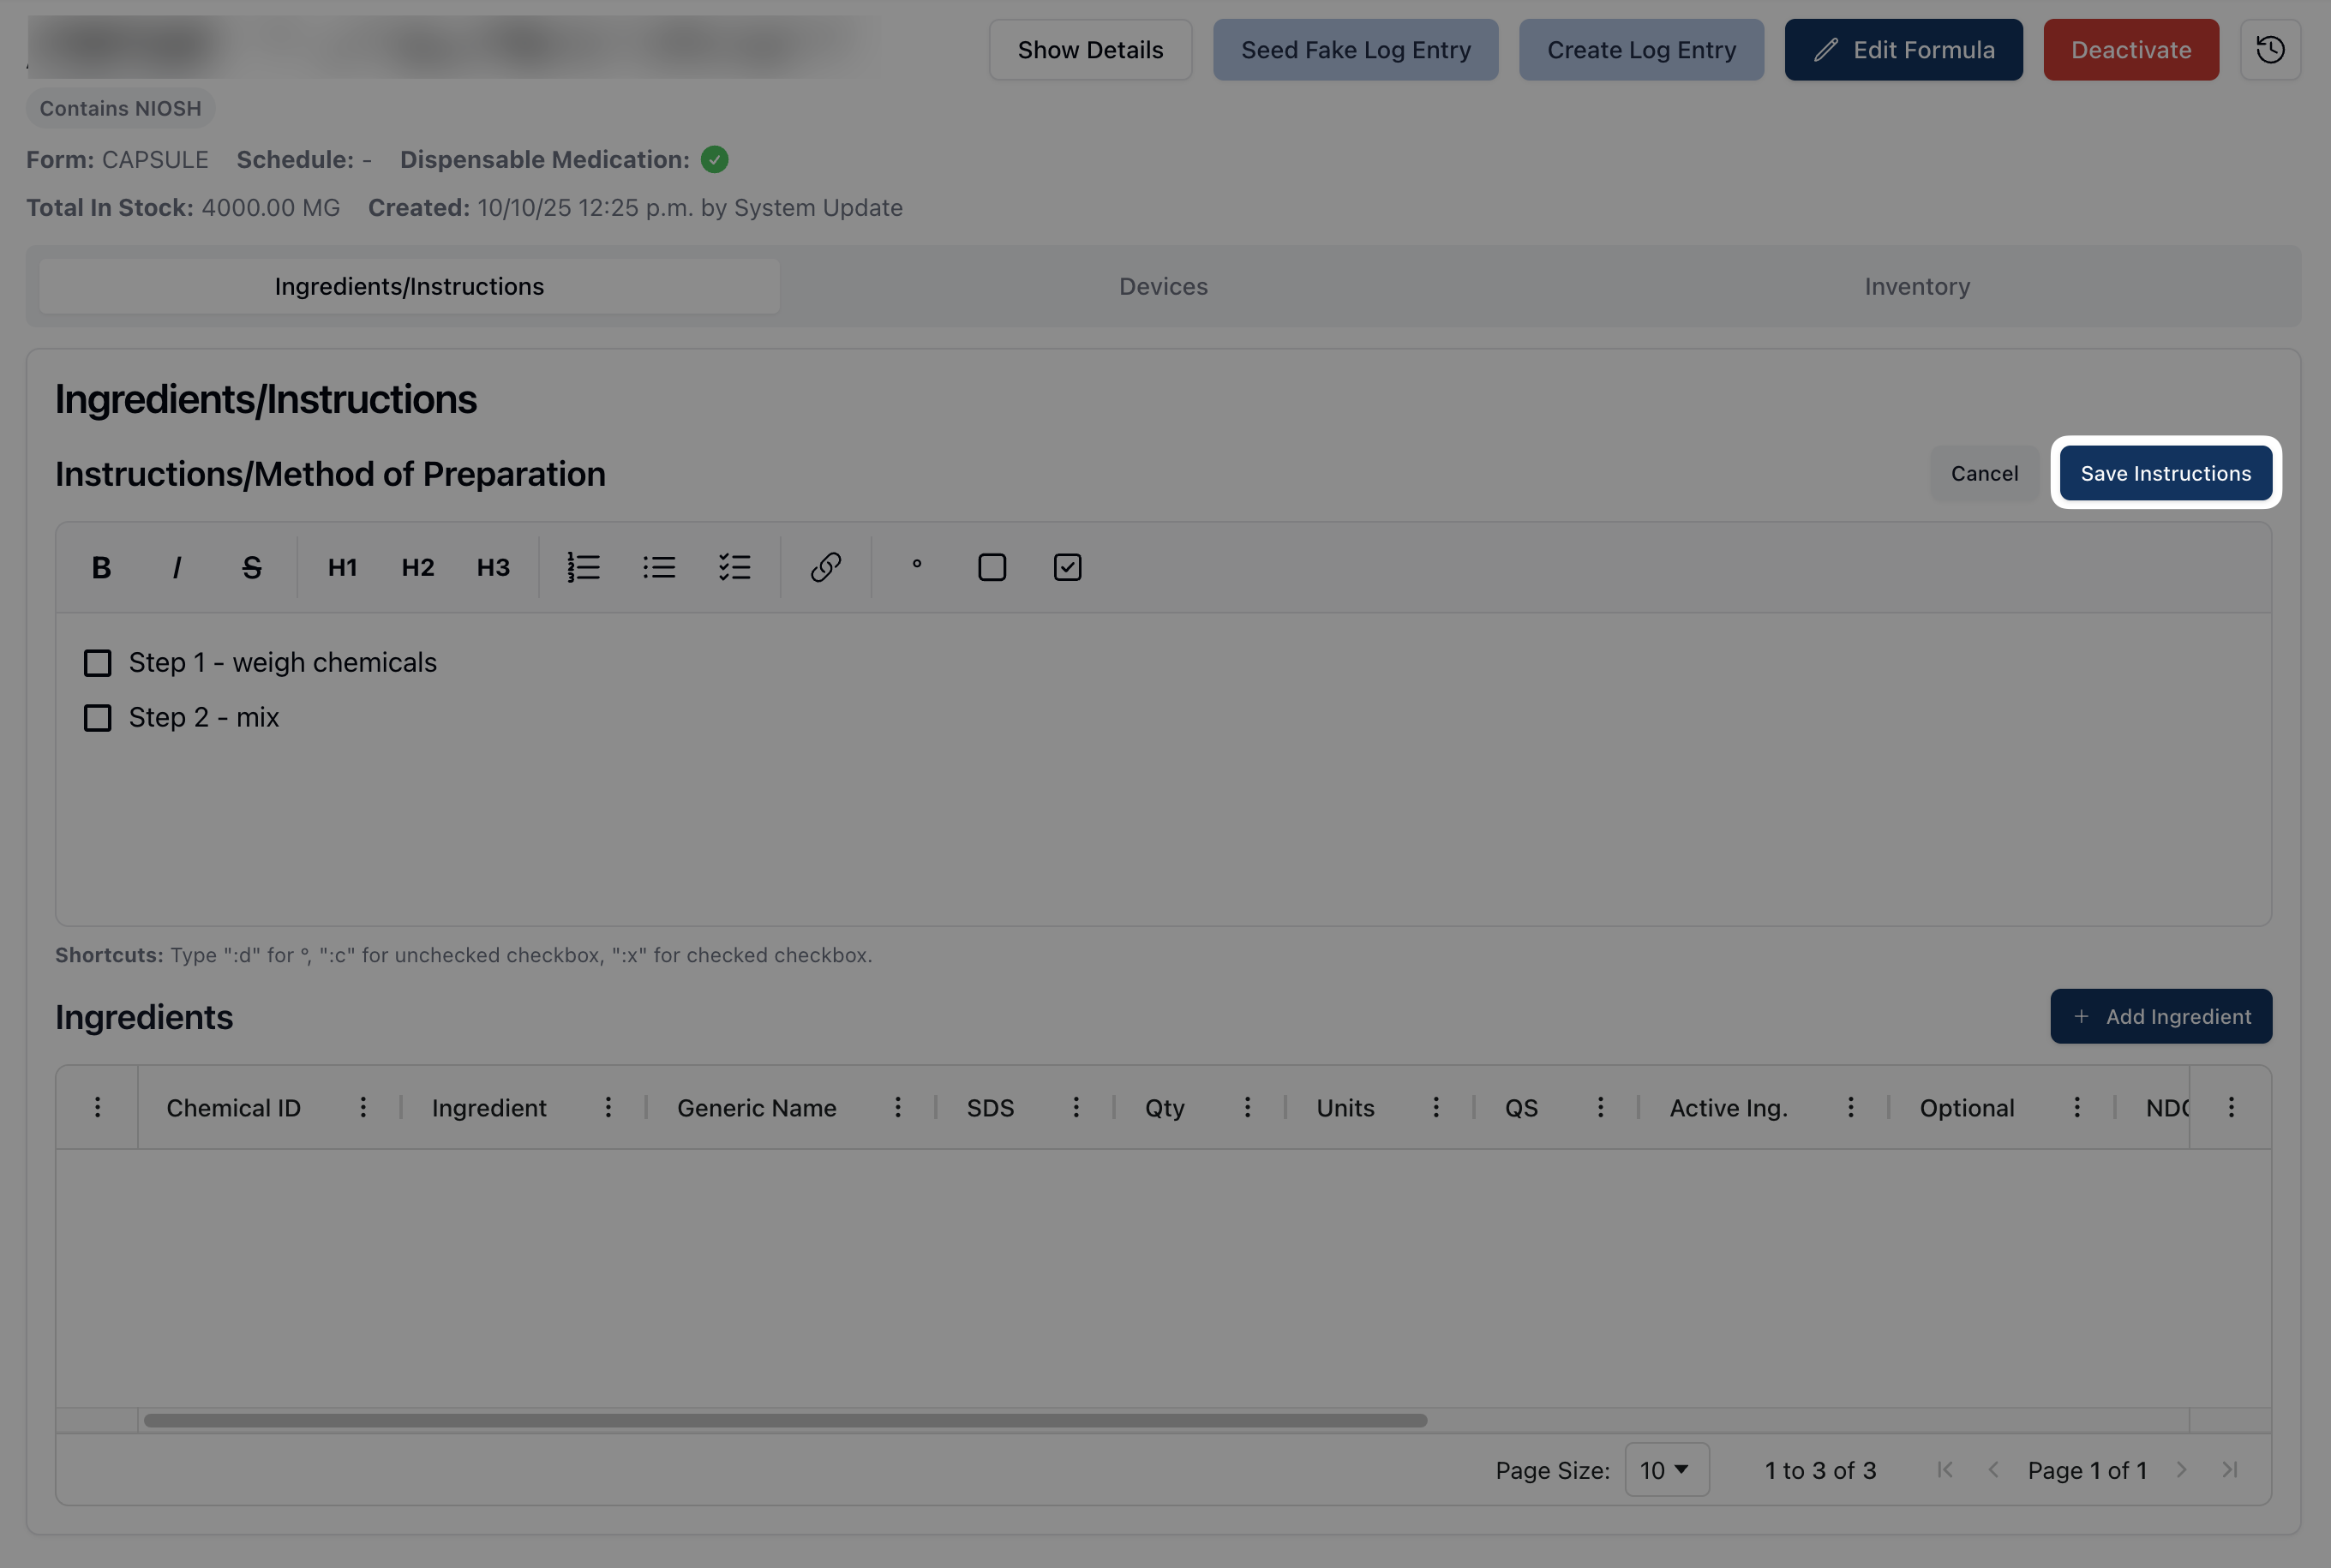 Once you've made any relevant changes, click the Save Instructions button to confirm the updates and return the editor to view-only.
Adding an ingredient
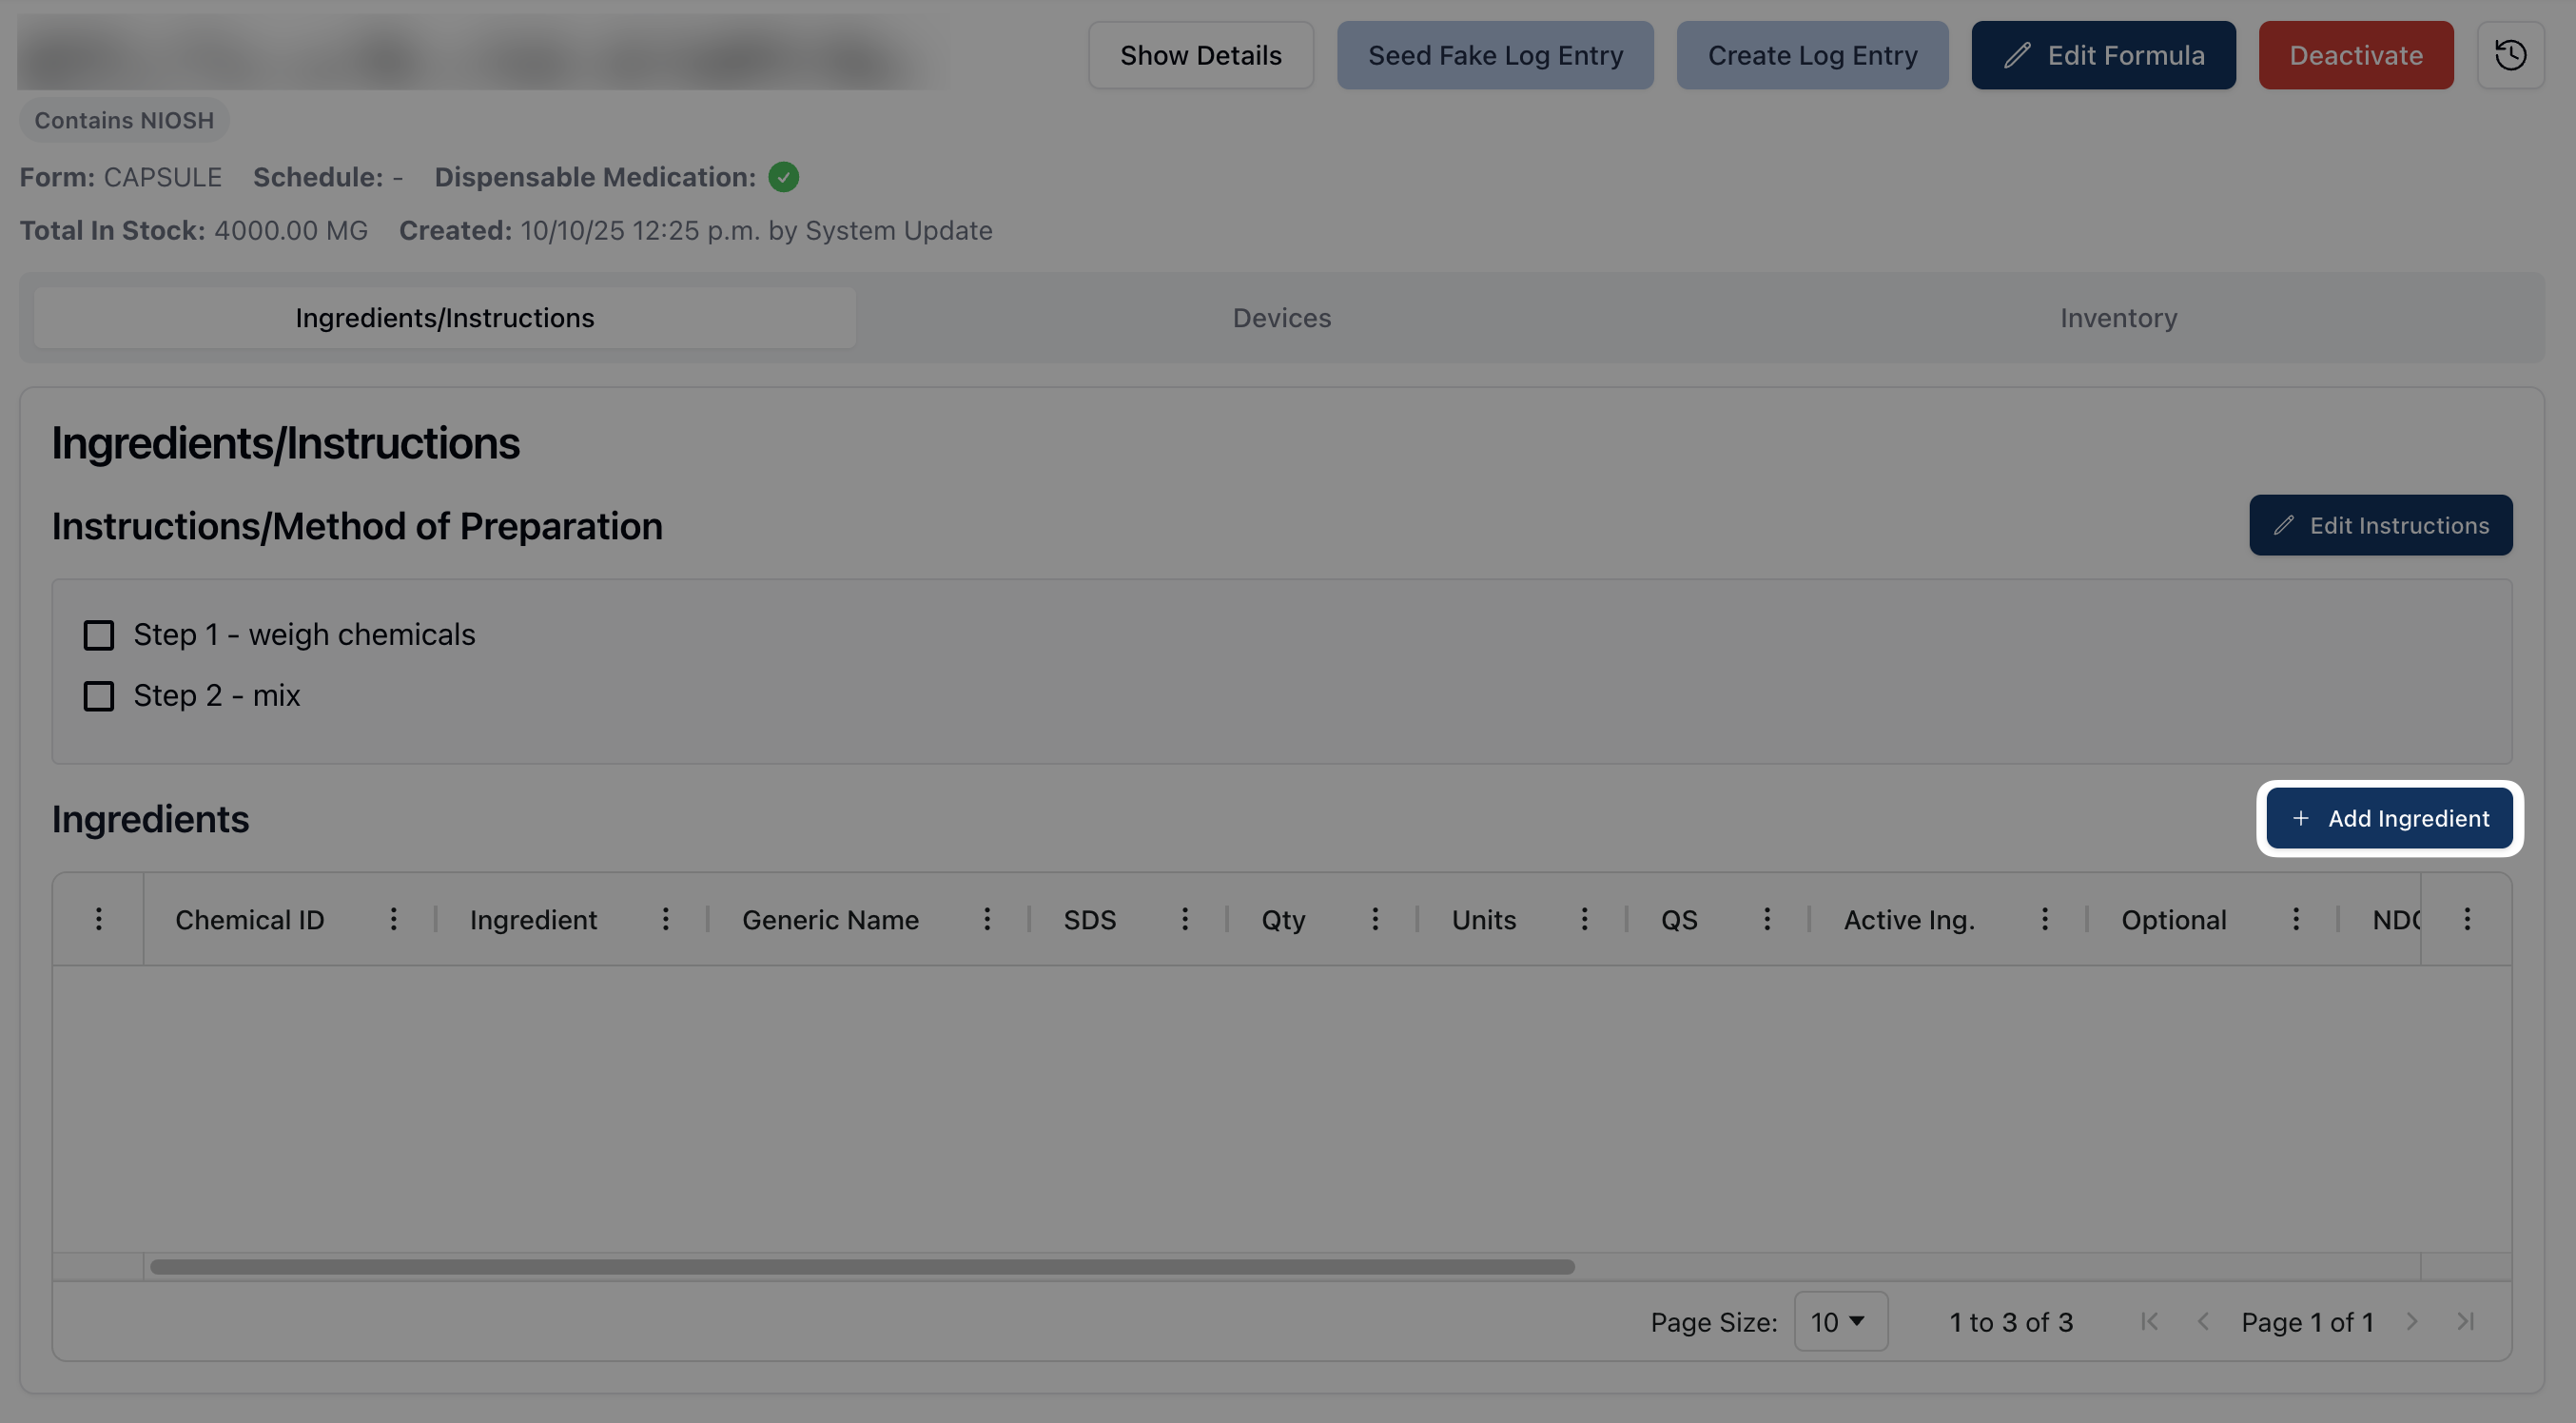 You may add a new ingredient to the formula by clicking on the + Add Ingredient button. Once selected, the Add Ingredient form appears.
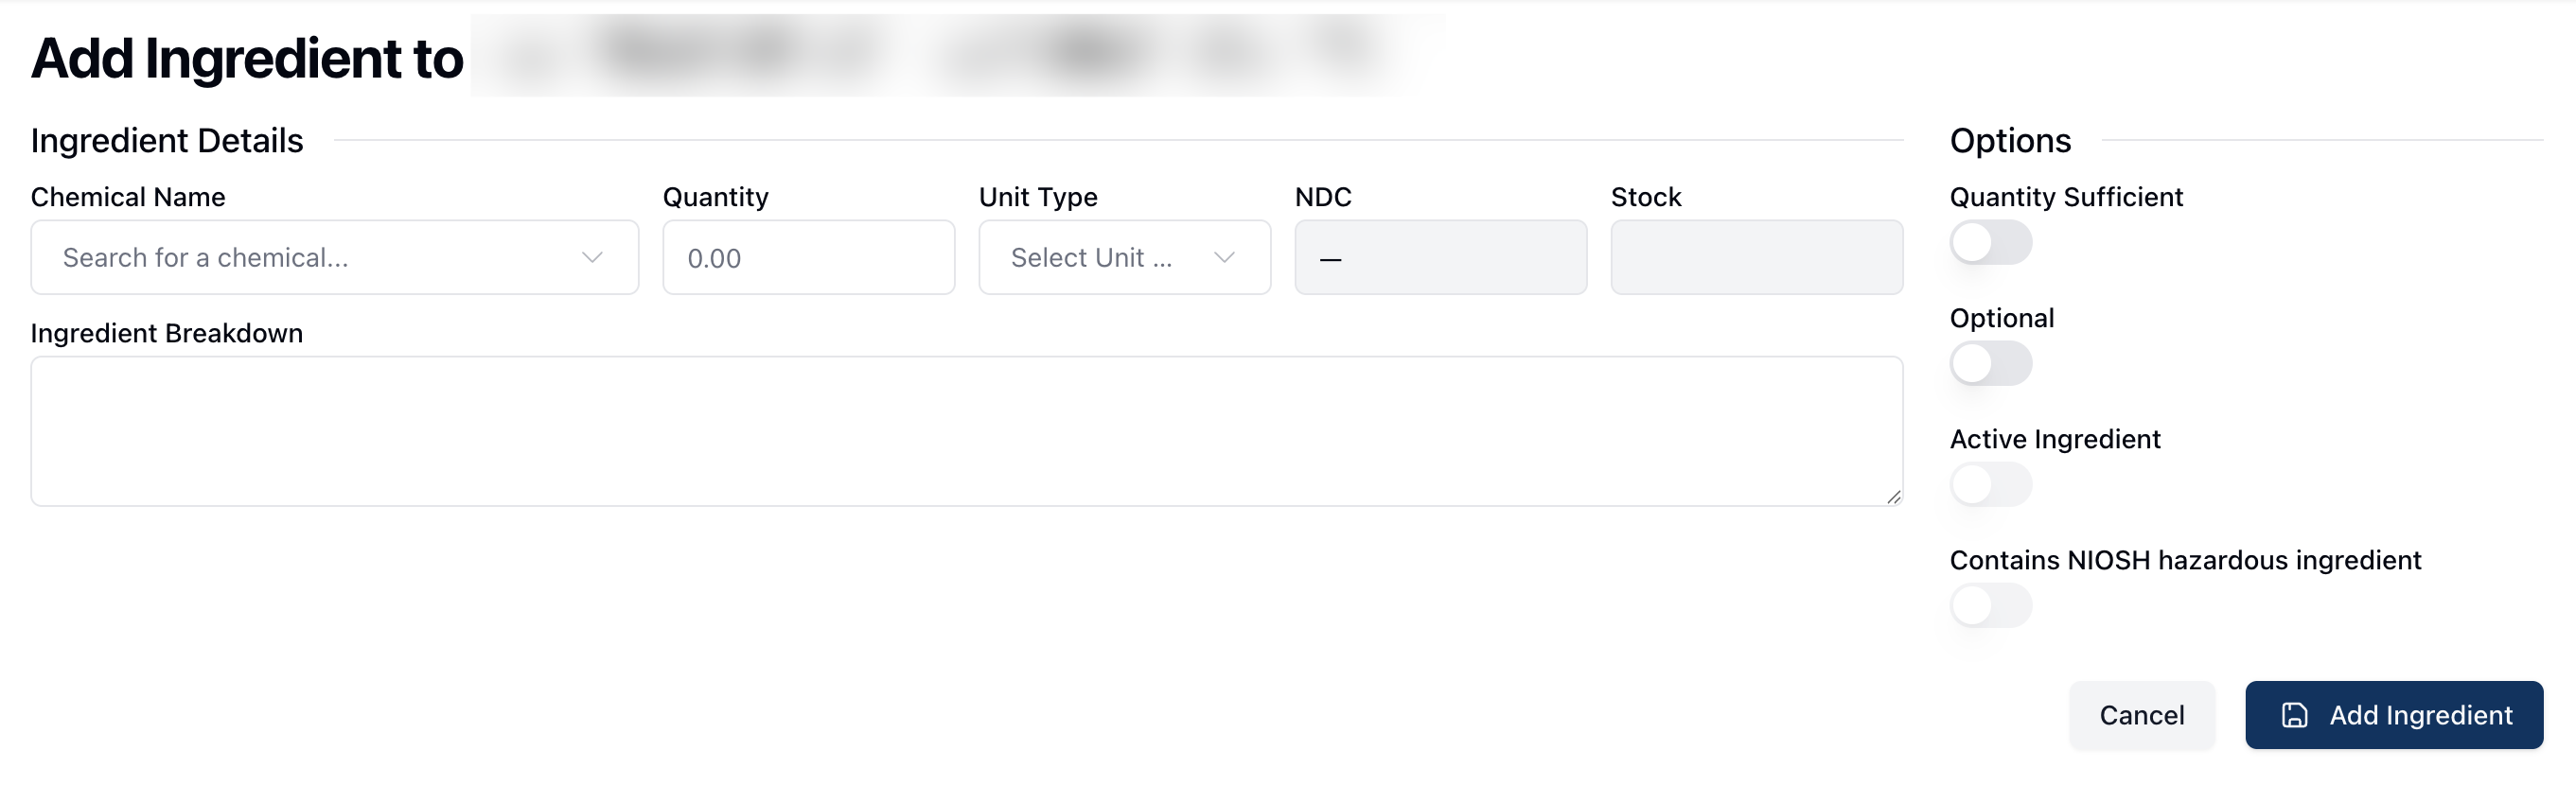 Under ingredient details, the Chemical Name field provides a dropdown list of chemicals available in the app. You can filter the list by entering the chemical name in the search bar at the top of the dropdown menu. Once the appropriate chemical name appears, click the chemical to select it.
After the chemical is selected, enter the Quantity needed. When both the Chemical Name and Quantity fields are complete, the Units, NDC, and Stock fields automatically update based on the chemical record information.
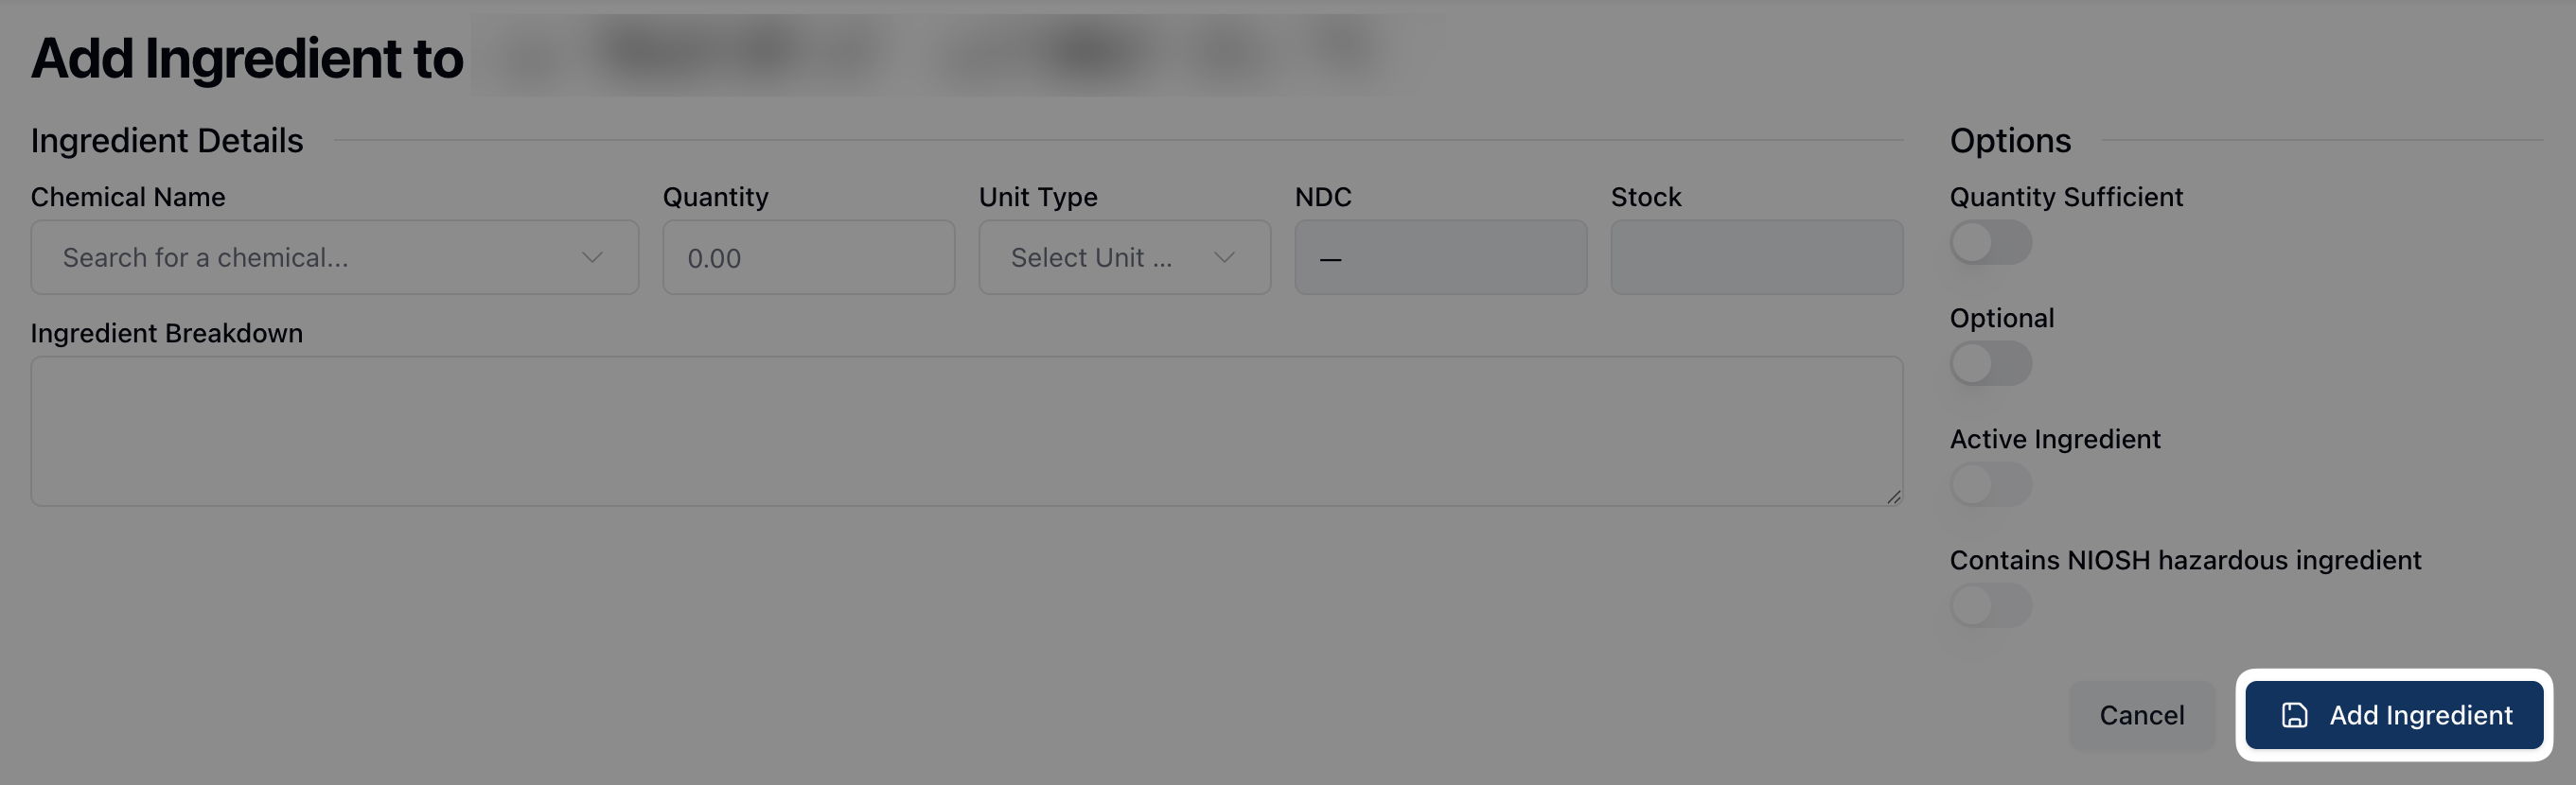 Then, enter the Ingredient Breakdown and toggle any of the relevant Options. Once all fields are complete, click Add Ingredient to add it to the formula record.
Devices
Adding a device
To do: Revisit when devices are added.
Inventory
The Inventory tab displays all inventory for a formula. Compounded formula lots, or batches, determine inventory and can be added by creating a new formula log entry.
To do: Revisit when inventory is added.
Adding a new formula
To do: There are some differences in staging vs. dev re: dispensable medication settings. Re-review with an eye on the toggles/available fields in the future.
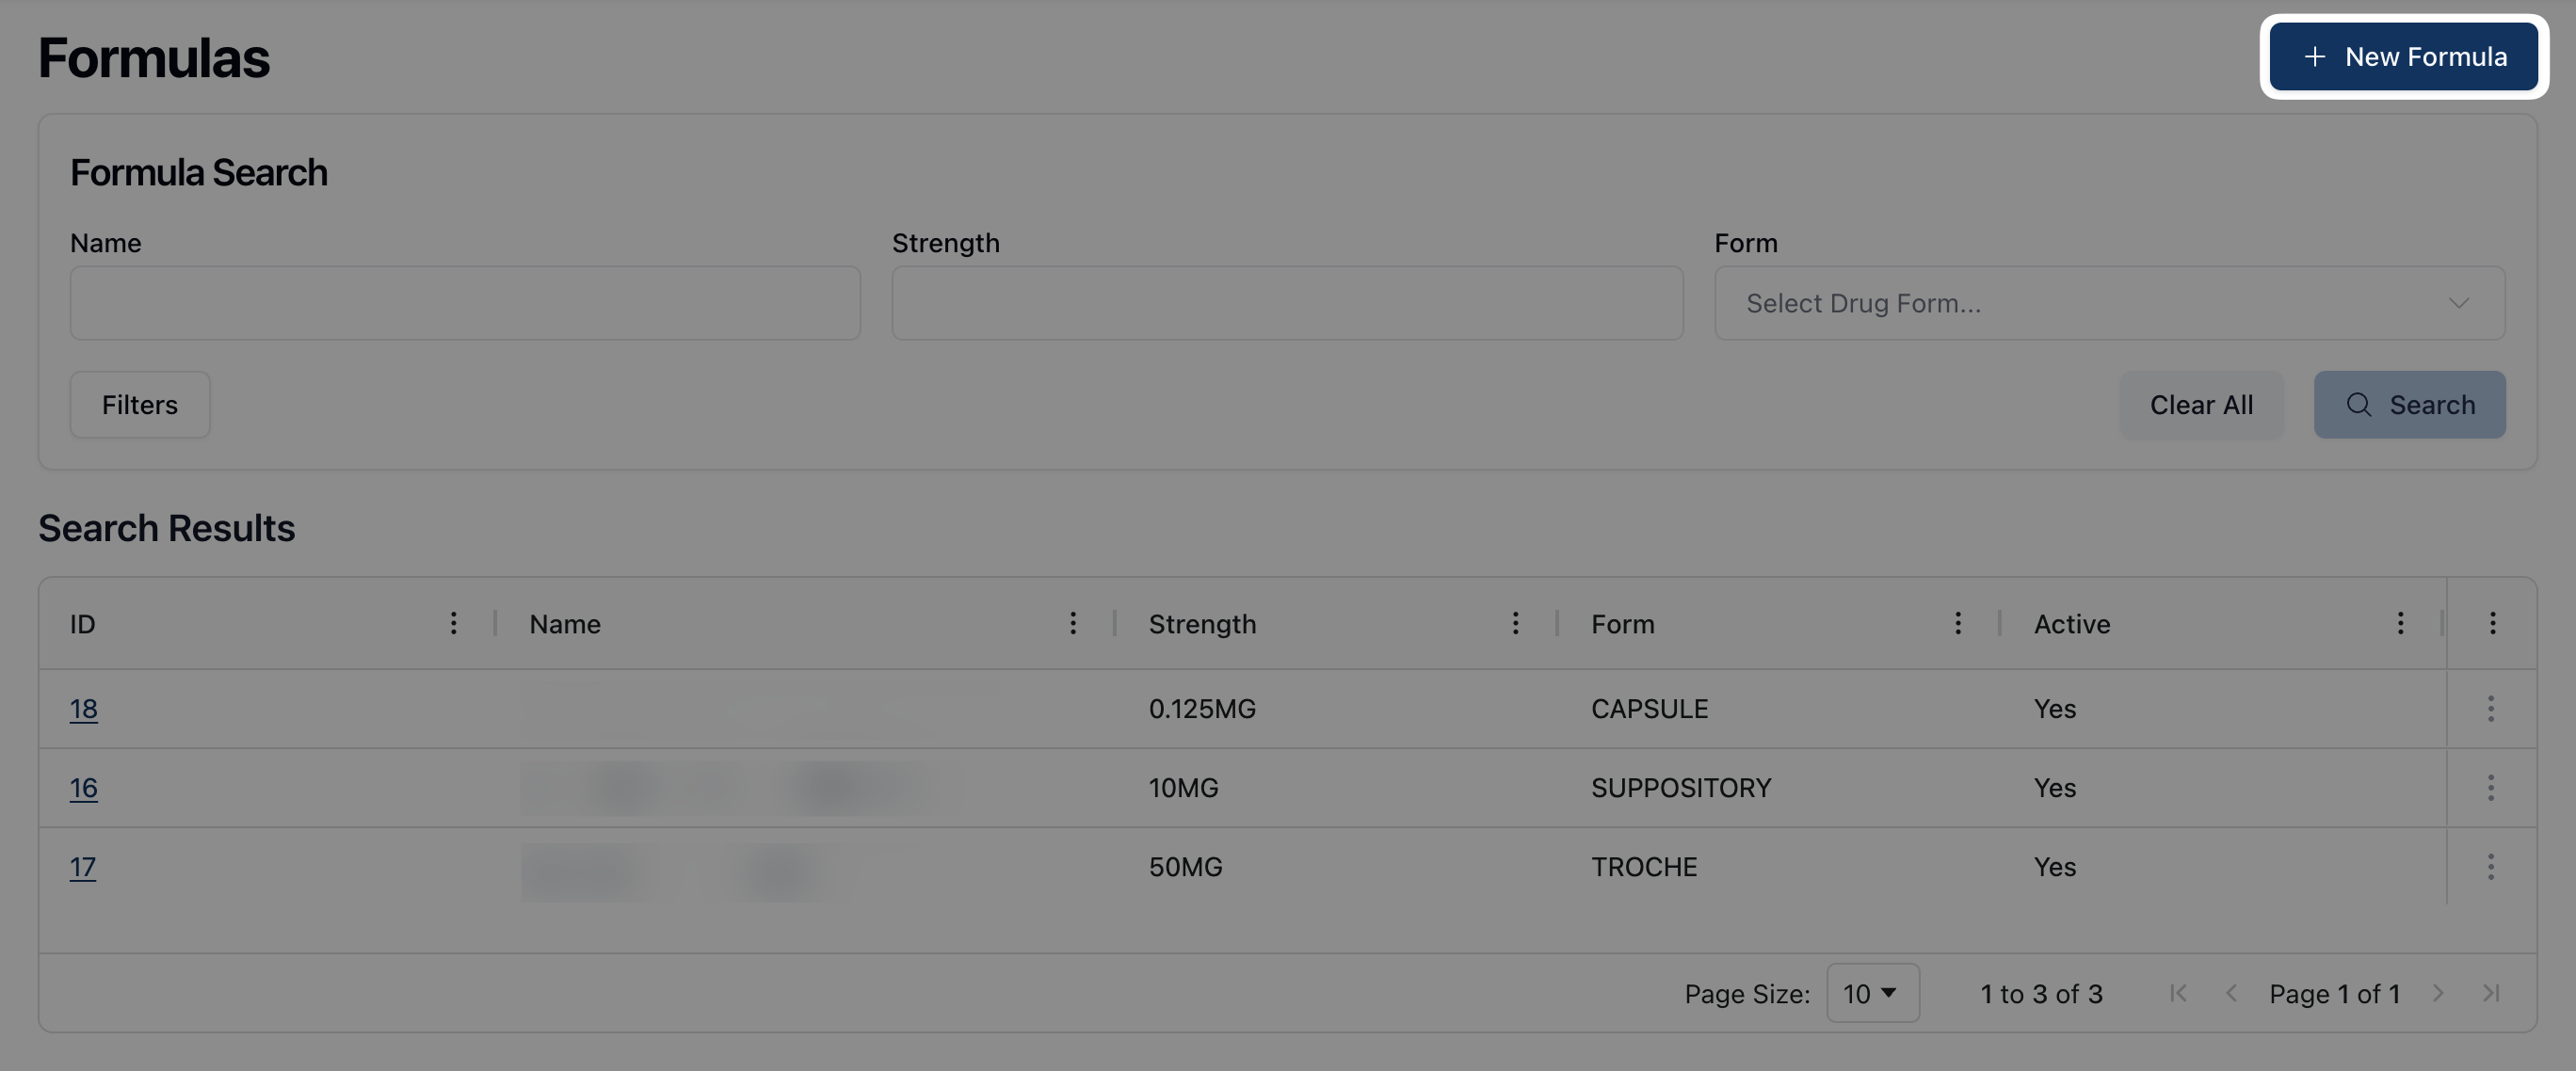 To add a new formula, click the + New Formula button in the upper right corner of the Formulas page. After clicking, a blank Create Formula form appears.
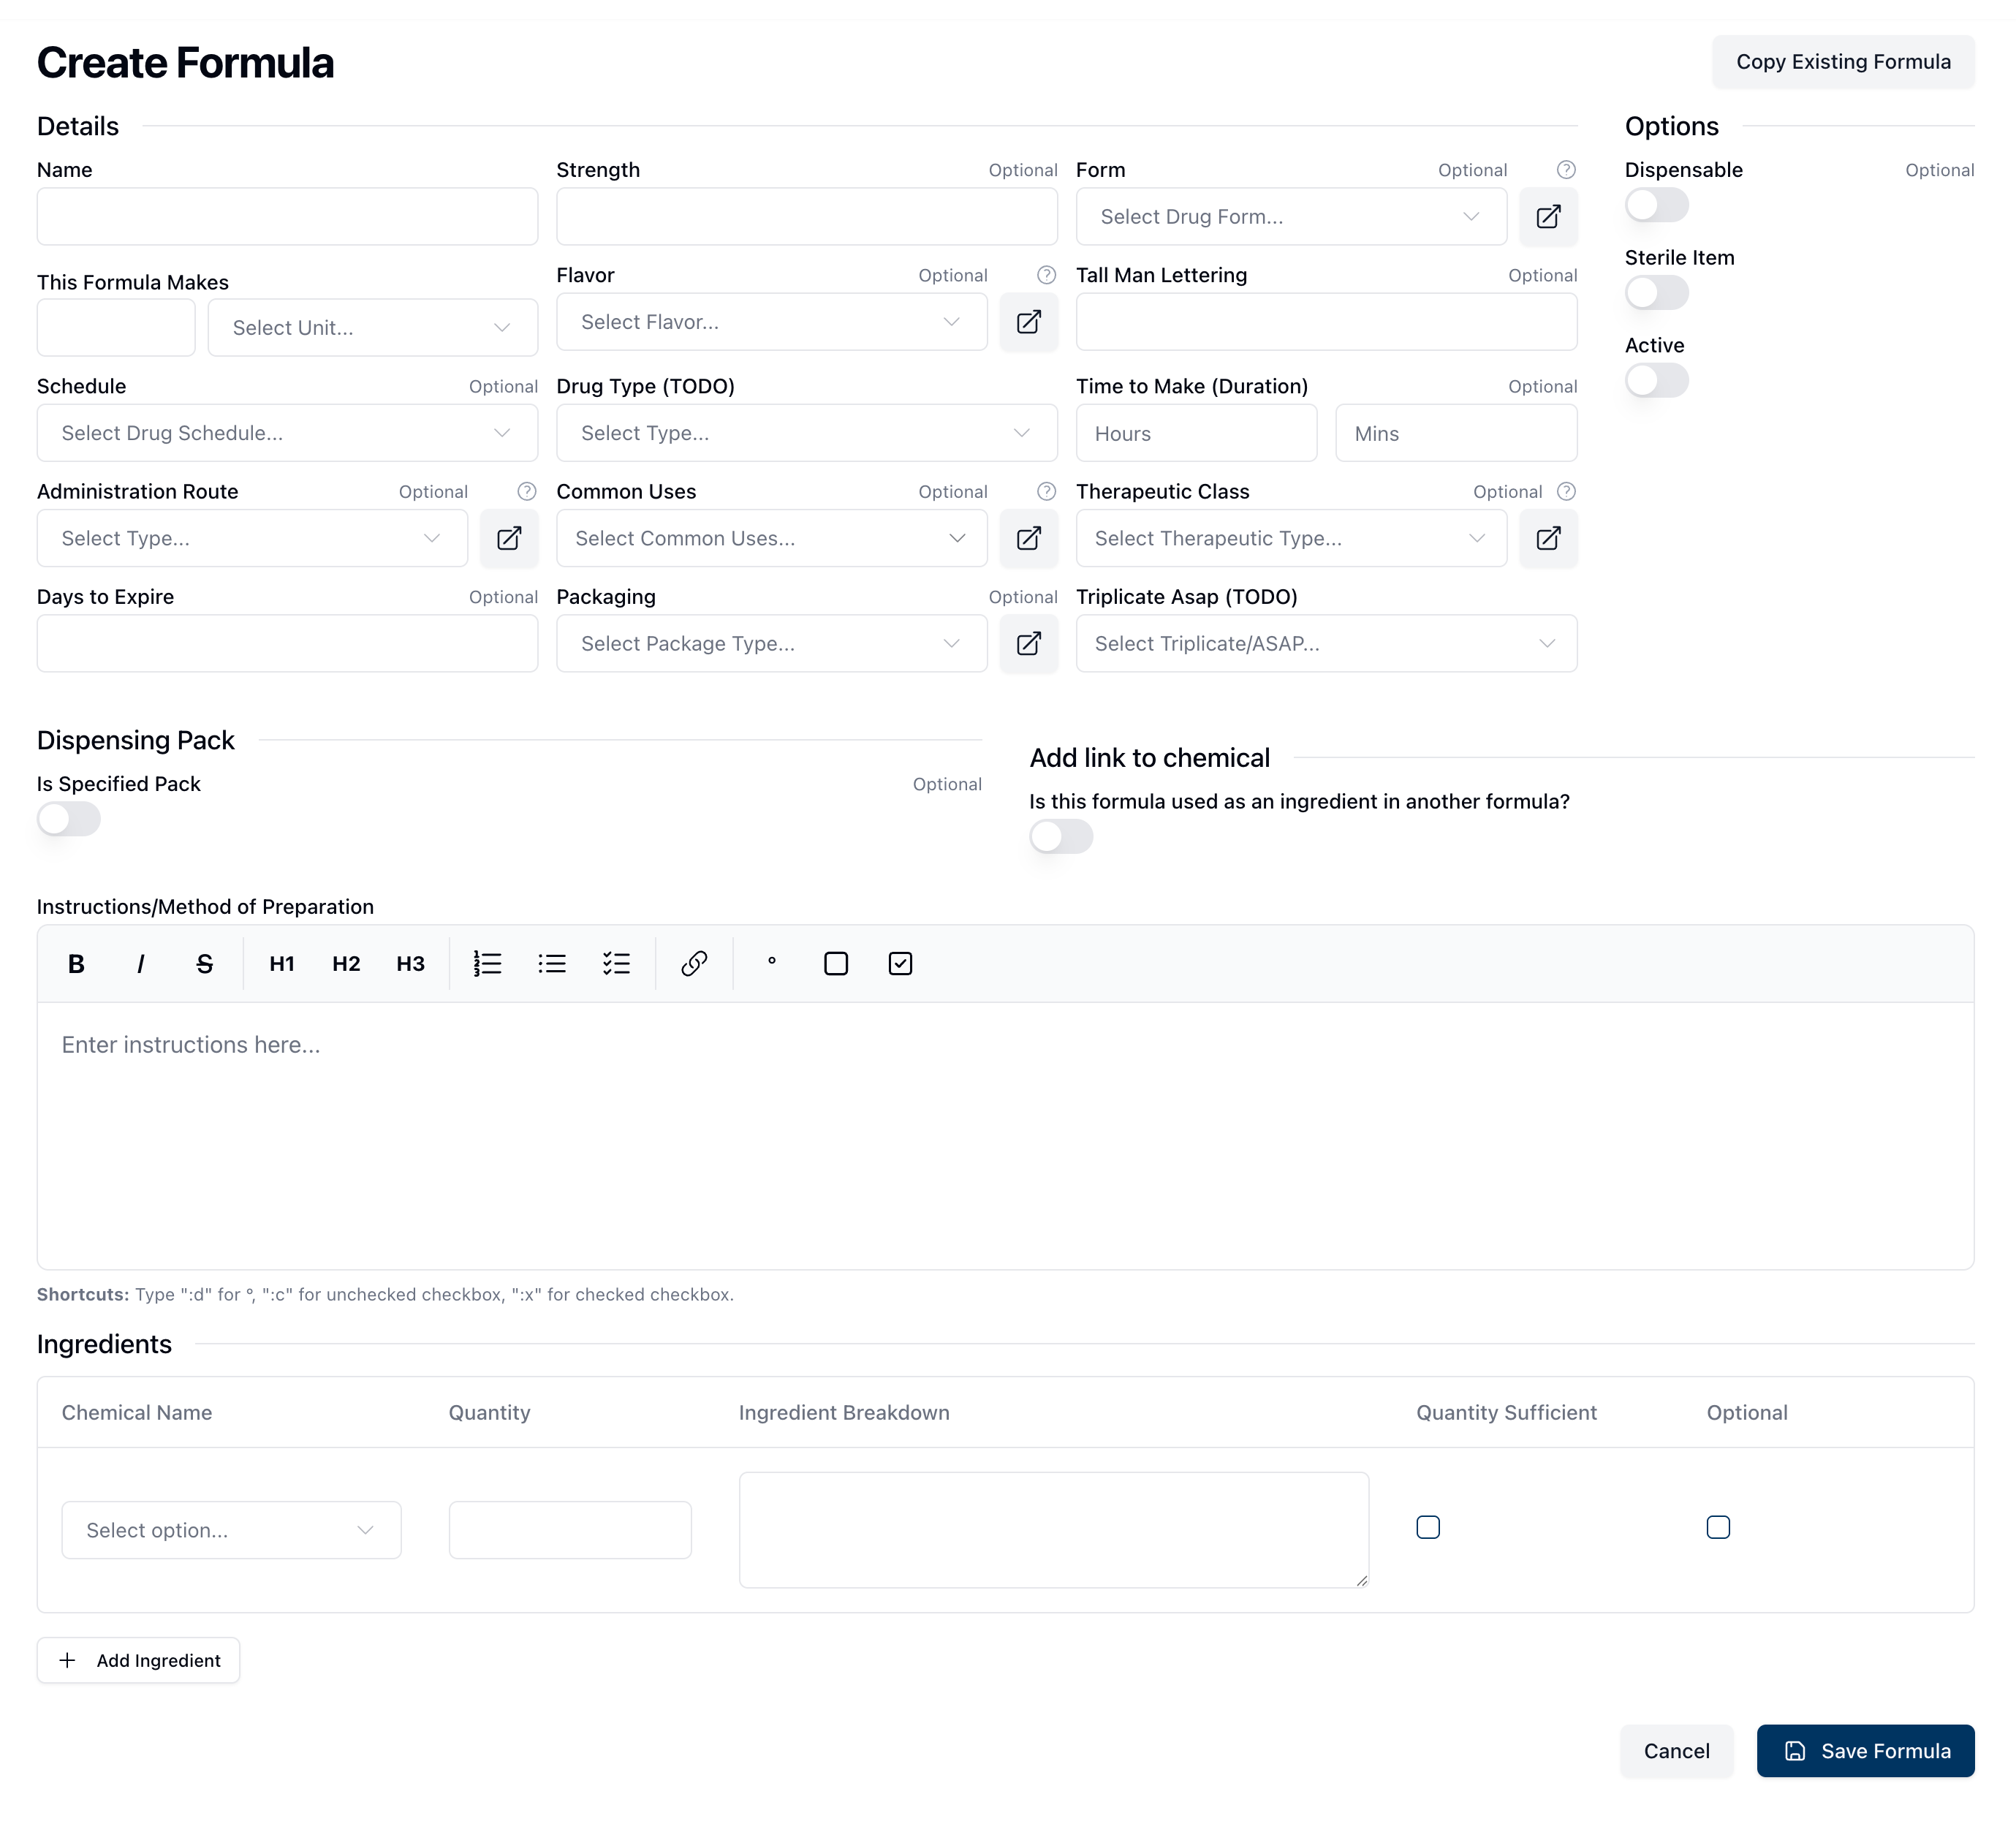 If the formula already exists elsewhere in the system, or if the formula you're creating is similar to another formula, the Copy Formula button allows you to search and prepopulate the form based on an existing formula record.
When using the Copy Formula tool, note that the existing formula information appears in the Create Formula form, which you may then edit or adjust accordingly. Additionally, there is a green box at the top of the page, highlighting that the formula information is copied from an existing record in the system. (To do: Highlight/information box.)
If you decide you'd prefer to start from a blank form, click the Start Over button to clear the prefilled fields.
 Whether starting from a prefilled or blank form, review the fields under each section to fill any required and relevant information.
You can add the formula's basic information in the Details section. Note that all fields are required, unless marked as optional. The information provided in these fields also populates the Details section when viewing a formula record.
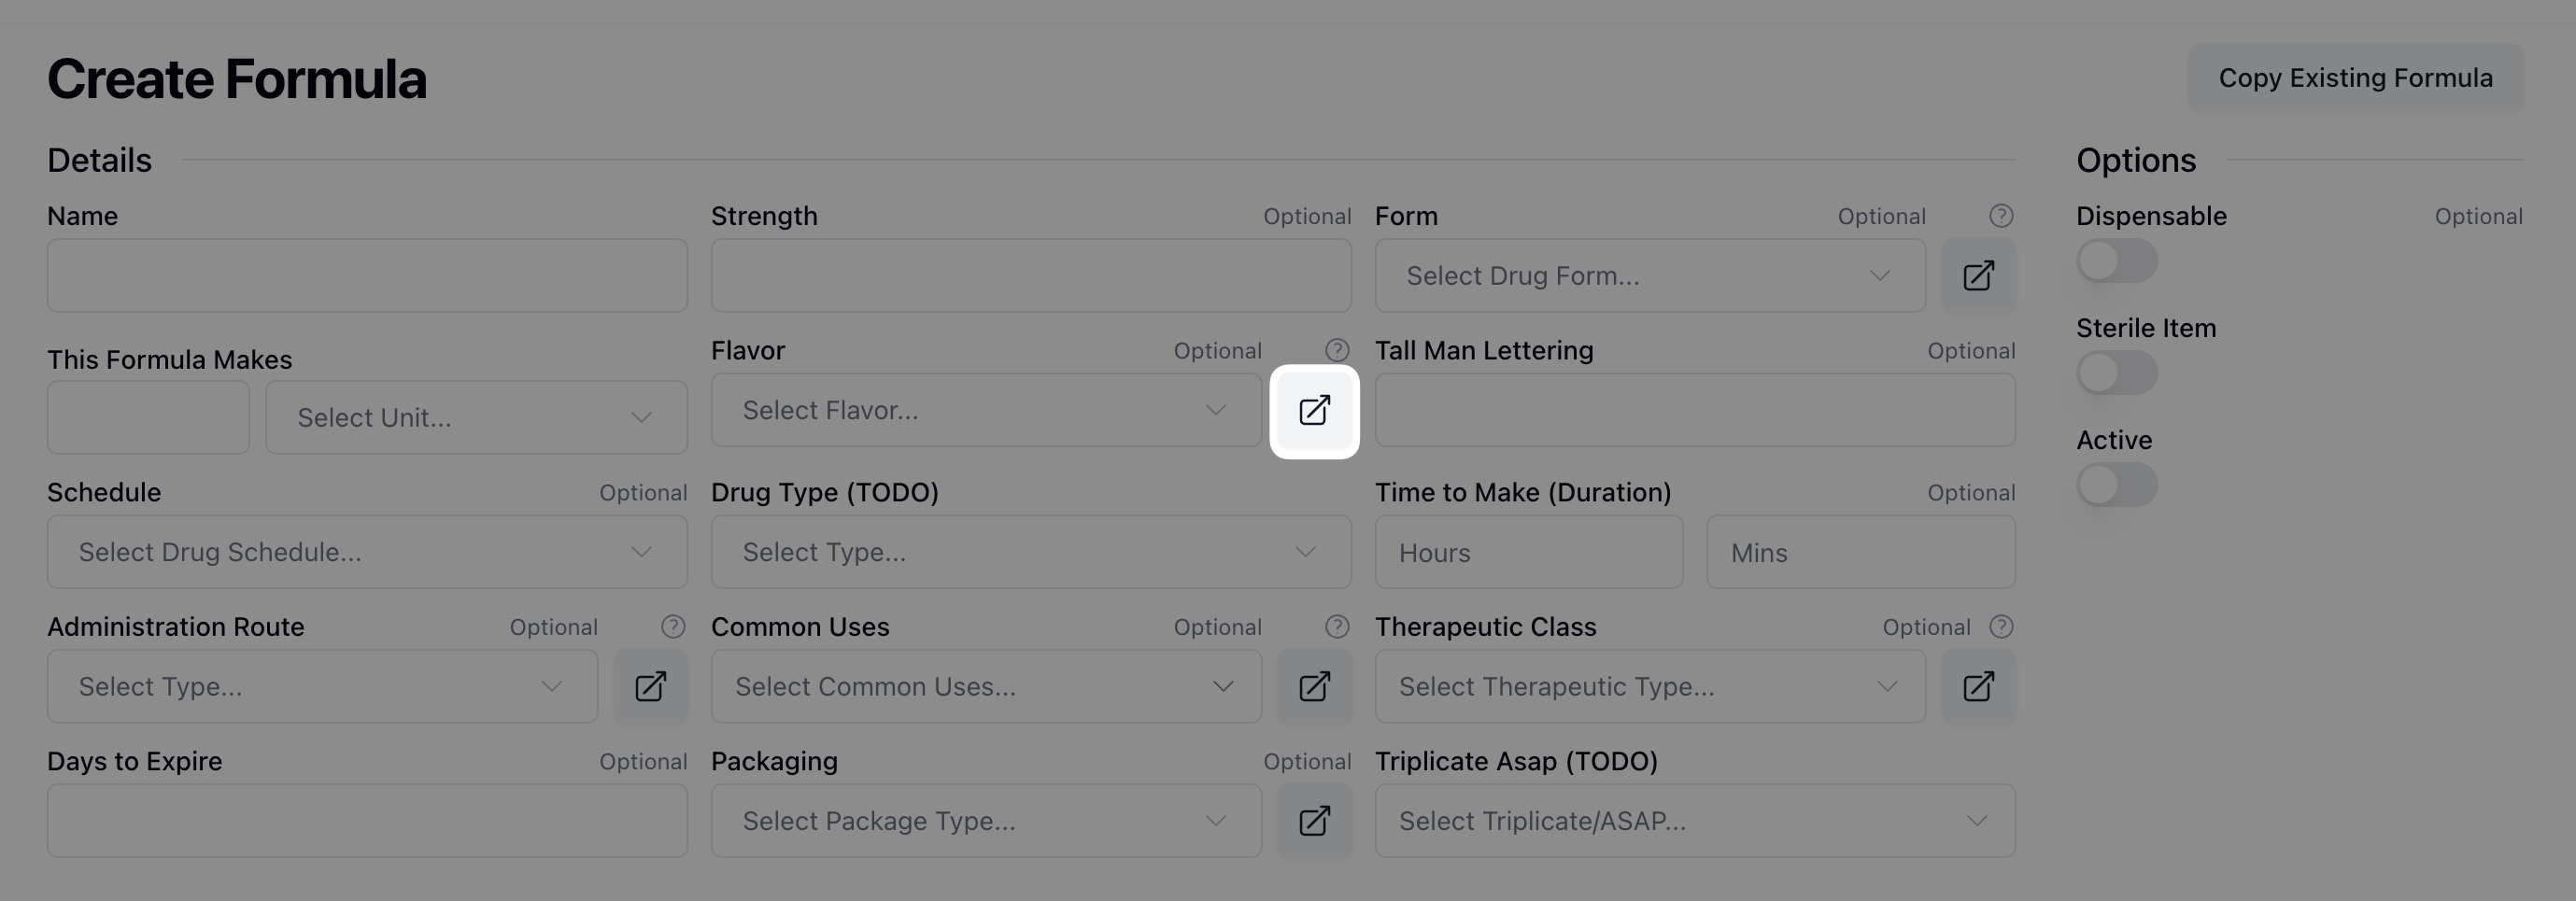 Note that a handful of fields provide choices via a dropdown list, such as Form and Flavor. You can manage the options that appear in these lists via the Pharmacy Settings page or by clicking on the icon to the right of the field.
The Options section includes a number of toggle options that you can turn on or off, depending on the formula settings. All toggles are off by default.
 When entering a new formula, you may also toggle on Is Specified Pack if the formula has a specified Dispensing Pack. Additionally, if this formula creates a subformula - or a formula used as an ingredient in another formula - toggle the button under Add link to chemical. This attaches a chemical ID to the subformula, allowing you to add it as an ingredient to other formulas in the future. (To do: Does this mean the type of drug form this formula produces is a specific output, or a different type of pack? Also confirm usage of subformula/accuracy.)
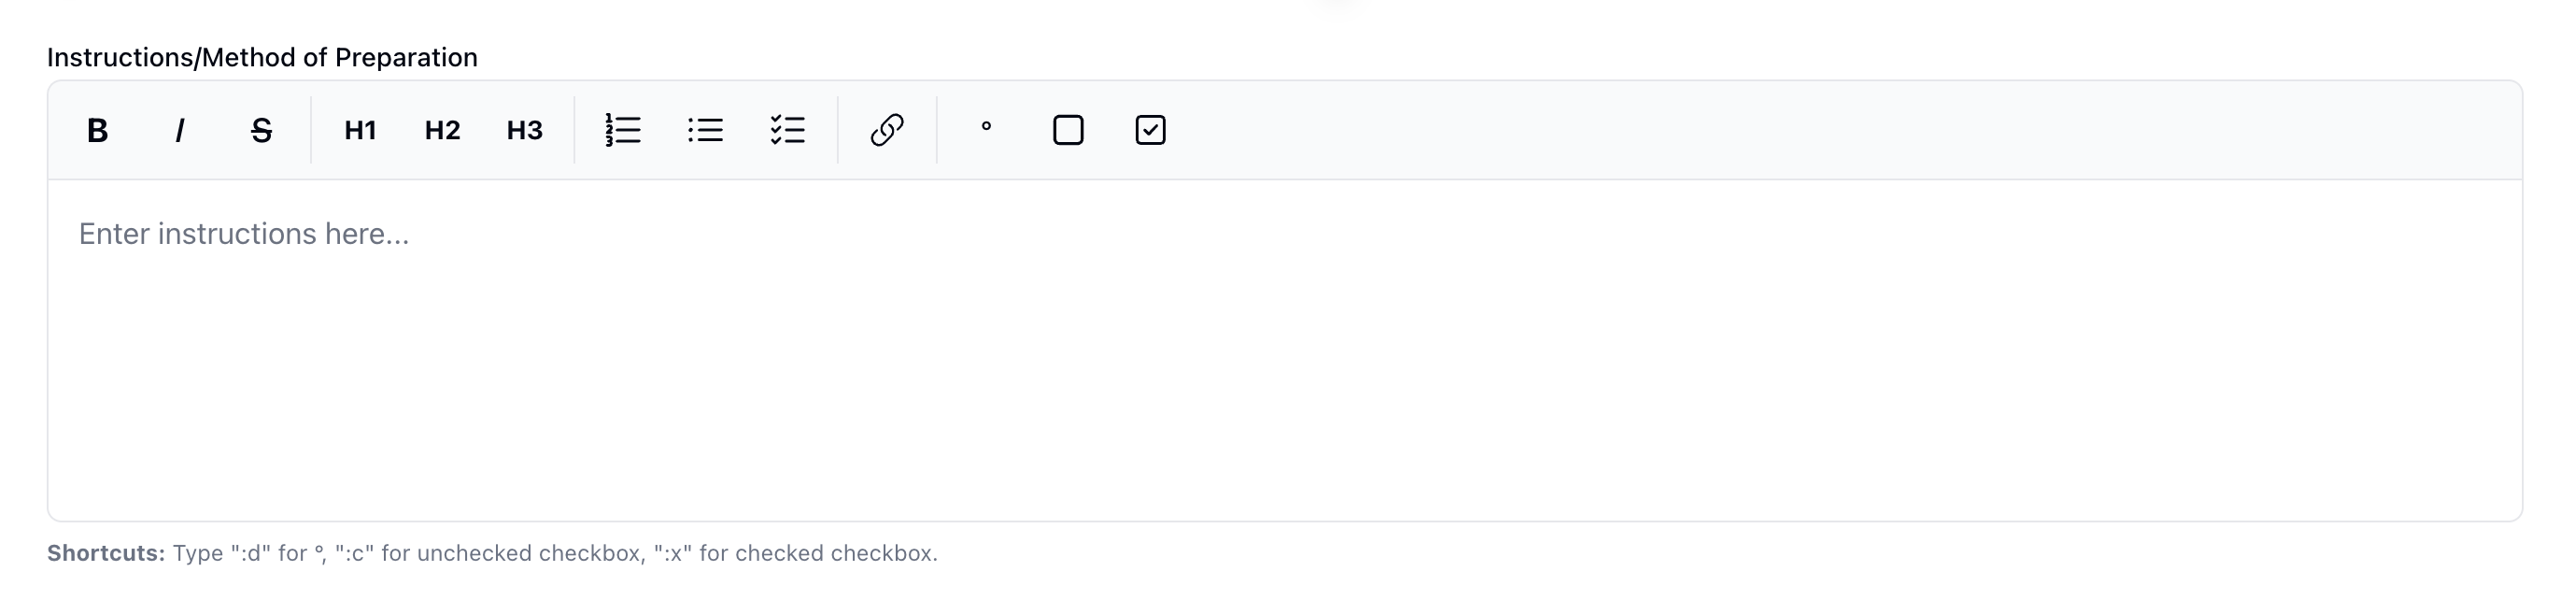 Under Instructions/Method of Preparation is an open text box for providing a step-by-step process to produce the formula. This text box also includes rich formatting options to facilitate the formatting and readability of the instructions.
 The buttons in the formatting toolbar include the following options:
Text formatting: Bold, Italic, and Strikethrough.
Heading options: Heading 1, Heading 2, and Heading 3.
List options: Ordered/Numbered list, Bulleted list, and Task list.
Add a Link: Add a hyperlink to the instruction text.
Degree: Insert a degree symbol.
Checkbox: Add an unchecked checkbox.
Checked Checkbox: Add a checked checkbox.
Once you have added the formula instructions, you can add ingredients under the Ingredients section.
To add each ingredient, fill out the related fields, starting with the Chemical Name. After clicking the Chemical Name dropdown menu, enter the relevant chemical name into the search bar at the top of the list to filter and select the appropriate chemical.
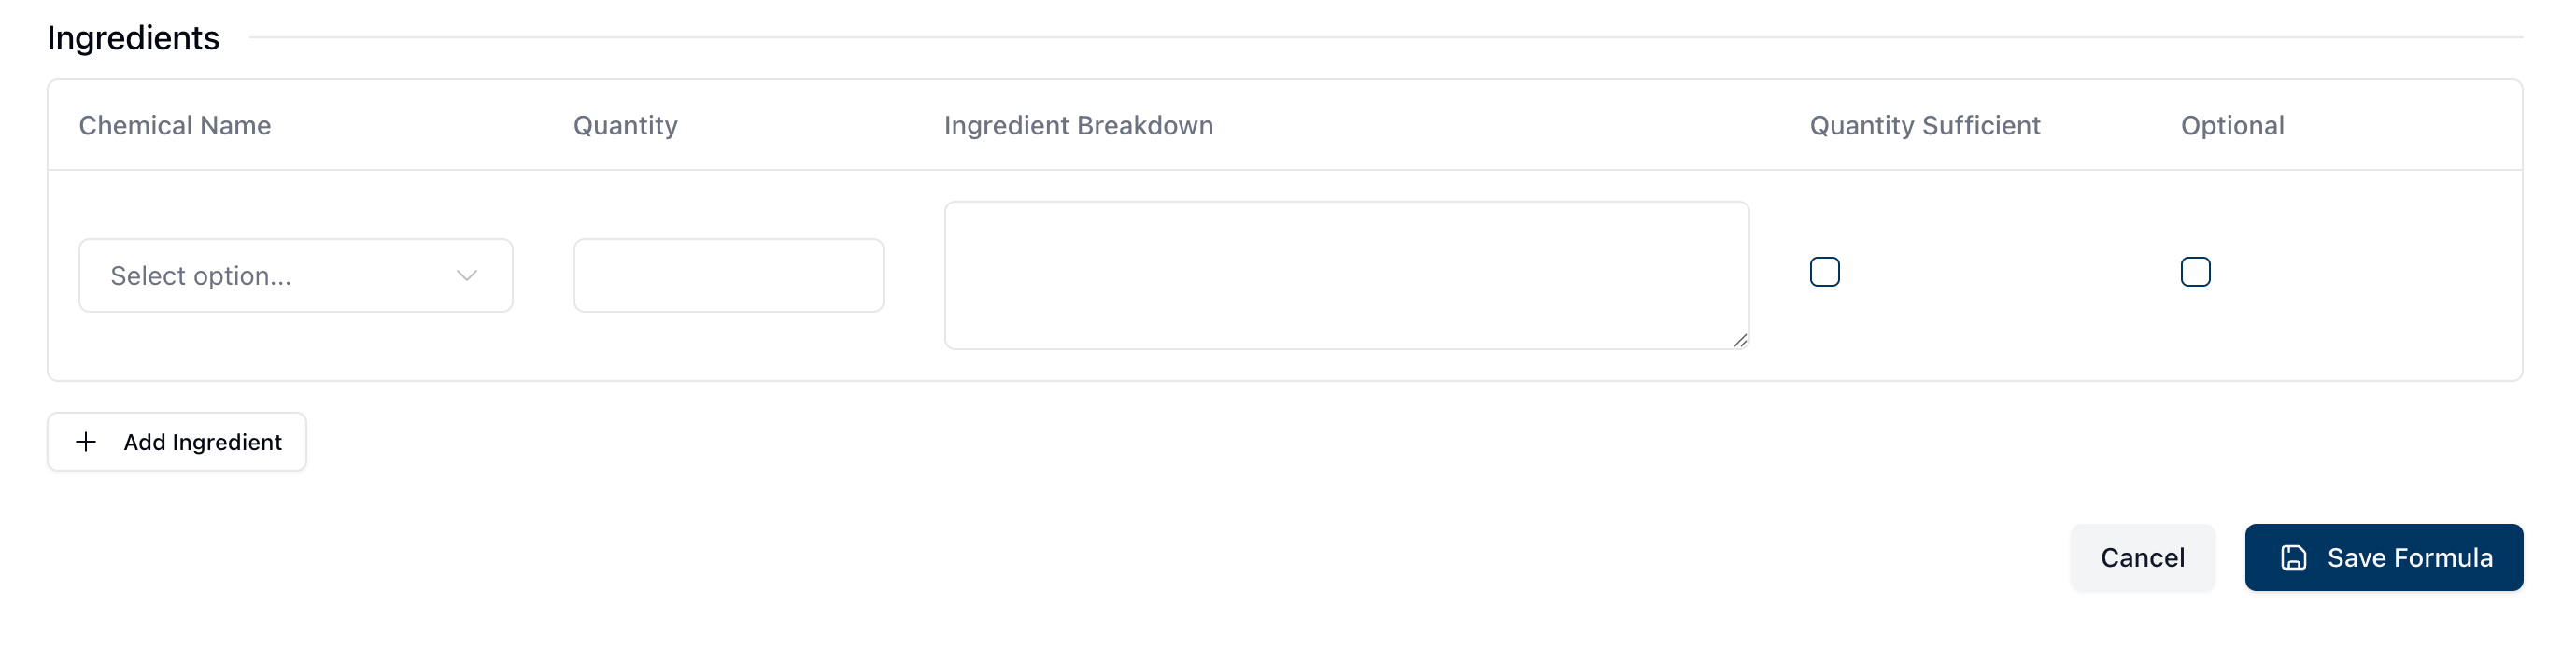 To complete the ingredient list, include the Quantity of the chemical included in the formula and the Ingredient Breakdown. You may also mark if the ingredient is Optional by selecting the checkbox in this column. (To do: Review and revise for Quantity Sufficient.)
You can add additional ingredients by clicking the + Add Ingredient button. To remove an existing ingredient, click the red trash icon and confirm the deletion in the popup that appears.
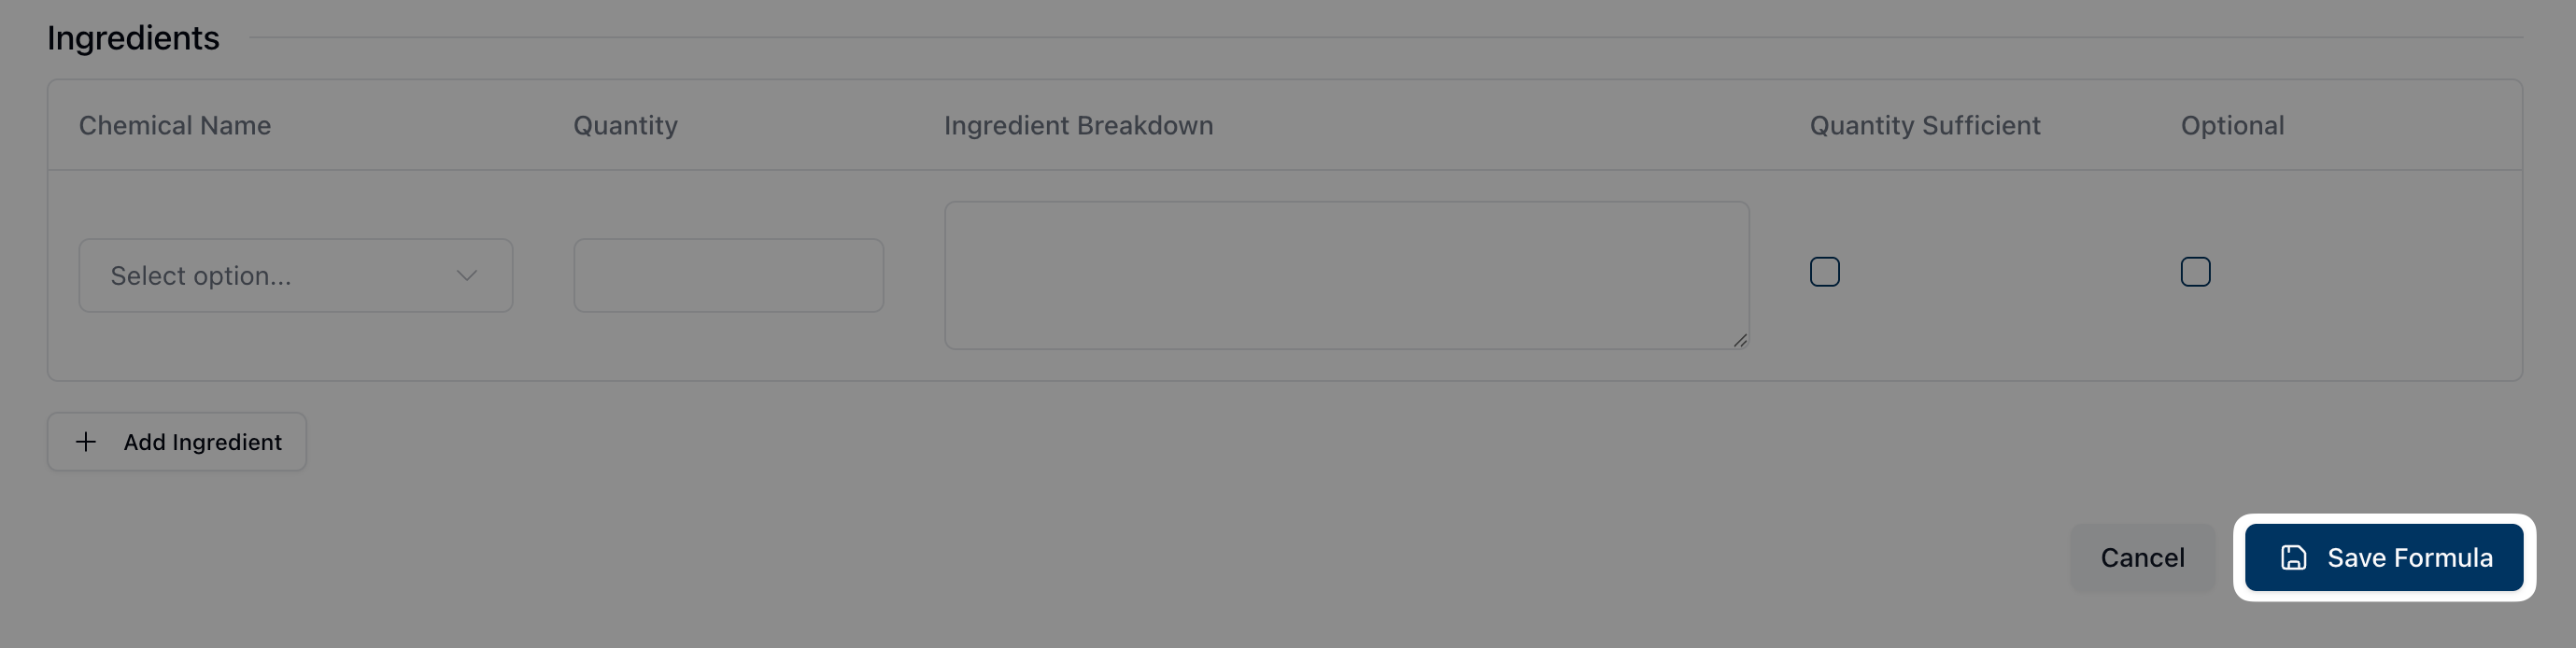 Once all relevant fields are complete, click the Save Formula button.